Send Email
📧 What is the “Send Email” Workflow Action?
The “Send Email” action in your automation workflow allows you to send personalized, automated emails to your contacts at the right time. It’s a powerful tool for marketing, customer service, and follow-up processes — ensuring that your messages are timely, relevant, and hands-free.
Whether it’s confirming bookings, promoting offers, or sending status updates, the “Send Email” action streamlines your communication workflow.
⭐ Key Benefits of Using the “Send Email” Action
-
Timely Communication Automate email delivery, so contacts receive messages exactly when they should — no manual effort needed.
-
Personalization Use dynamic fields like
{{contact.first_name}}, appointment times, or purchase history to make emails more engaging. -
Improved Customer Experience Automatically send confirmations, reminders, or follow-ups to reduce miscommunication and improve satisfaction.
-
Time-Saving Set up once, and let the automation do the rest — keeping your outreach consistent and scalable.
-
Flexibility Use custom templates, attach files, and tweak content to match any business use case.
🧭 Step-by-Step Process for Using the “Send Email” Workflow Action
1. Add the “Send Email” Action to Your Workflow
- Open the workflow editor
- Drag the “Send Email” action to the desired point (e.g., after a form submission or booking)
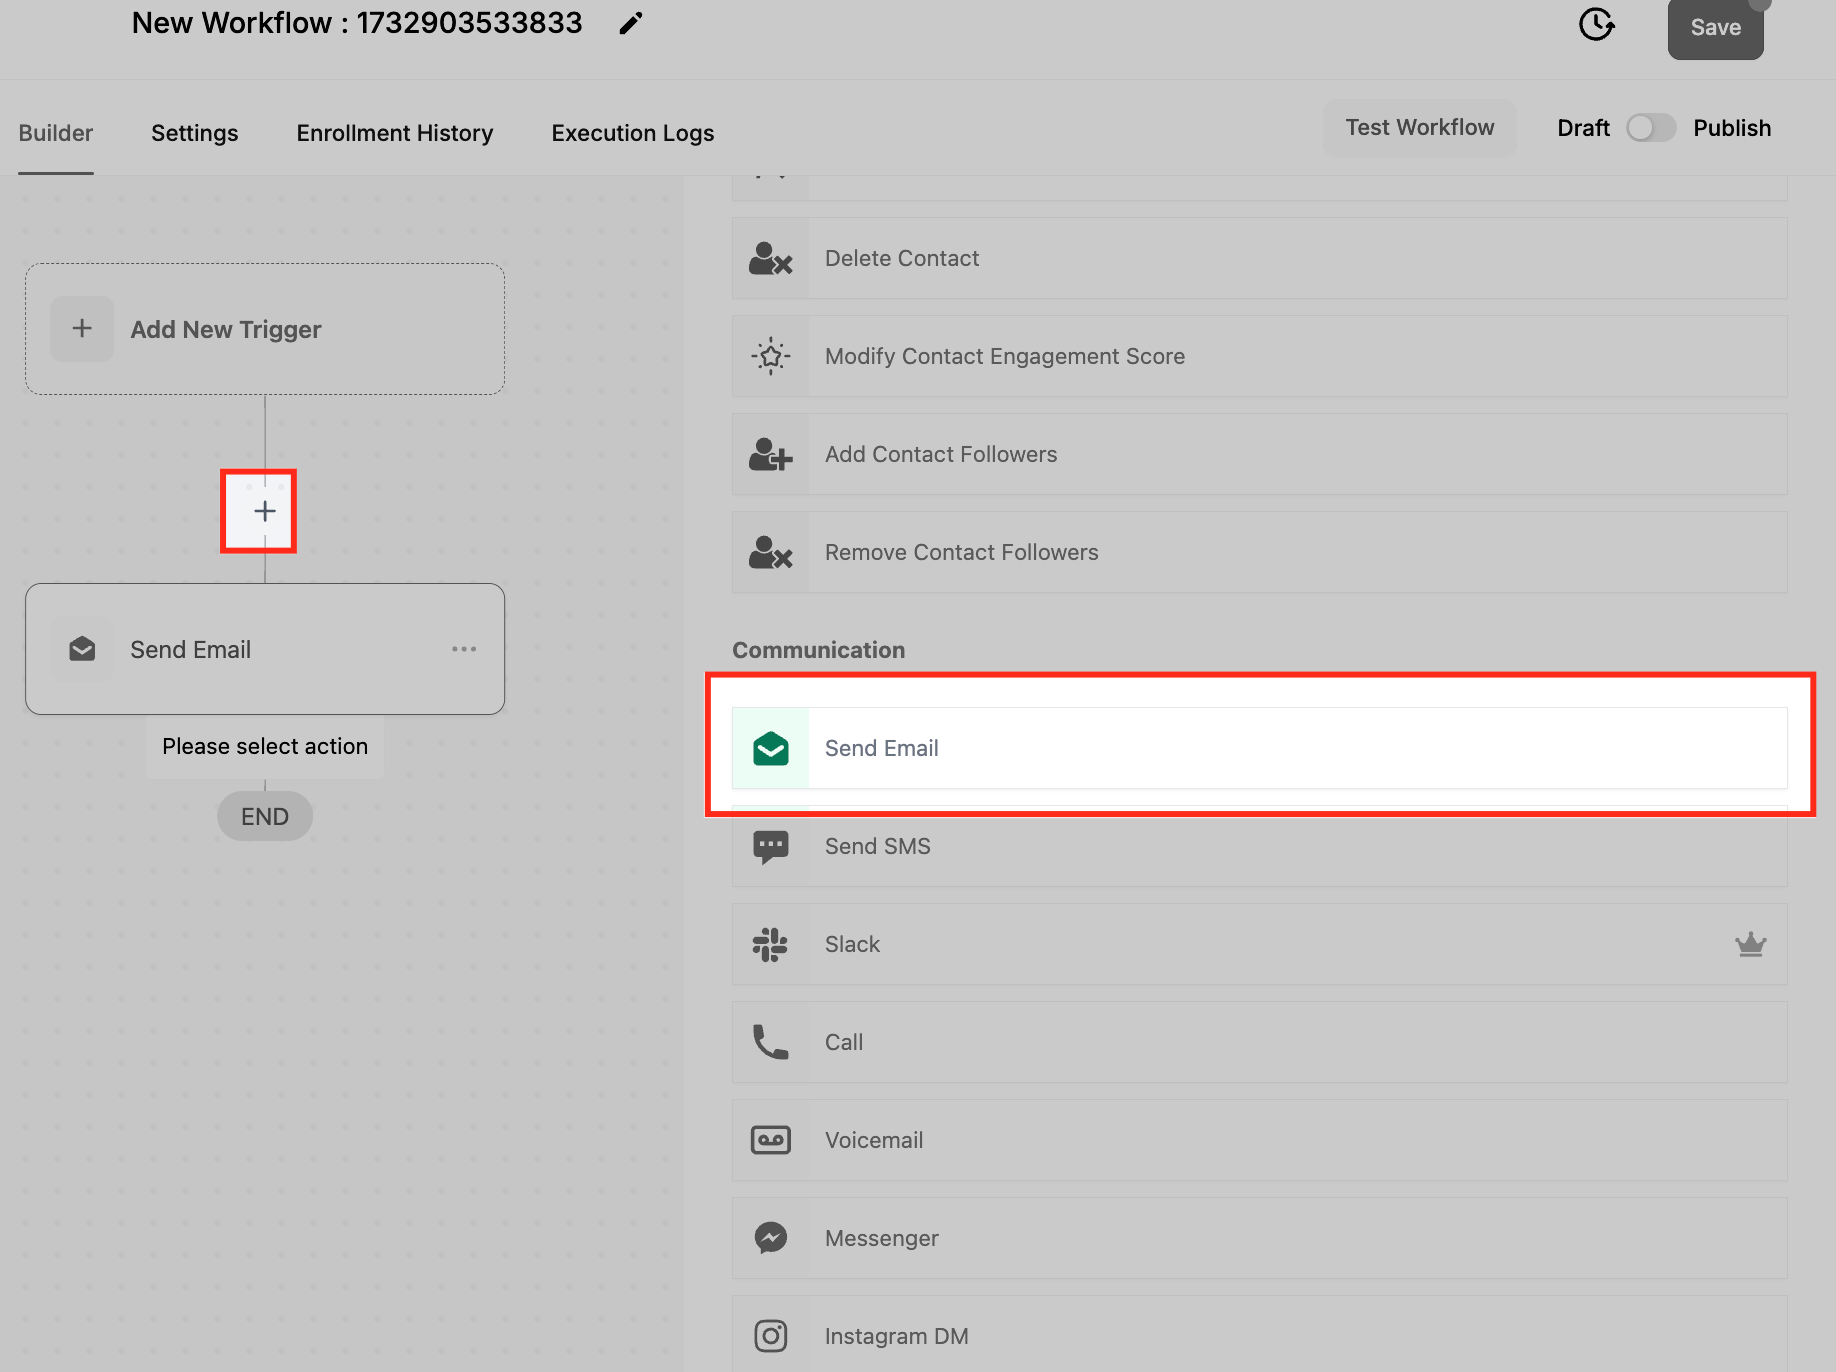
2. Configure the Action Name
- Give it a clear, descriptive name
Example: “Booking Confirmation Email”
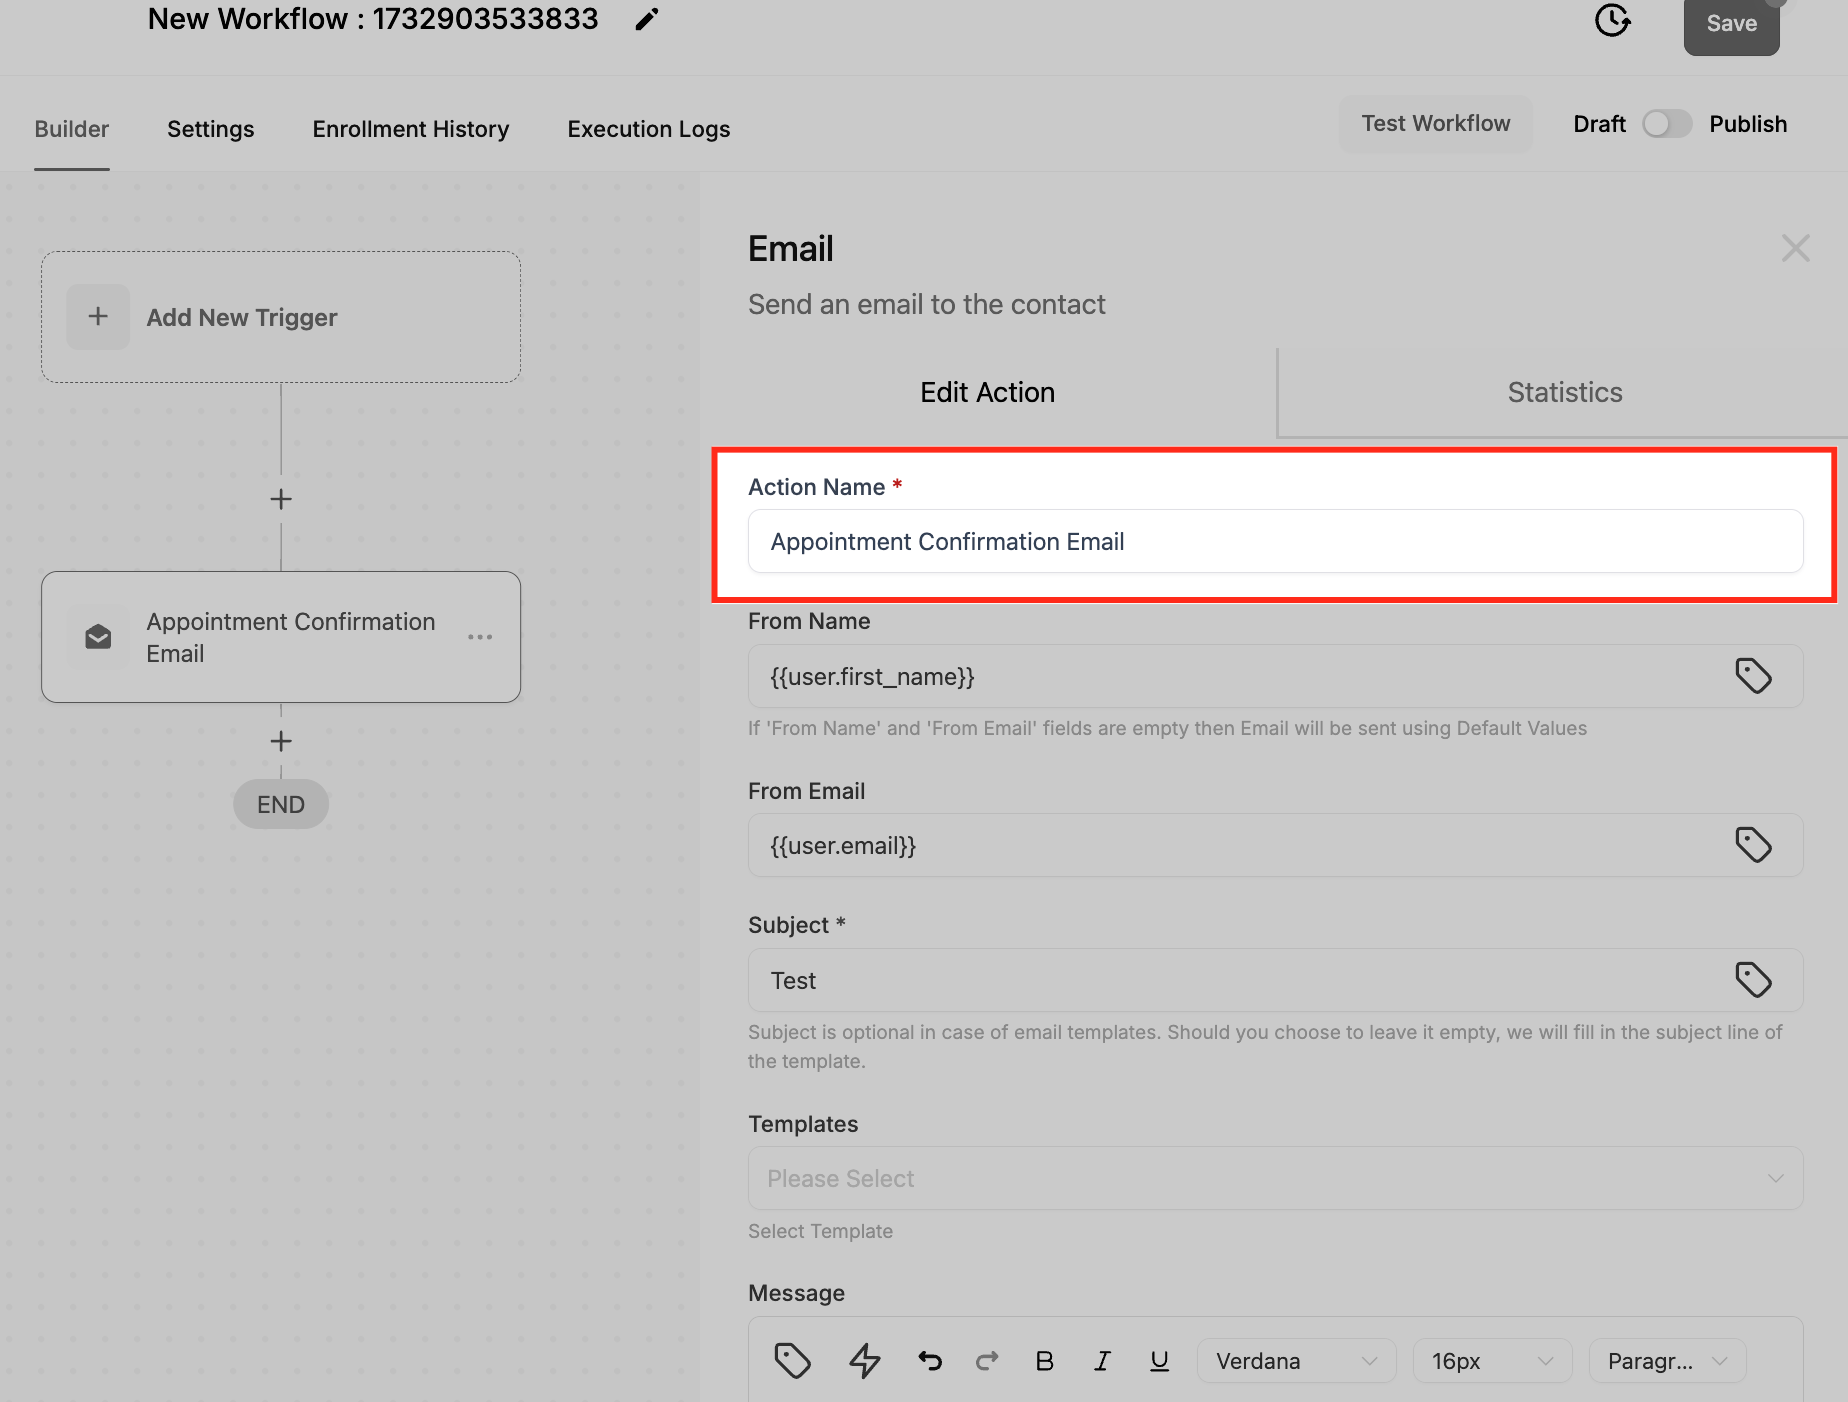
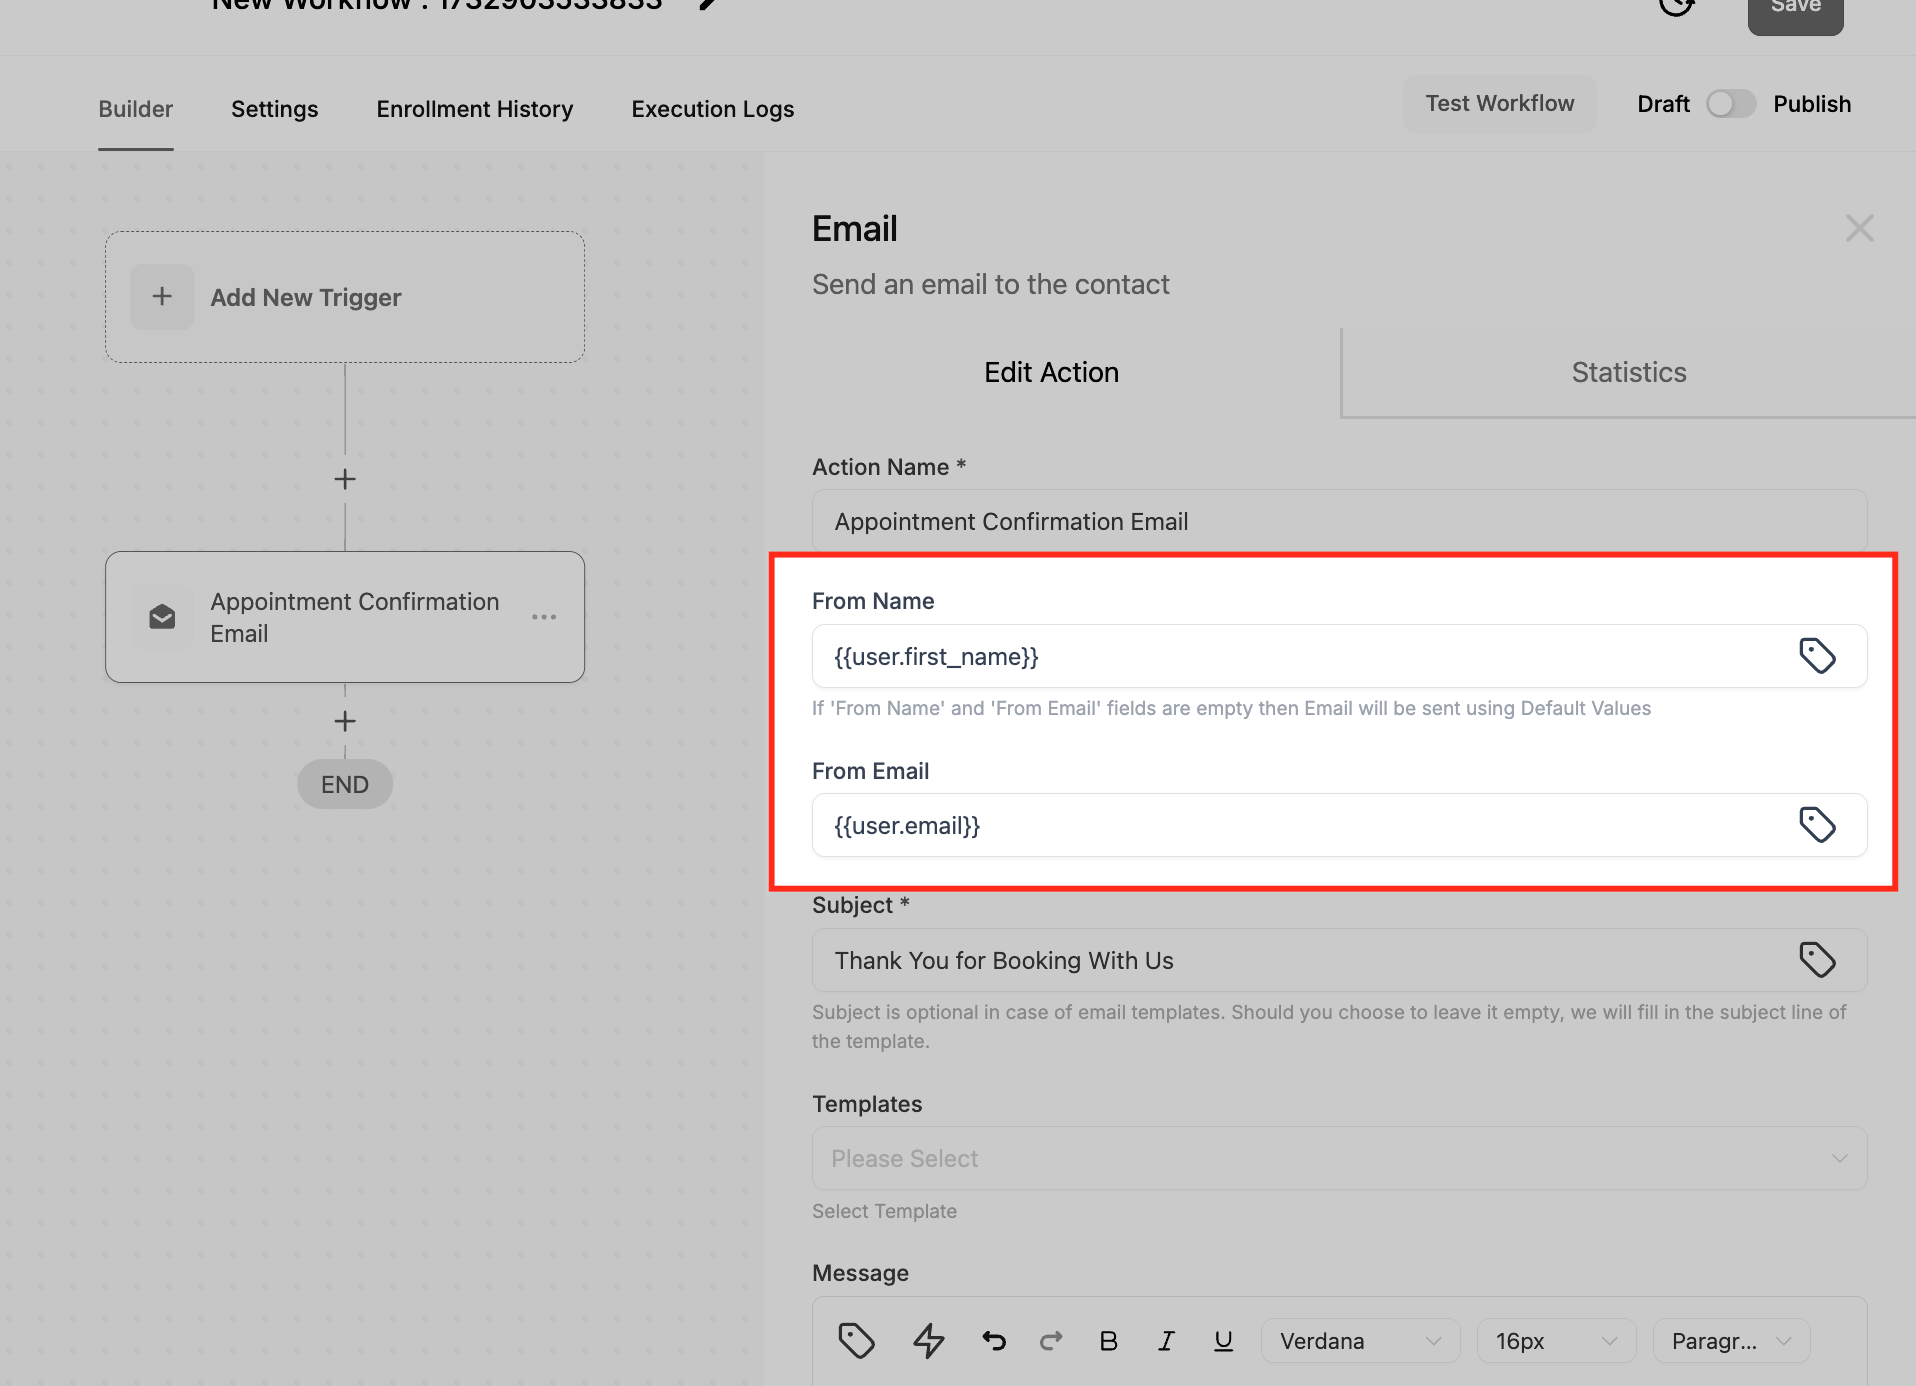
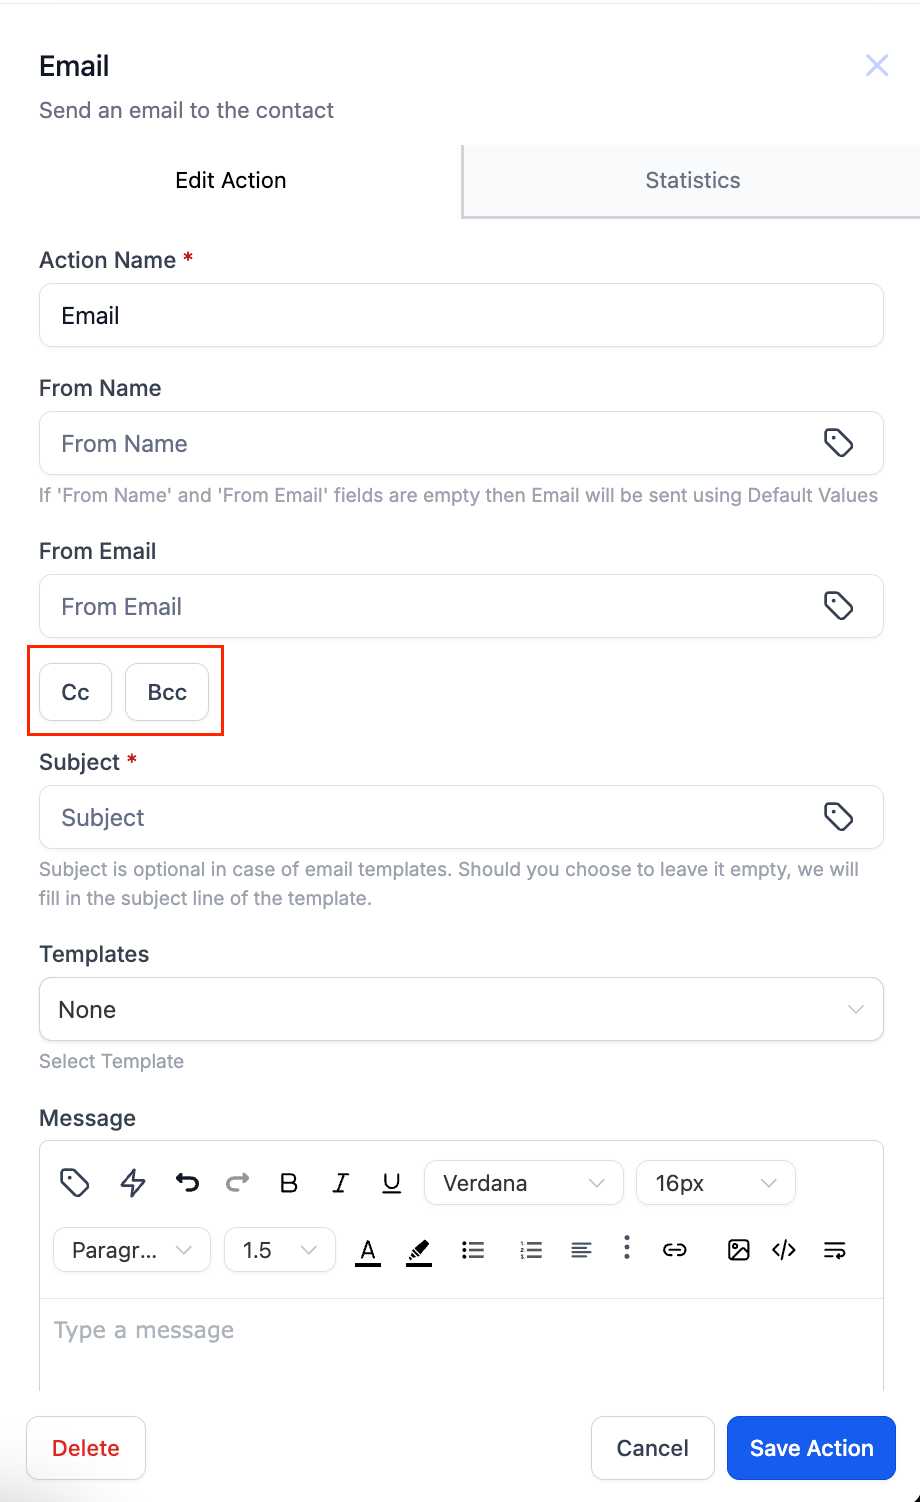
3. Fill in Sender Details
- From Name: e.g., My Company
- From Email: e.g., mycompany@email.com
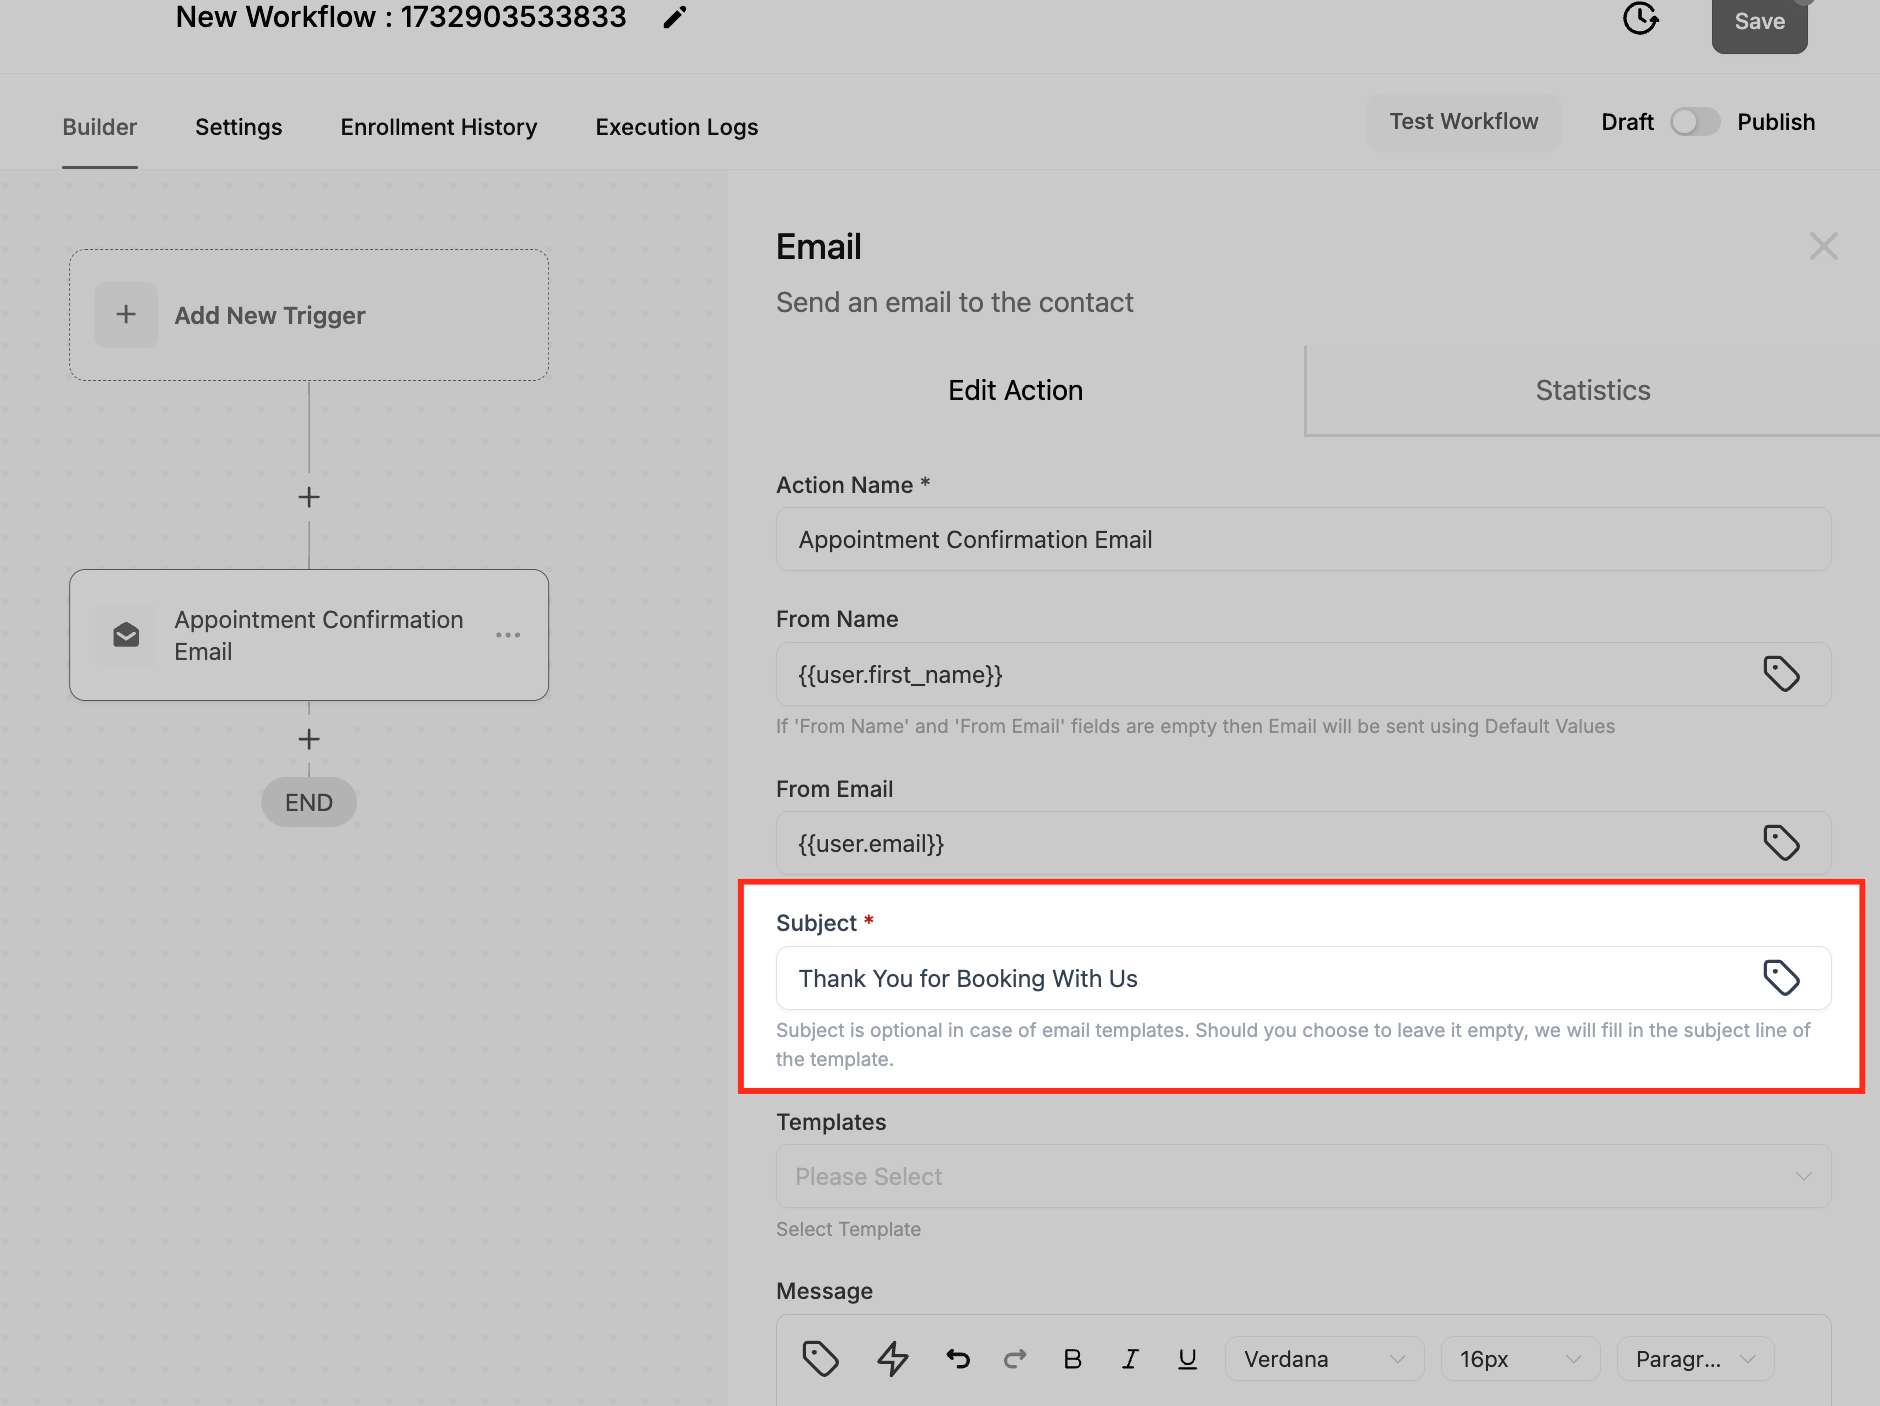
4. Create the Subject Line
- Use a subject that reflects the email's purpose
Example: “Thank You for Booking with Us!”
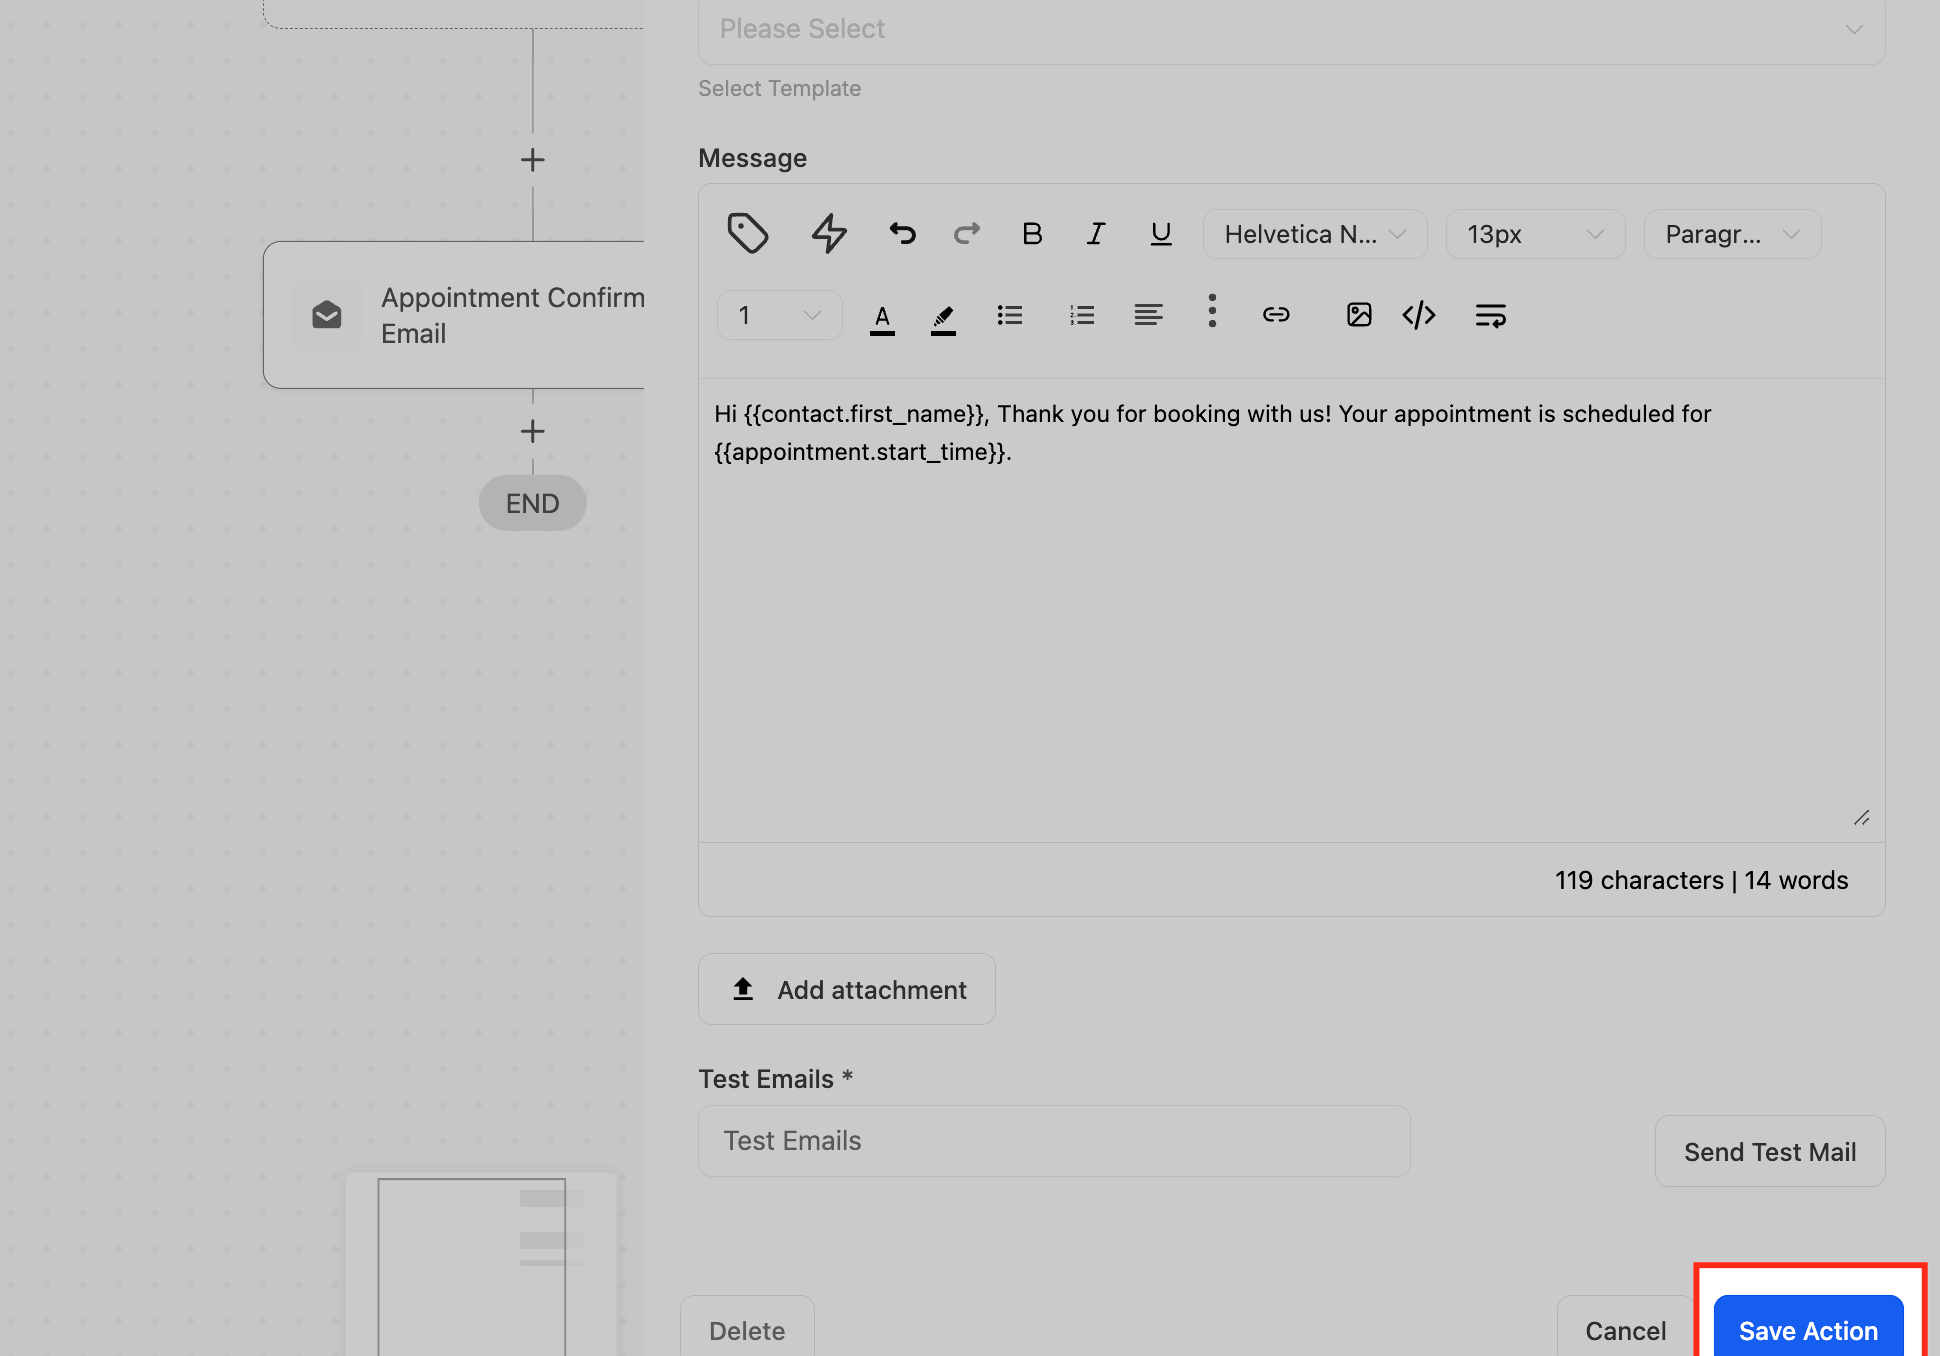
5. Choose or Create the Email Body
-
Templates: Select an email template from the dropdown (optional). If no template is available, you can write a custom message in the Email Body field.
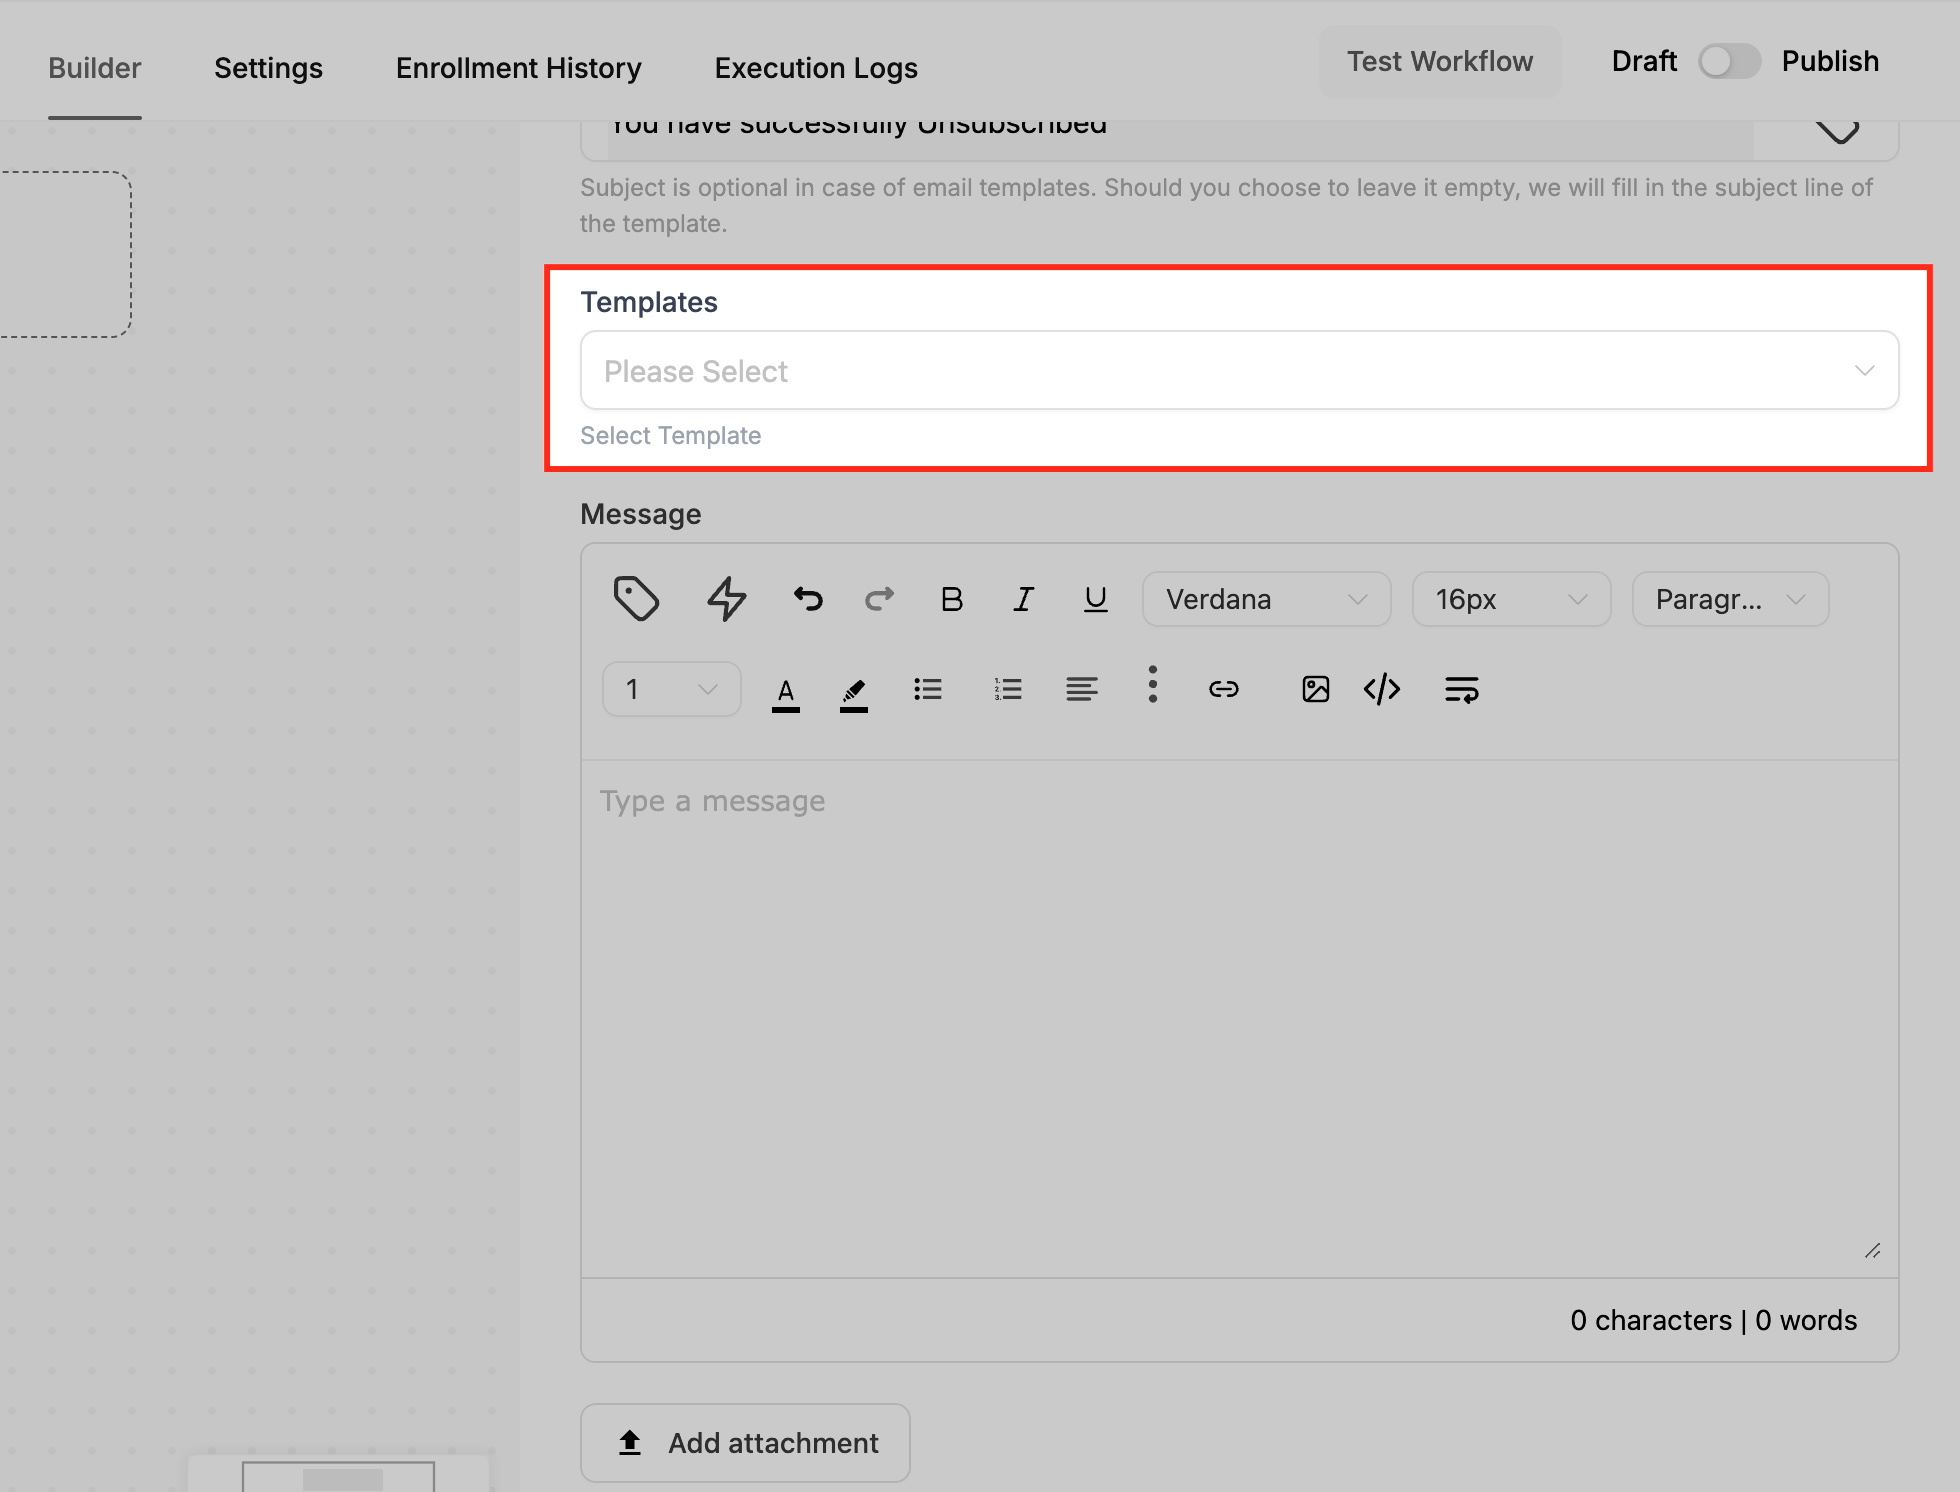
-
Email Body: reate your email body here. Use custom values to personalize the message. For example:
Hi {{contact.first_name}},
Thank you for booking with us!
Your appointment is scheduled for {{appointment.start_time}}.
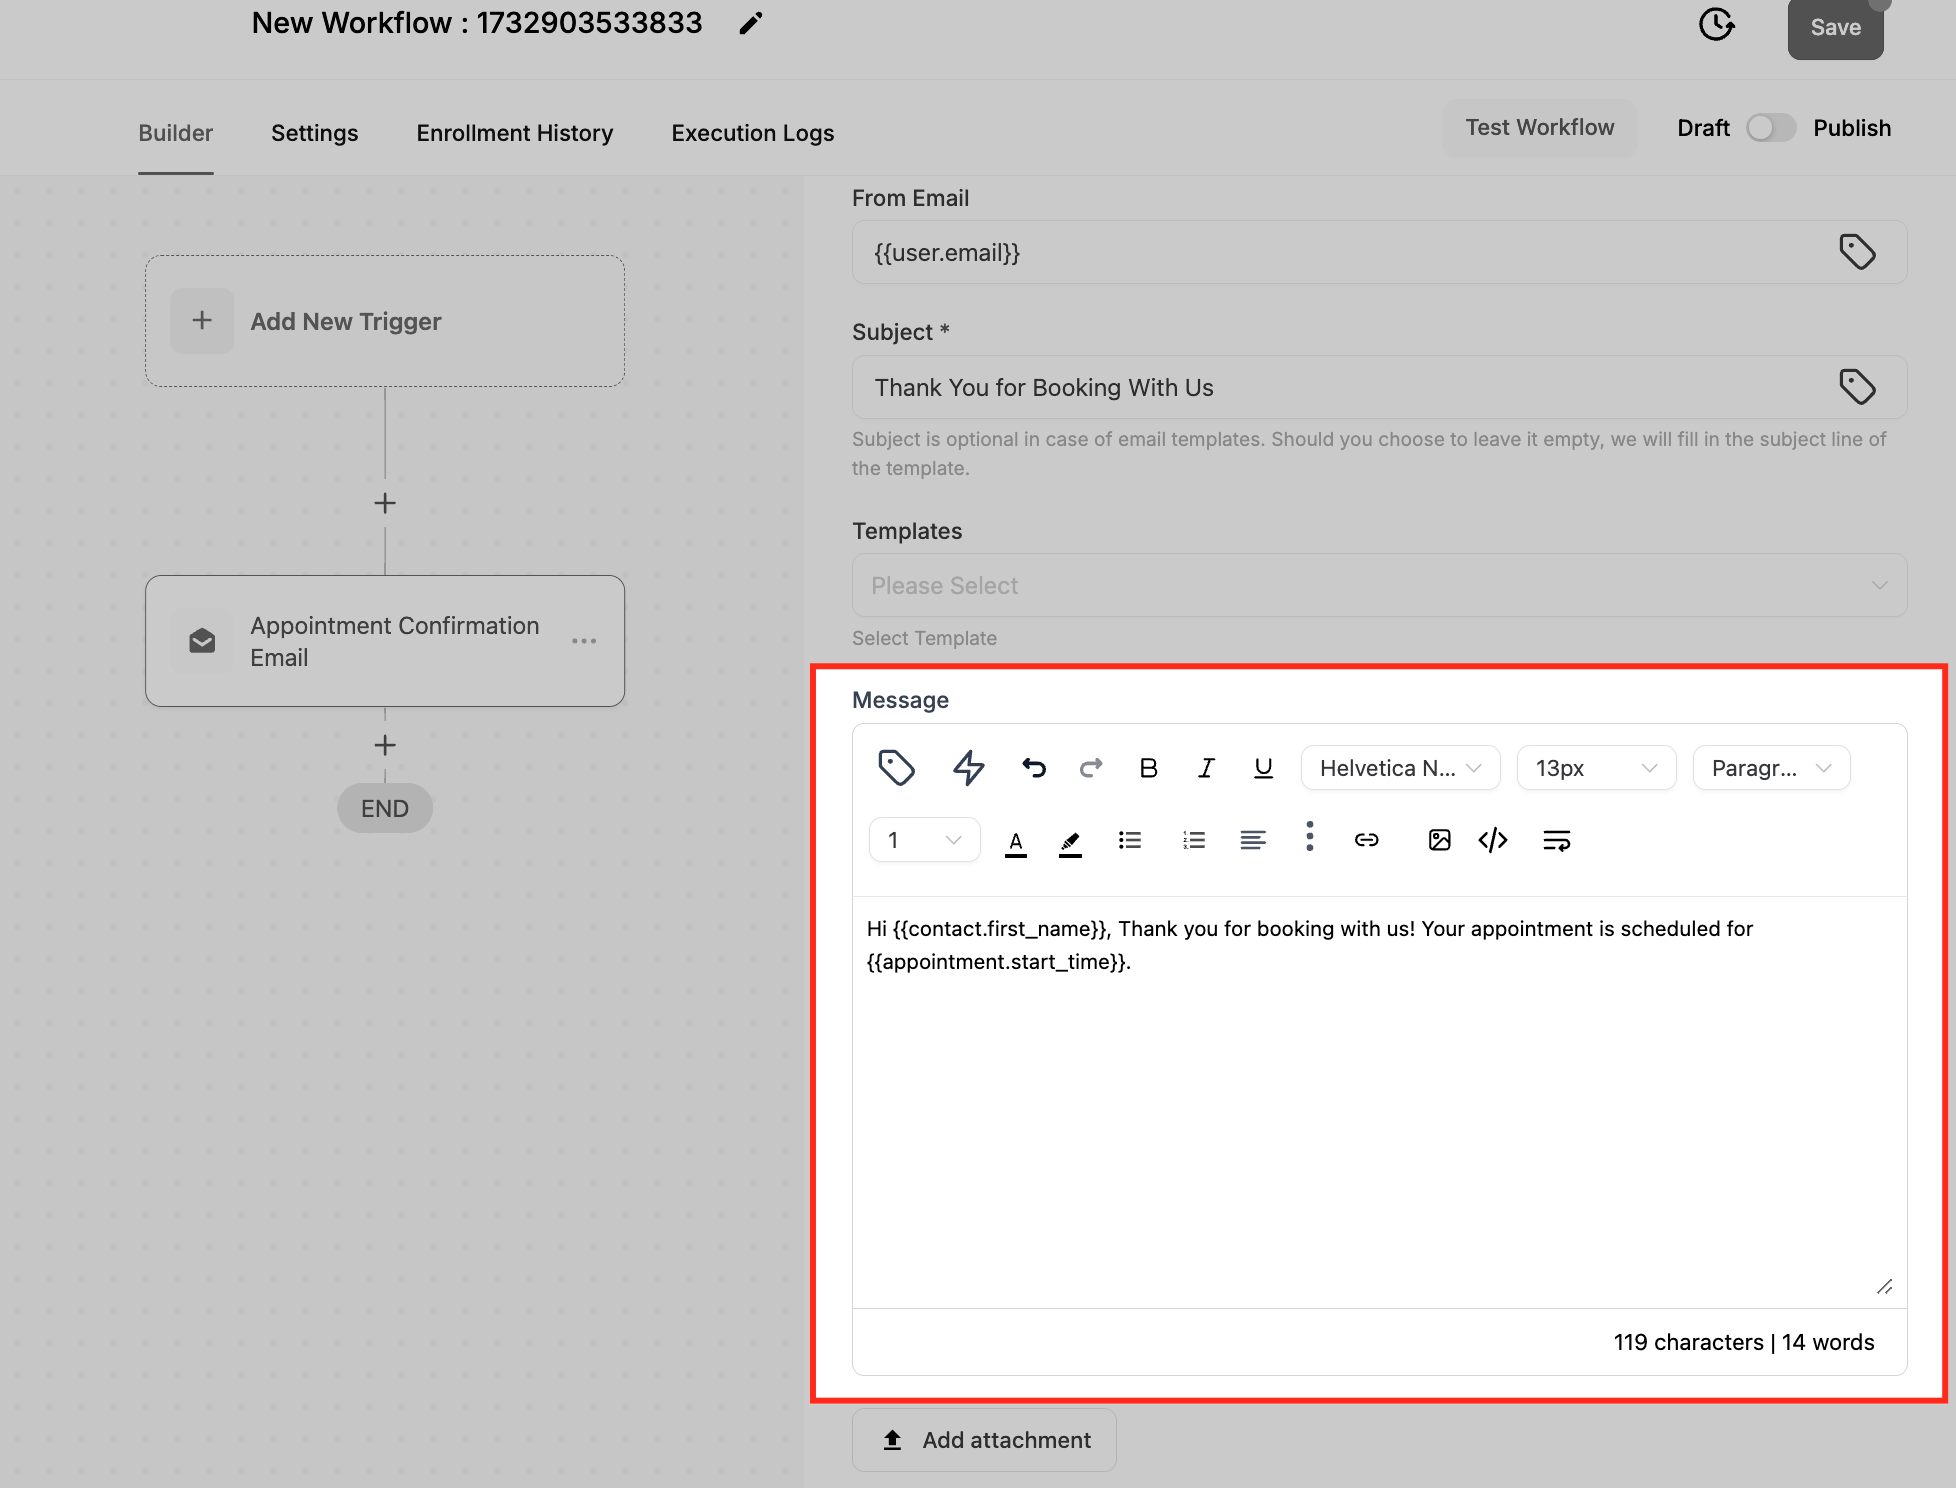
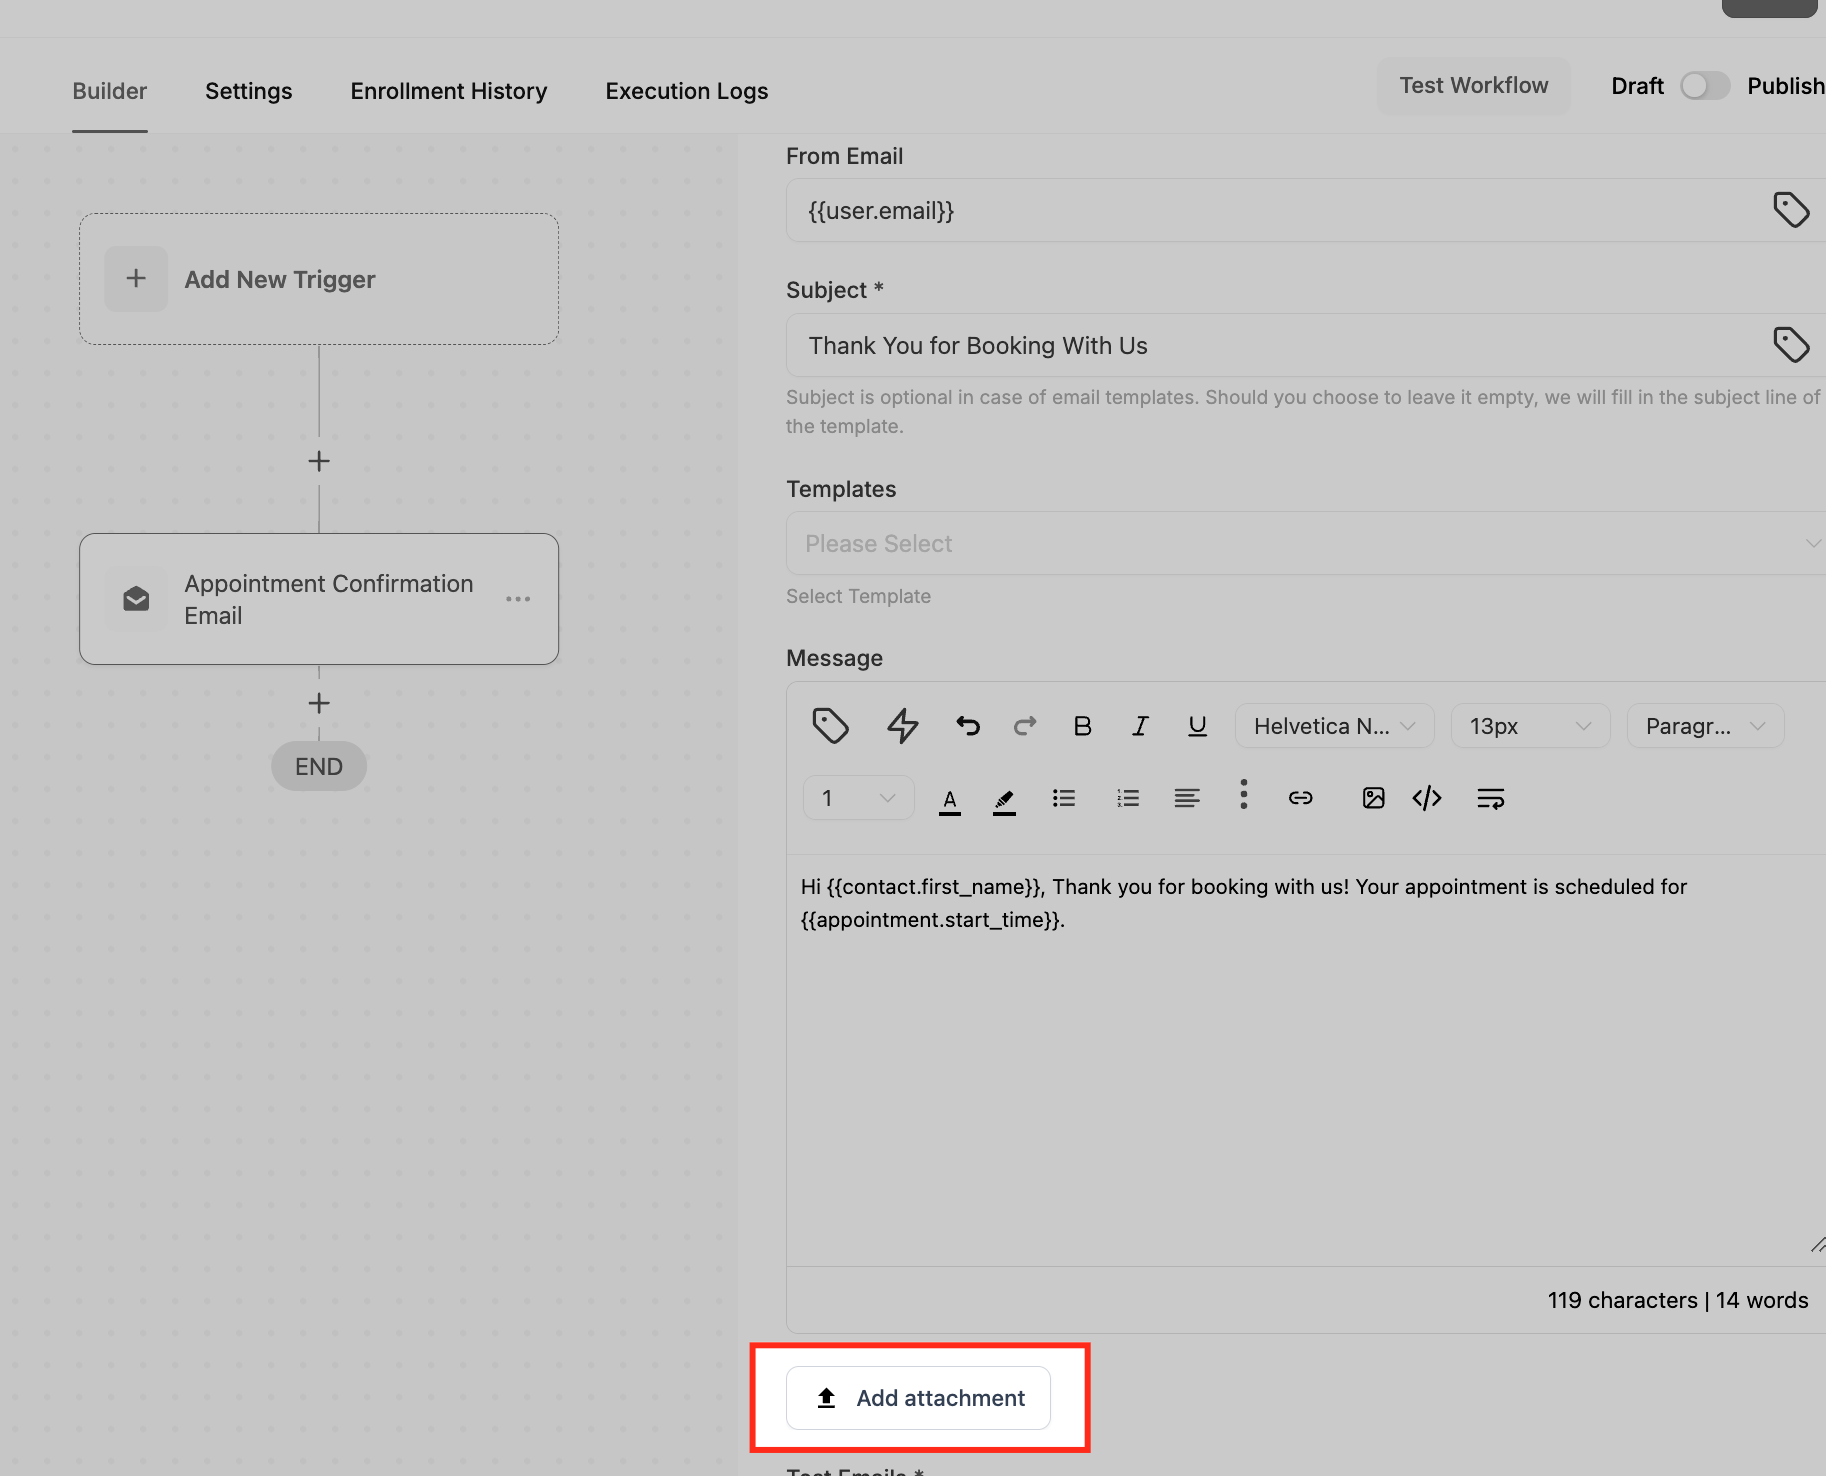
6. Add Attachments (Optional)
- If necessary, you can attach files to the email, such as booking confirmations, product details, or invoices. Attachments can be included via URLs.
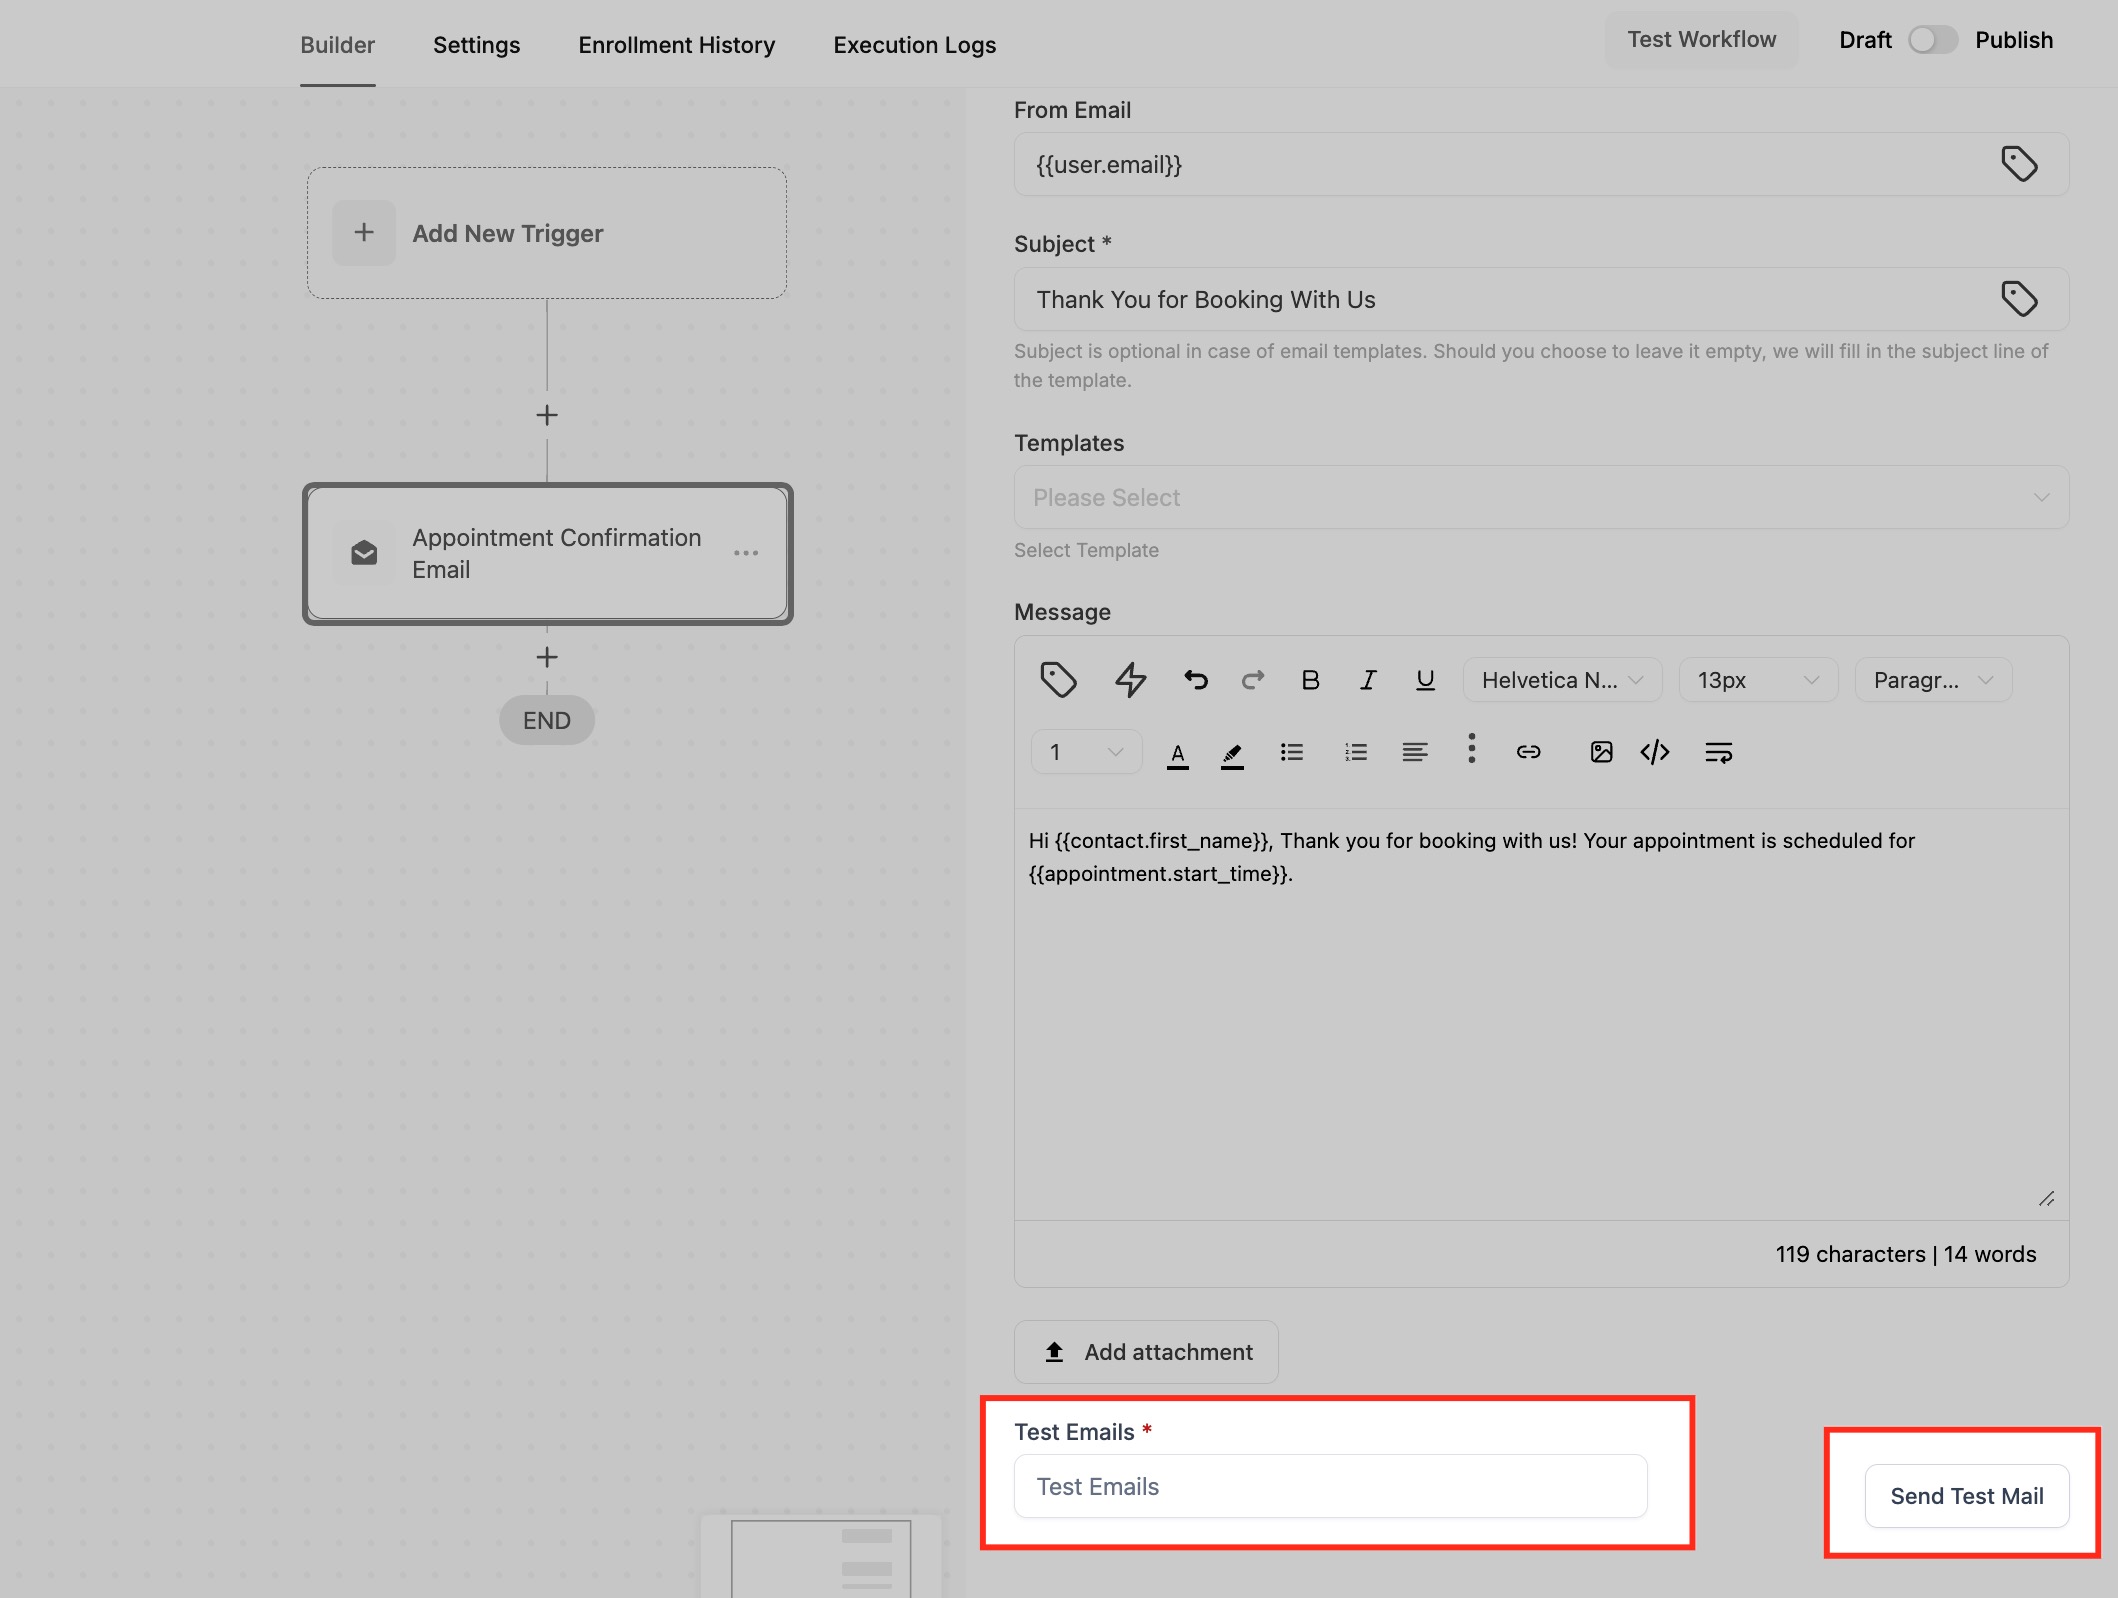
7. Test the Email
- Before finalizing, it’s a good idea to send a test email. Enter an email address in the Test Emails field and click Send Test Mail to ensure the content and formatting are correct.
8. Save and Activate the Action
- Once you’re satisfied with the configuration, click Save Action. The email will now be sent automatically when the workflow reaches this step.
9. Use CC/BCC Fields
- Click the cc or bcc buttons
- The fields will appear for you to add recipients as needed
✅ Example: Sending a Booking Confirmation Email
Let’s walk through an example of using the “Send Email” action to send a booking confirmation email to customers who book an appointment.
🧭 Step-by-Step
-
Trigger: The workflow begins when a customer makes a booking
-
Action: Add the “Send Email” action to send a confirmation email to the customer
- Action Name: Booking Confirmation Email
- From Name: My Company
- From Email: mycompany@email.com
- Subject: Thank You for Booking with Us!
- Email Body:
` Hi {{contact.first_name}},
Thank you for booking with us! Your appointment is scheduled for {{appointment.start_time}} on {{appointment.only_start_date}}.
We look forward to seeing you soon!`
-
Attach Files (Optional)
- Add relevant documents (e.g., a PDF with appointment details)
-
Test the Email
- Use the Test Email feature to check formatting and content
-
Save and Activate
- Save the email action in your workflow, and it will automatically be sent when a booking is made.
📌 Points to Remember for Cc/Bcc
- You can add cc, bcc, or both in the Email action
- Cc/Bcc emails will not appear in Email Stats
- The Test Email feature does not work for Cc/Bcc fields
- Success/failure is based only on the main recipient (To Email), not Cc/Bcc
- You can add multiple cc/bcc addresses, separated by commas
- If one of the cc/bcc emails is invalid, it will be skipped — valid ones will still be sent
- Both fields are optional (non-mandatory)