Create Sales Pipeline
Setting up a new sales pipeline is a breeze, and it helps you visualize exactly where every lead stands in your sales process. Here’s how easy it is to get started:
-
Navigate to Opportunities.
-
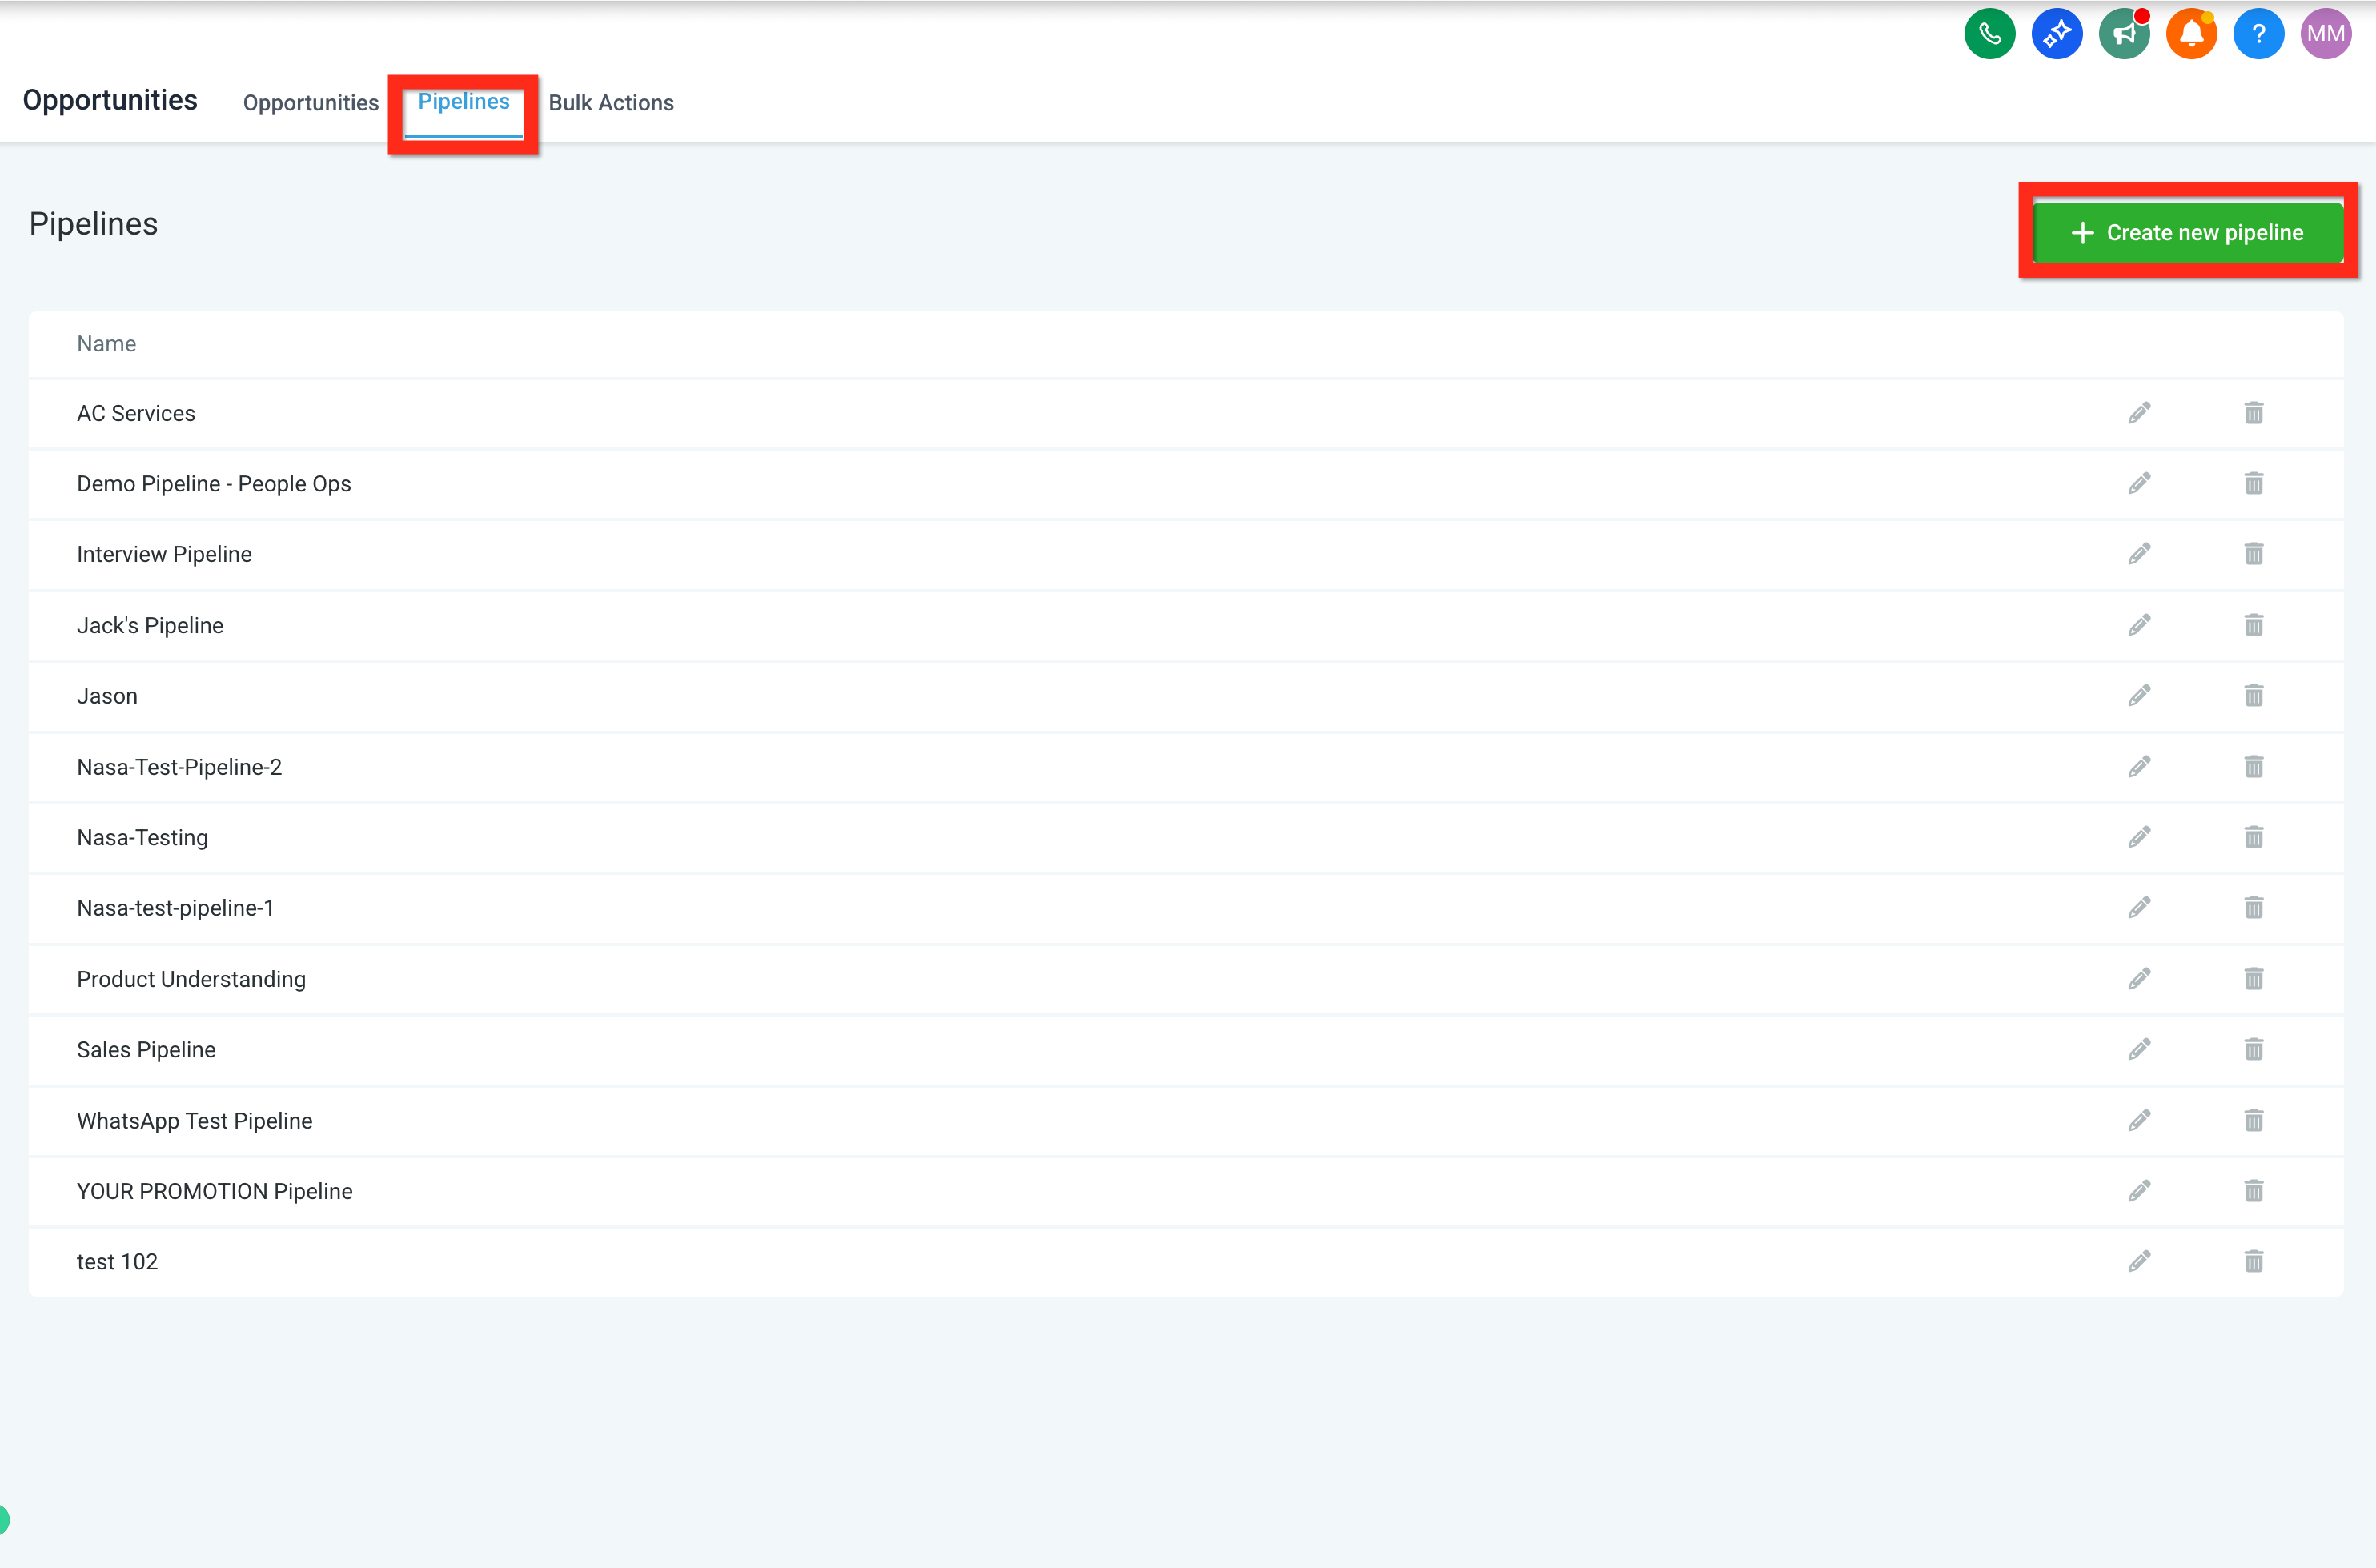
Click Pipelines.
-
Click Create New Pipeline.
-
Fill in the details (name, stages, etc.) and click Save.
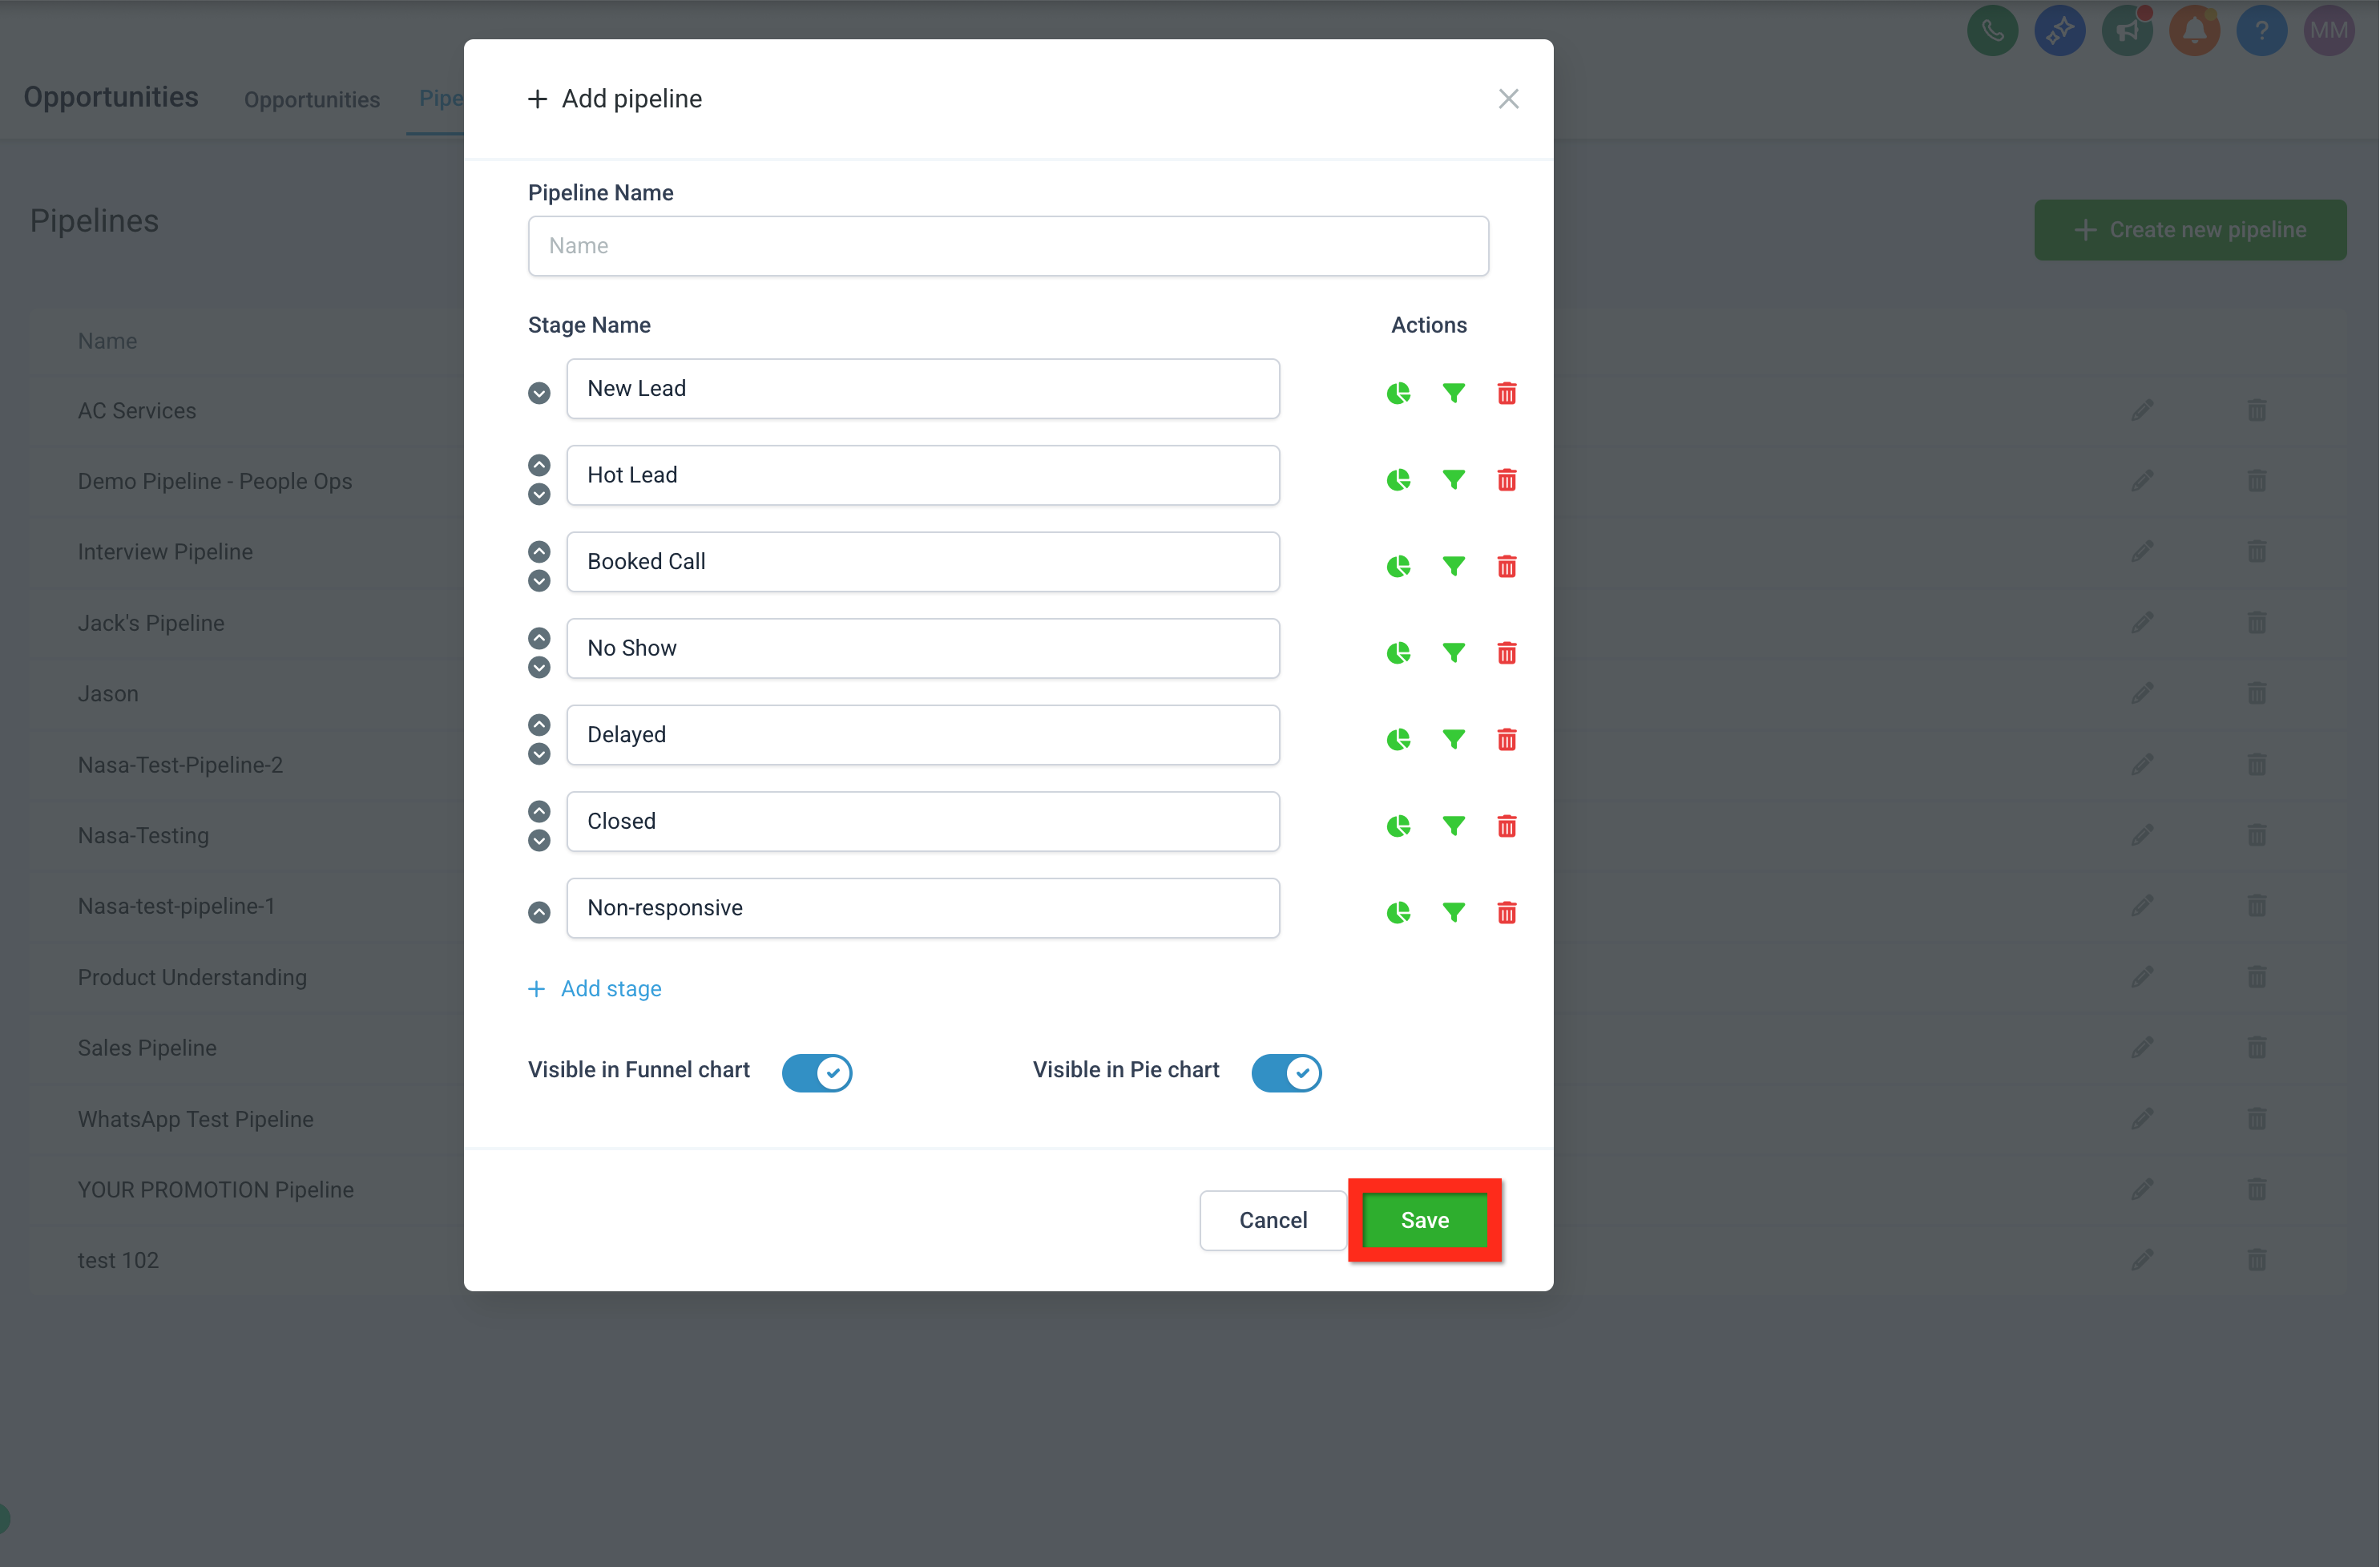
Consider customizing your pipeline stages to match your team's workflow, such as:
- New Lead
- Hot Lead
- Booked Call
- No Show
- Delayed
- Closed
- Non-responsive
Import Contacts as Opportunities
Got a list of contacts from an event or another platform? Great news—you can easily import them straight into your sales pipeline and turn those leads into opportunities with just a few clicks:
-
Navigate to Opportunities.
-
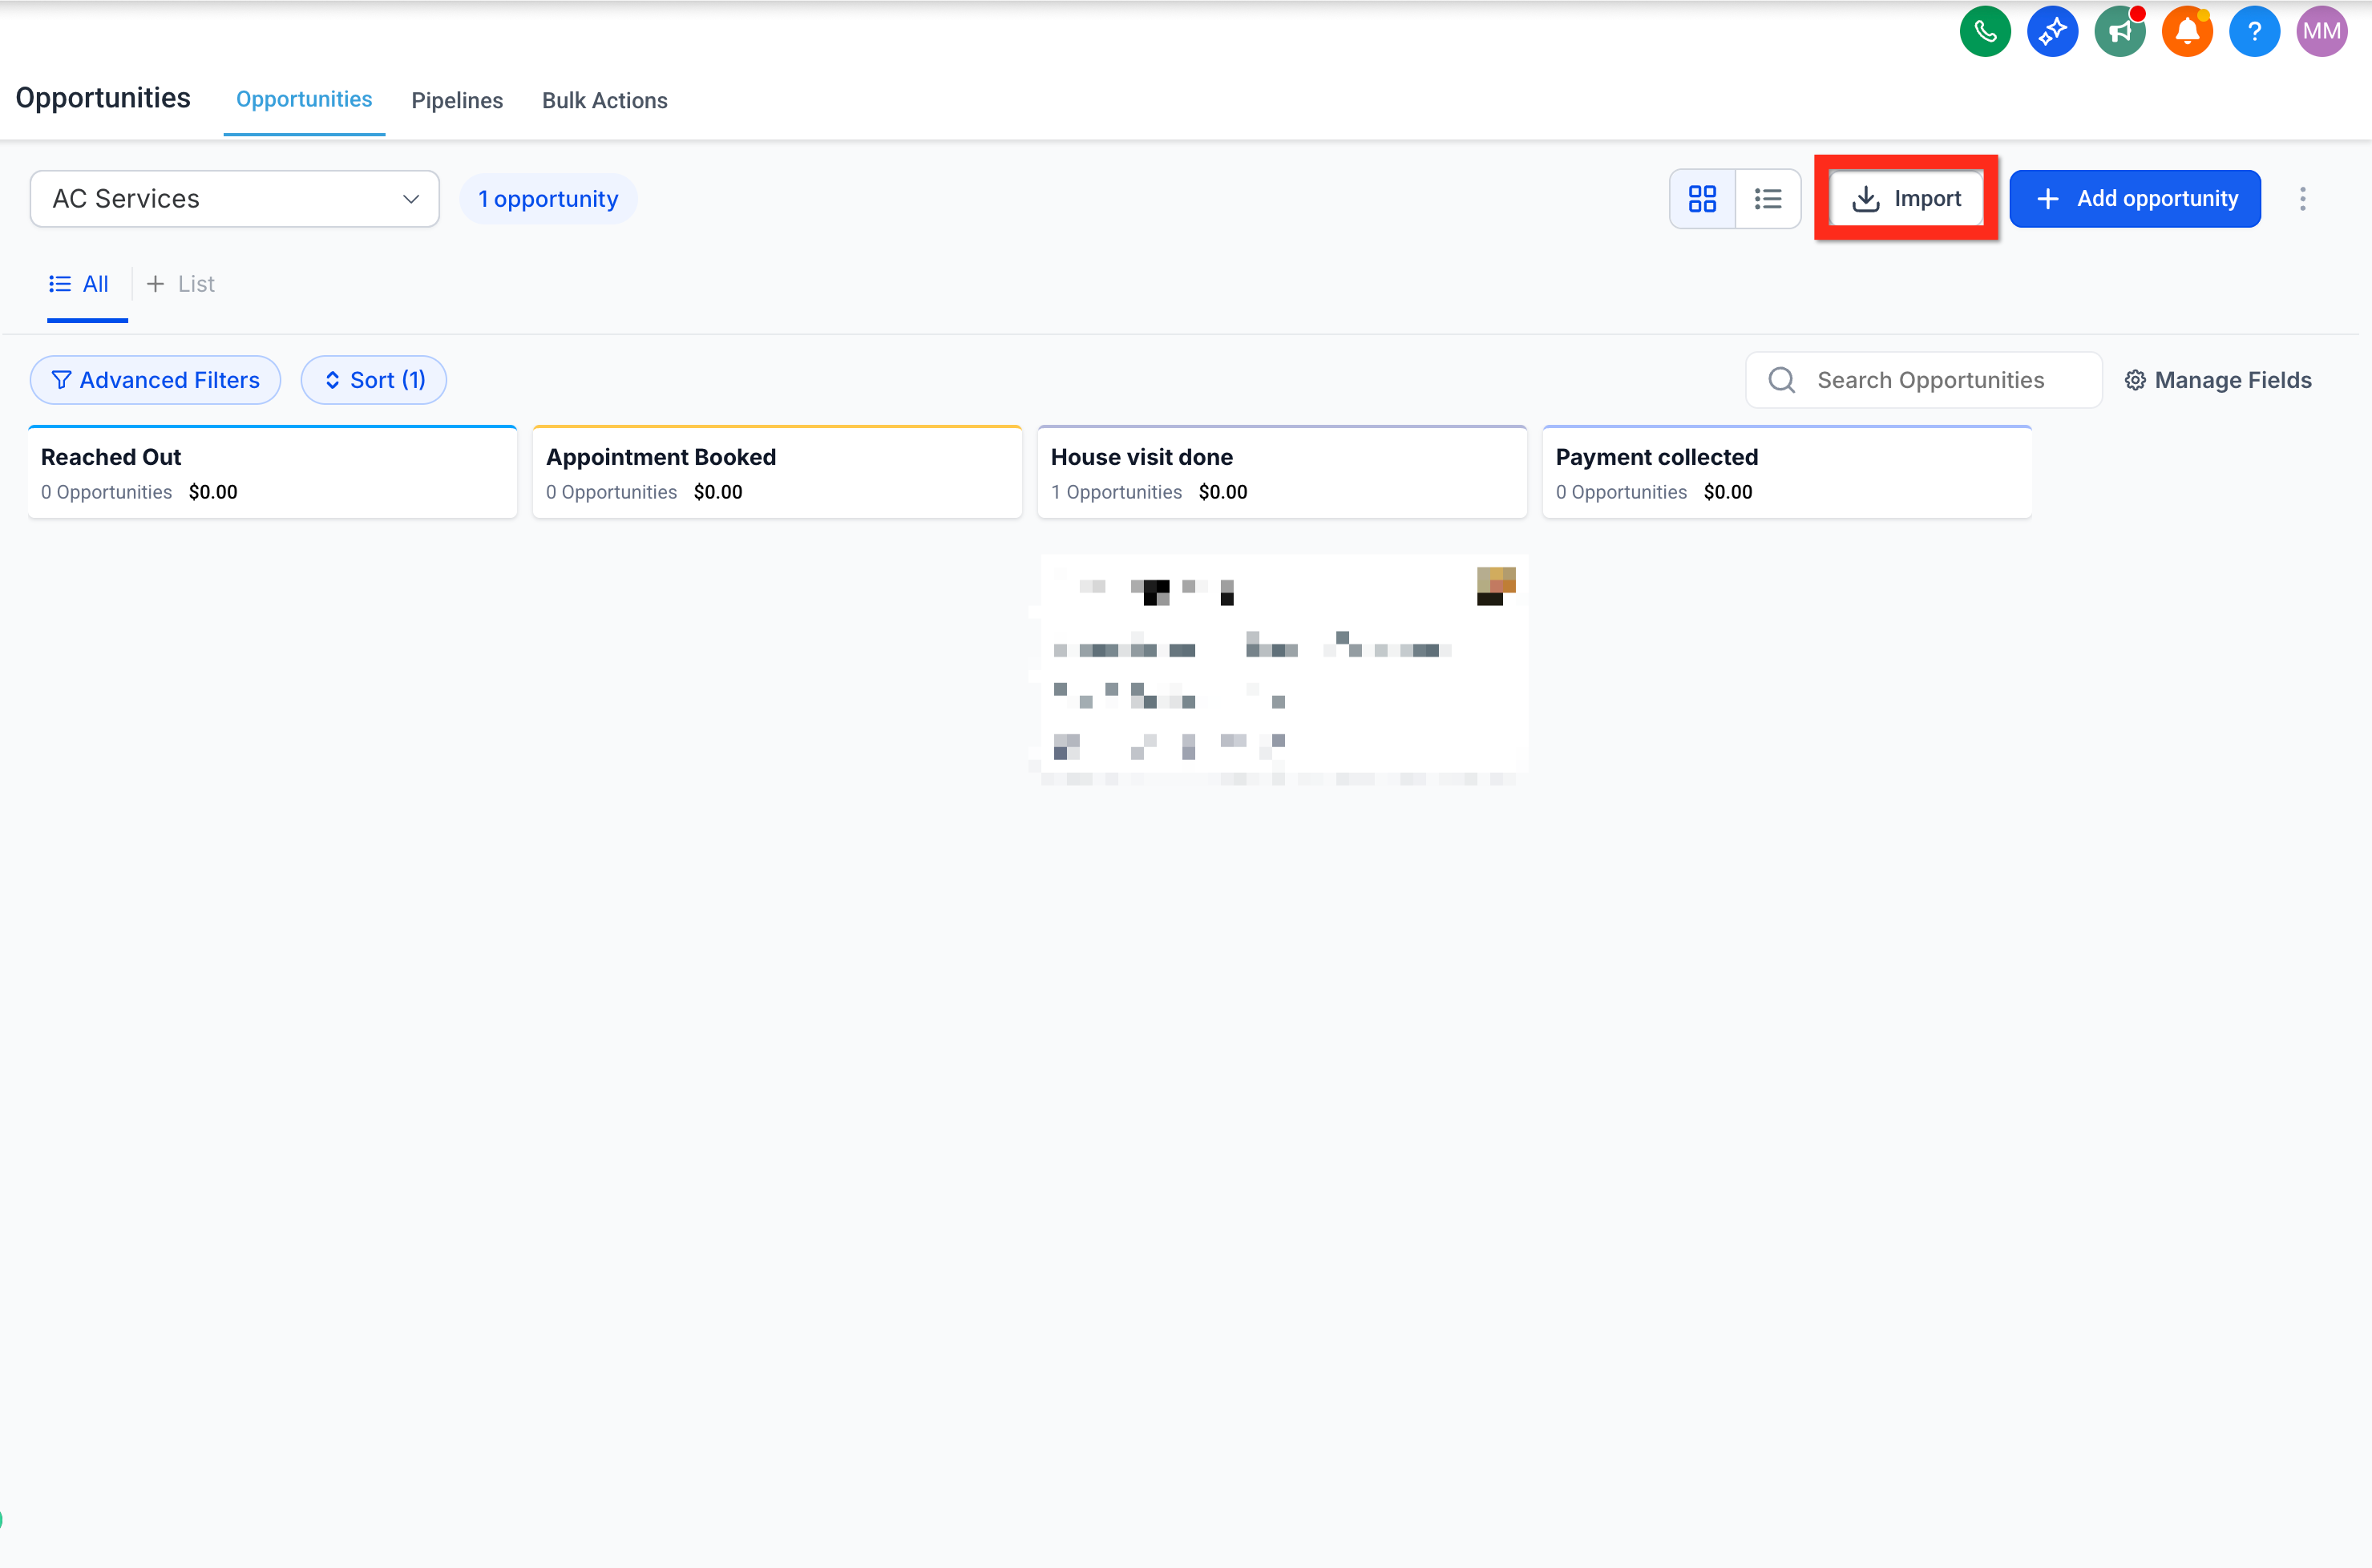
Click Import.
-
Select Opportunities.
-
Click Next.

-
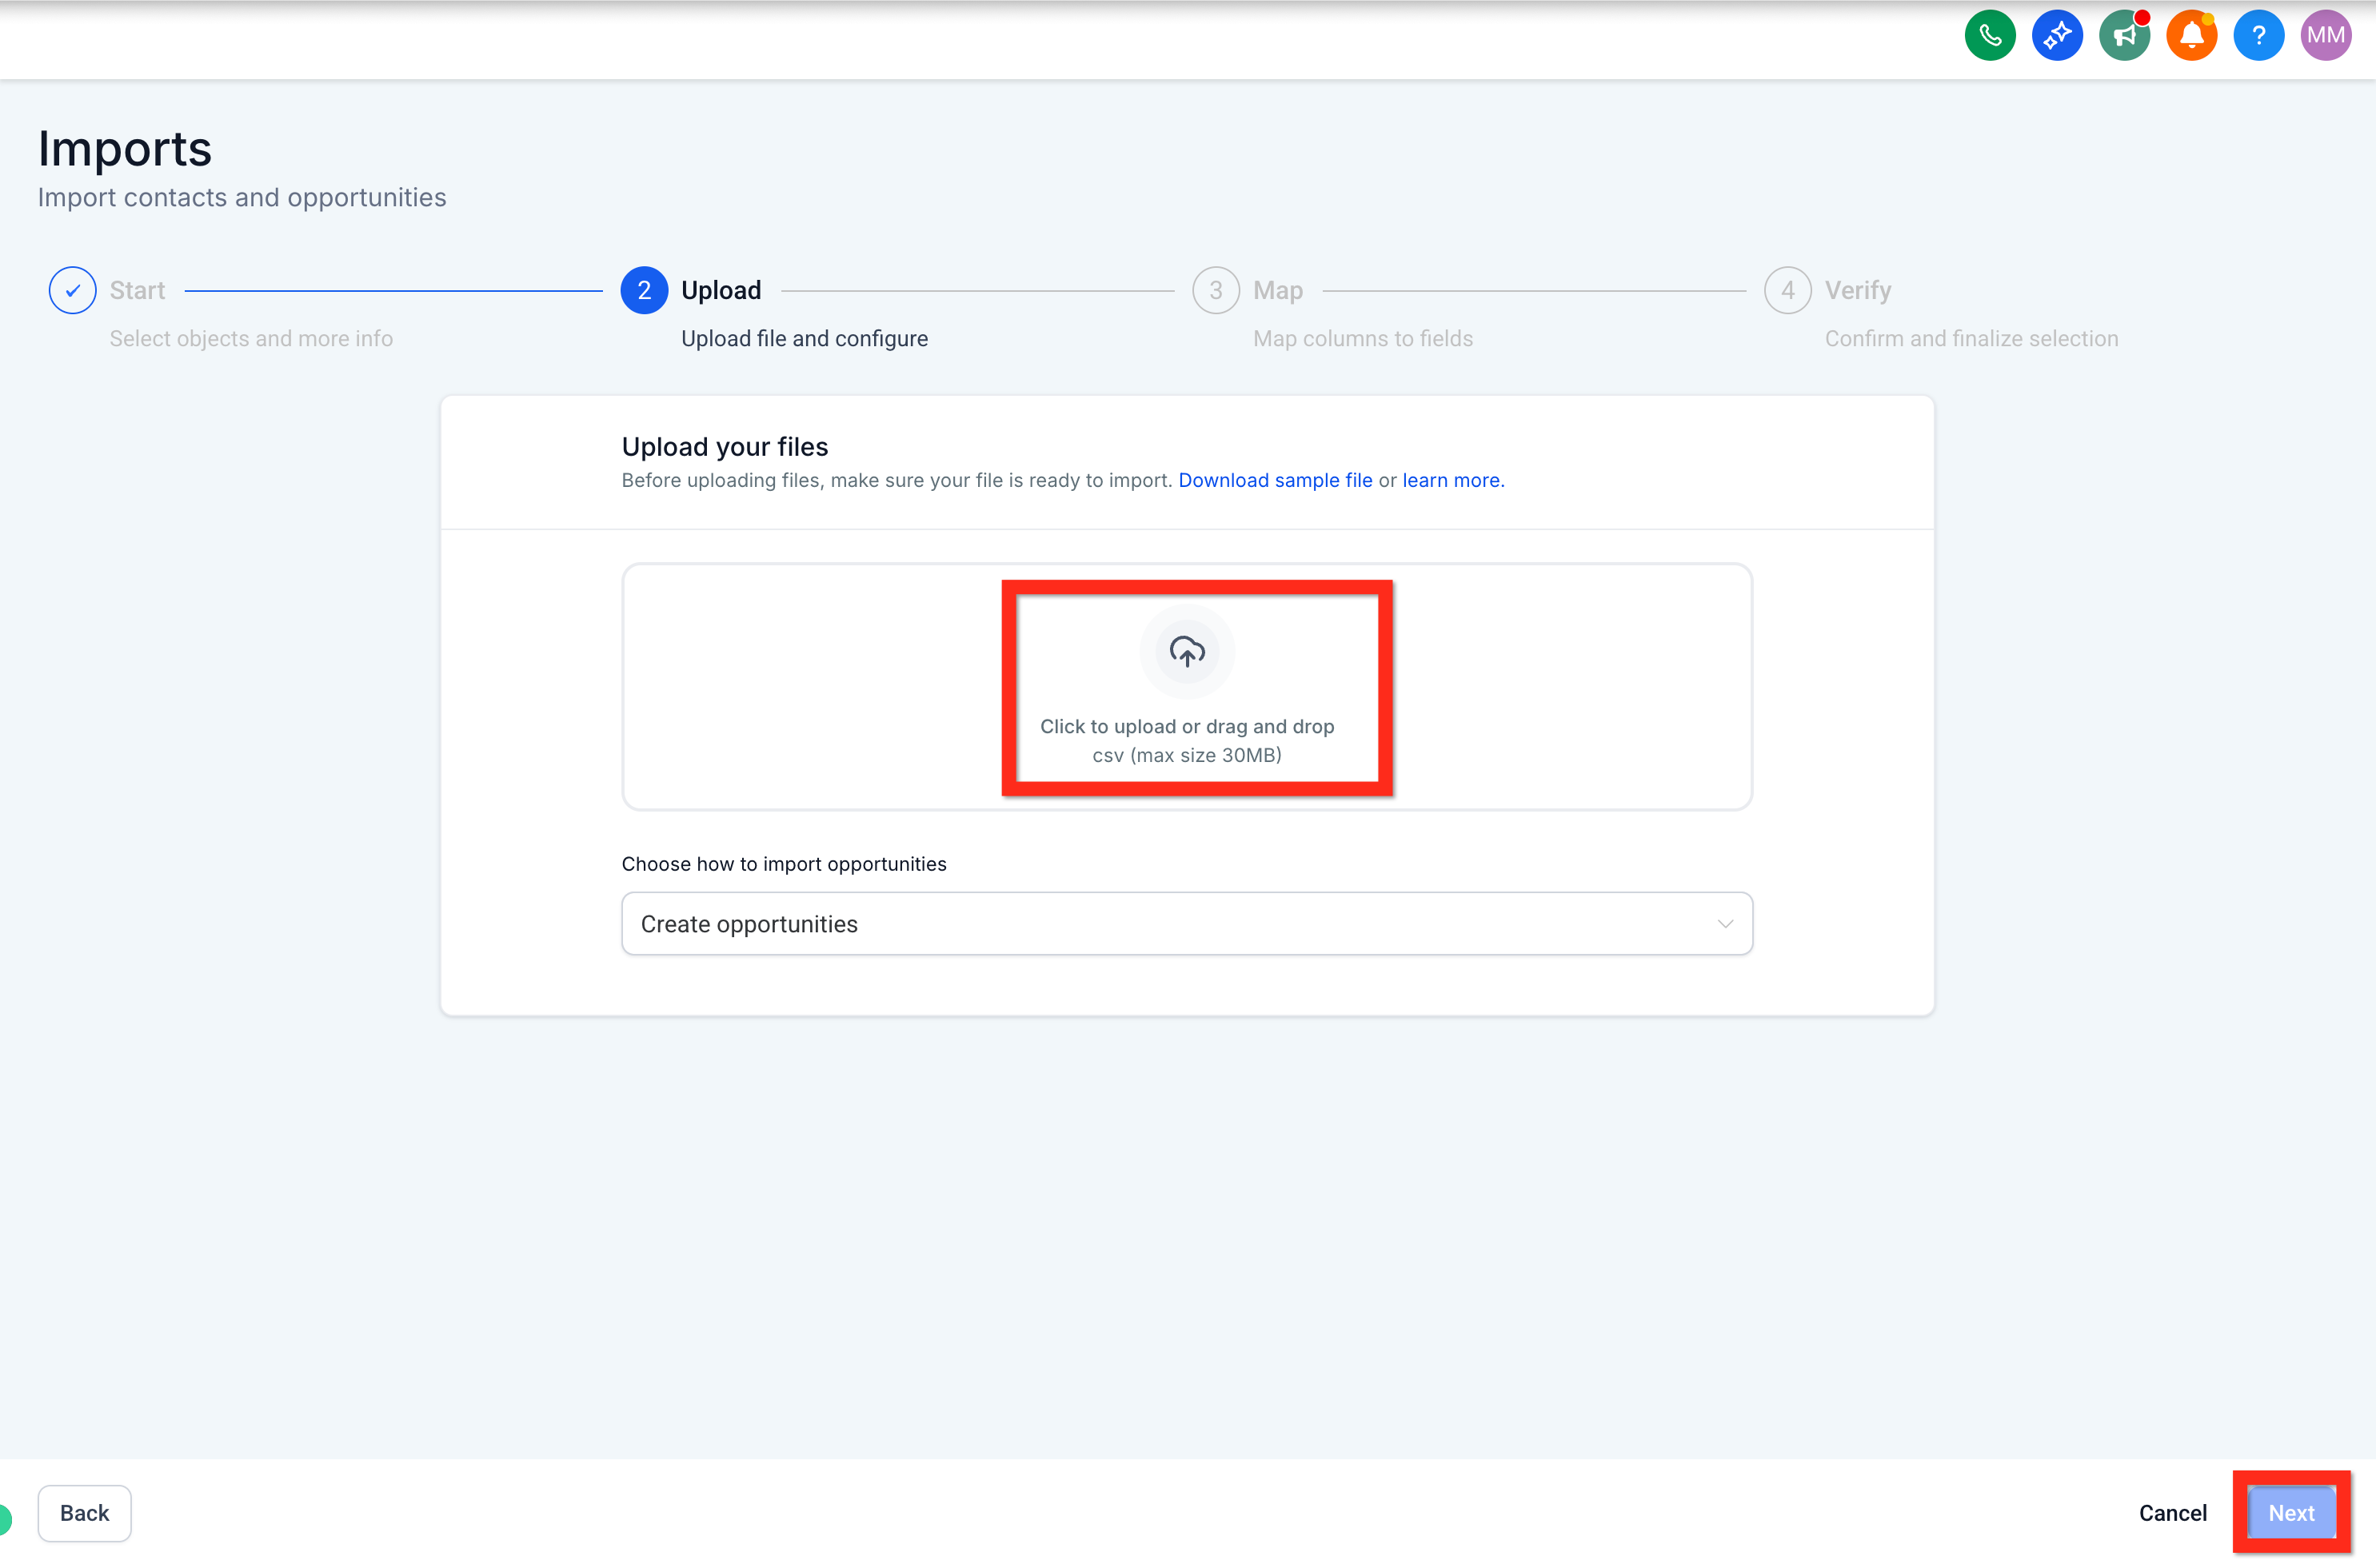
Upload your file.
-
Click Next.
-
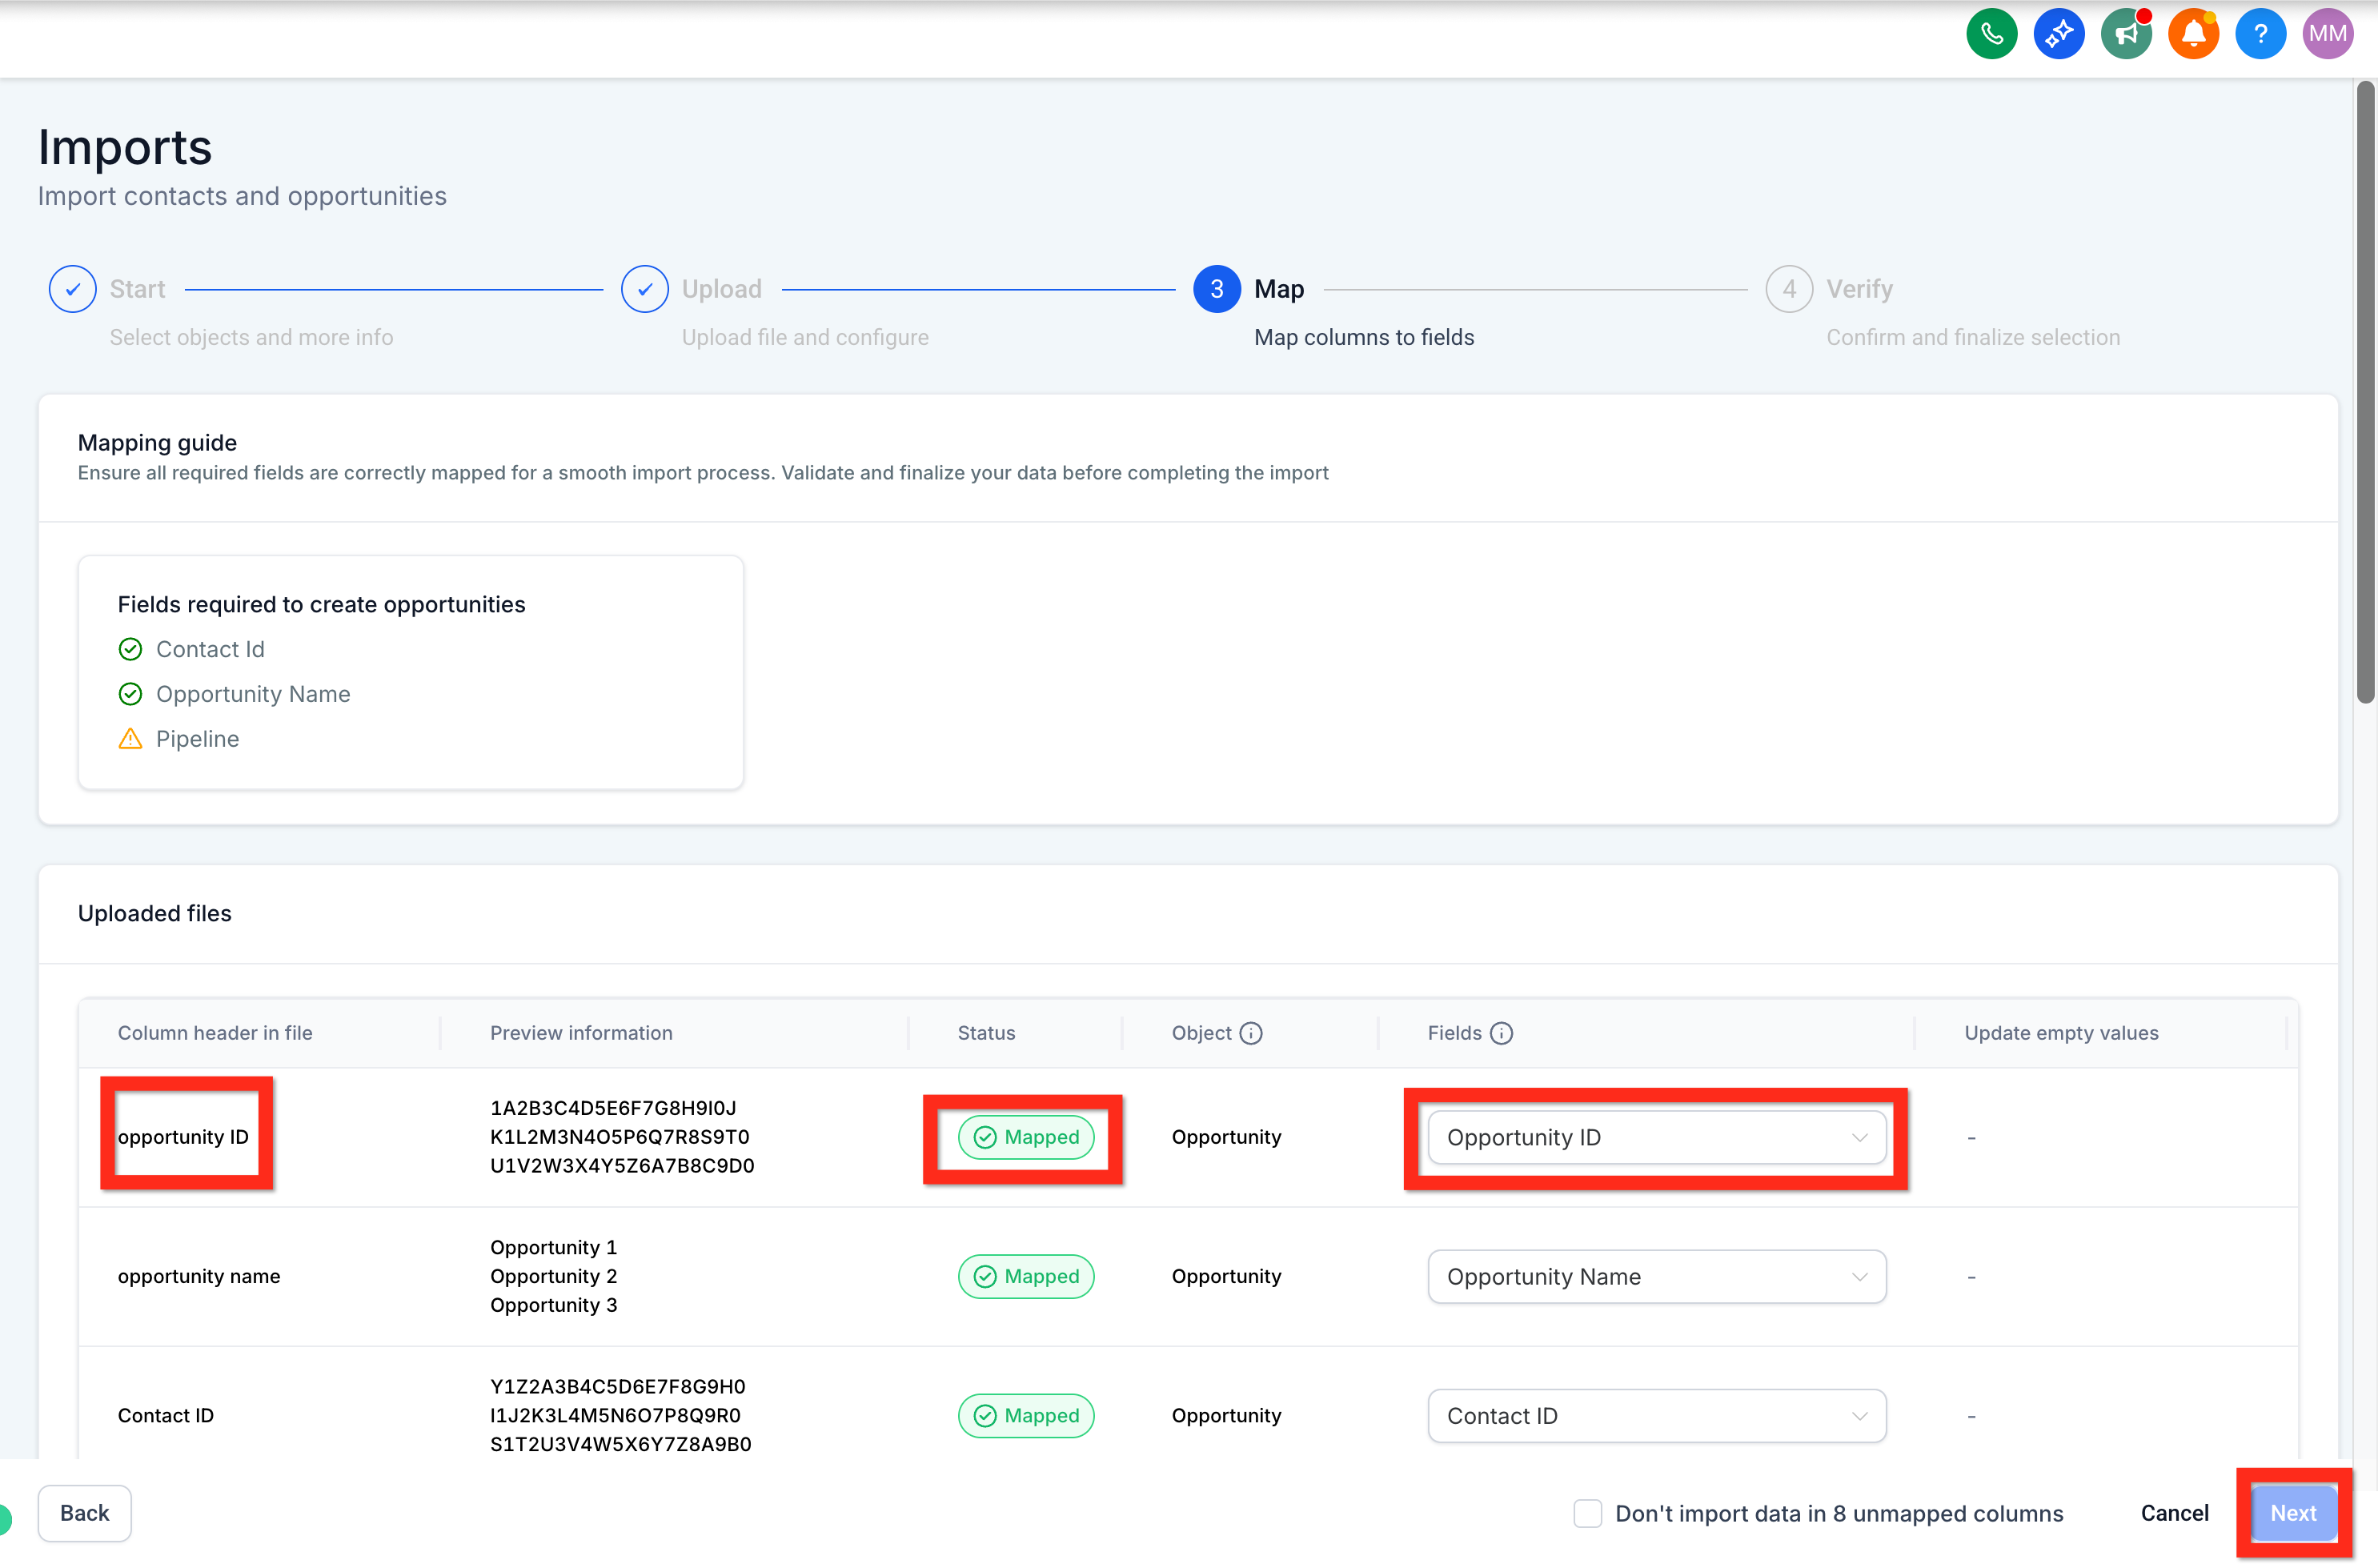
Map file columns to Opportunity fields.
-
Click Next.
-
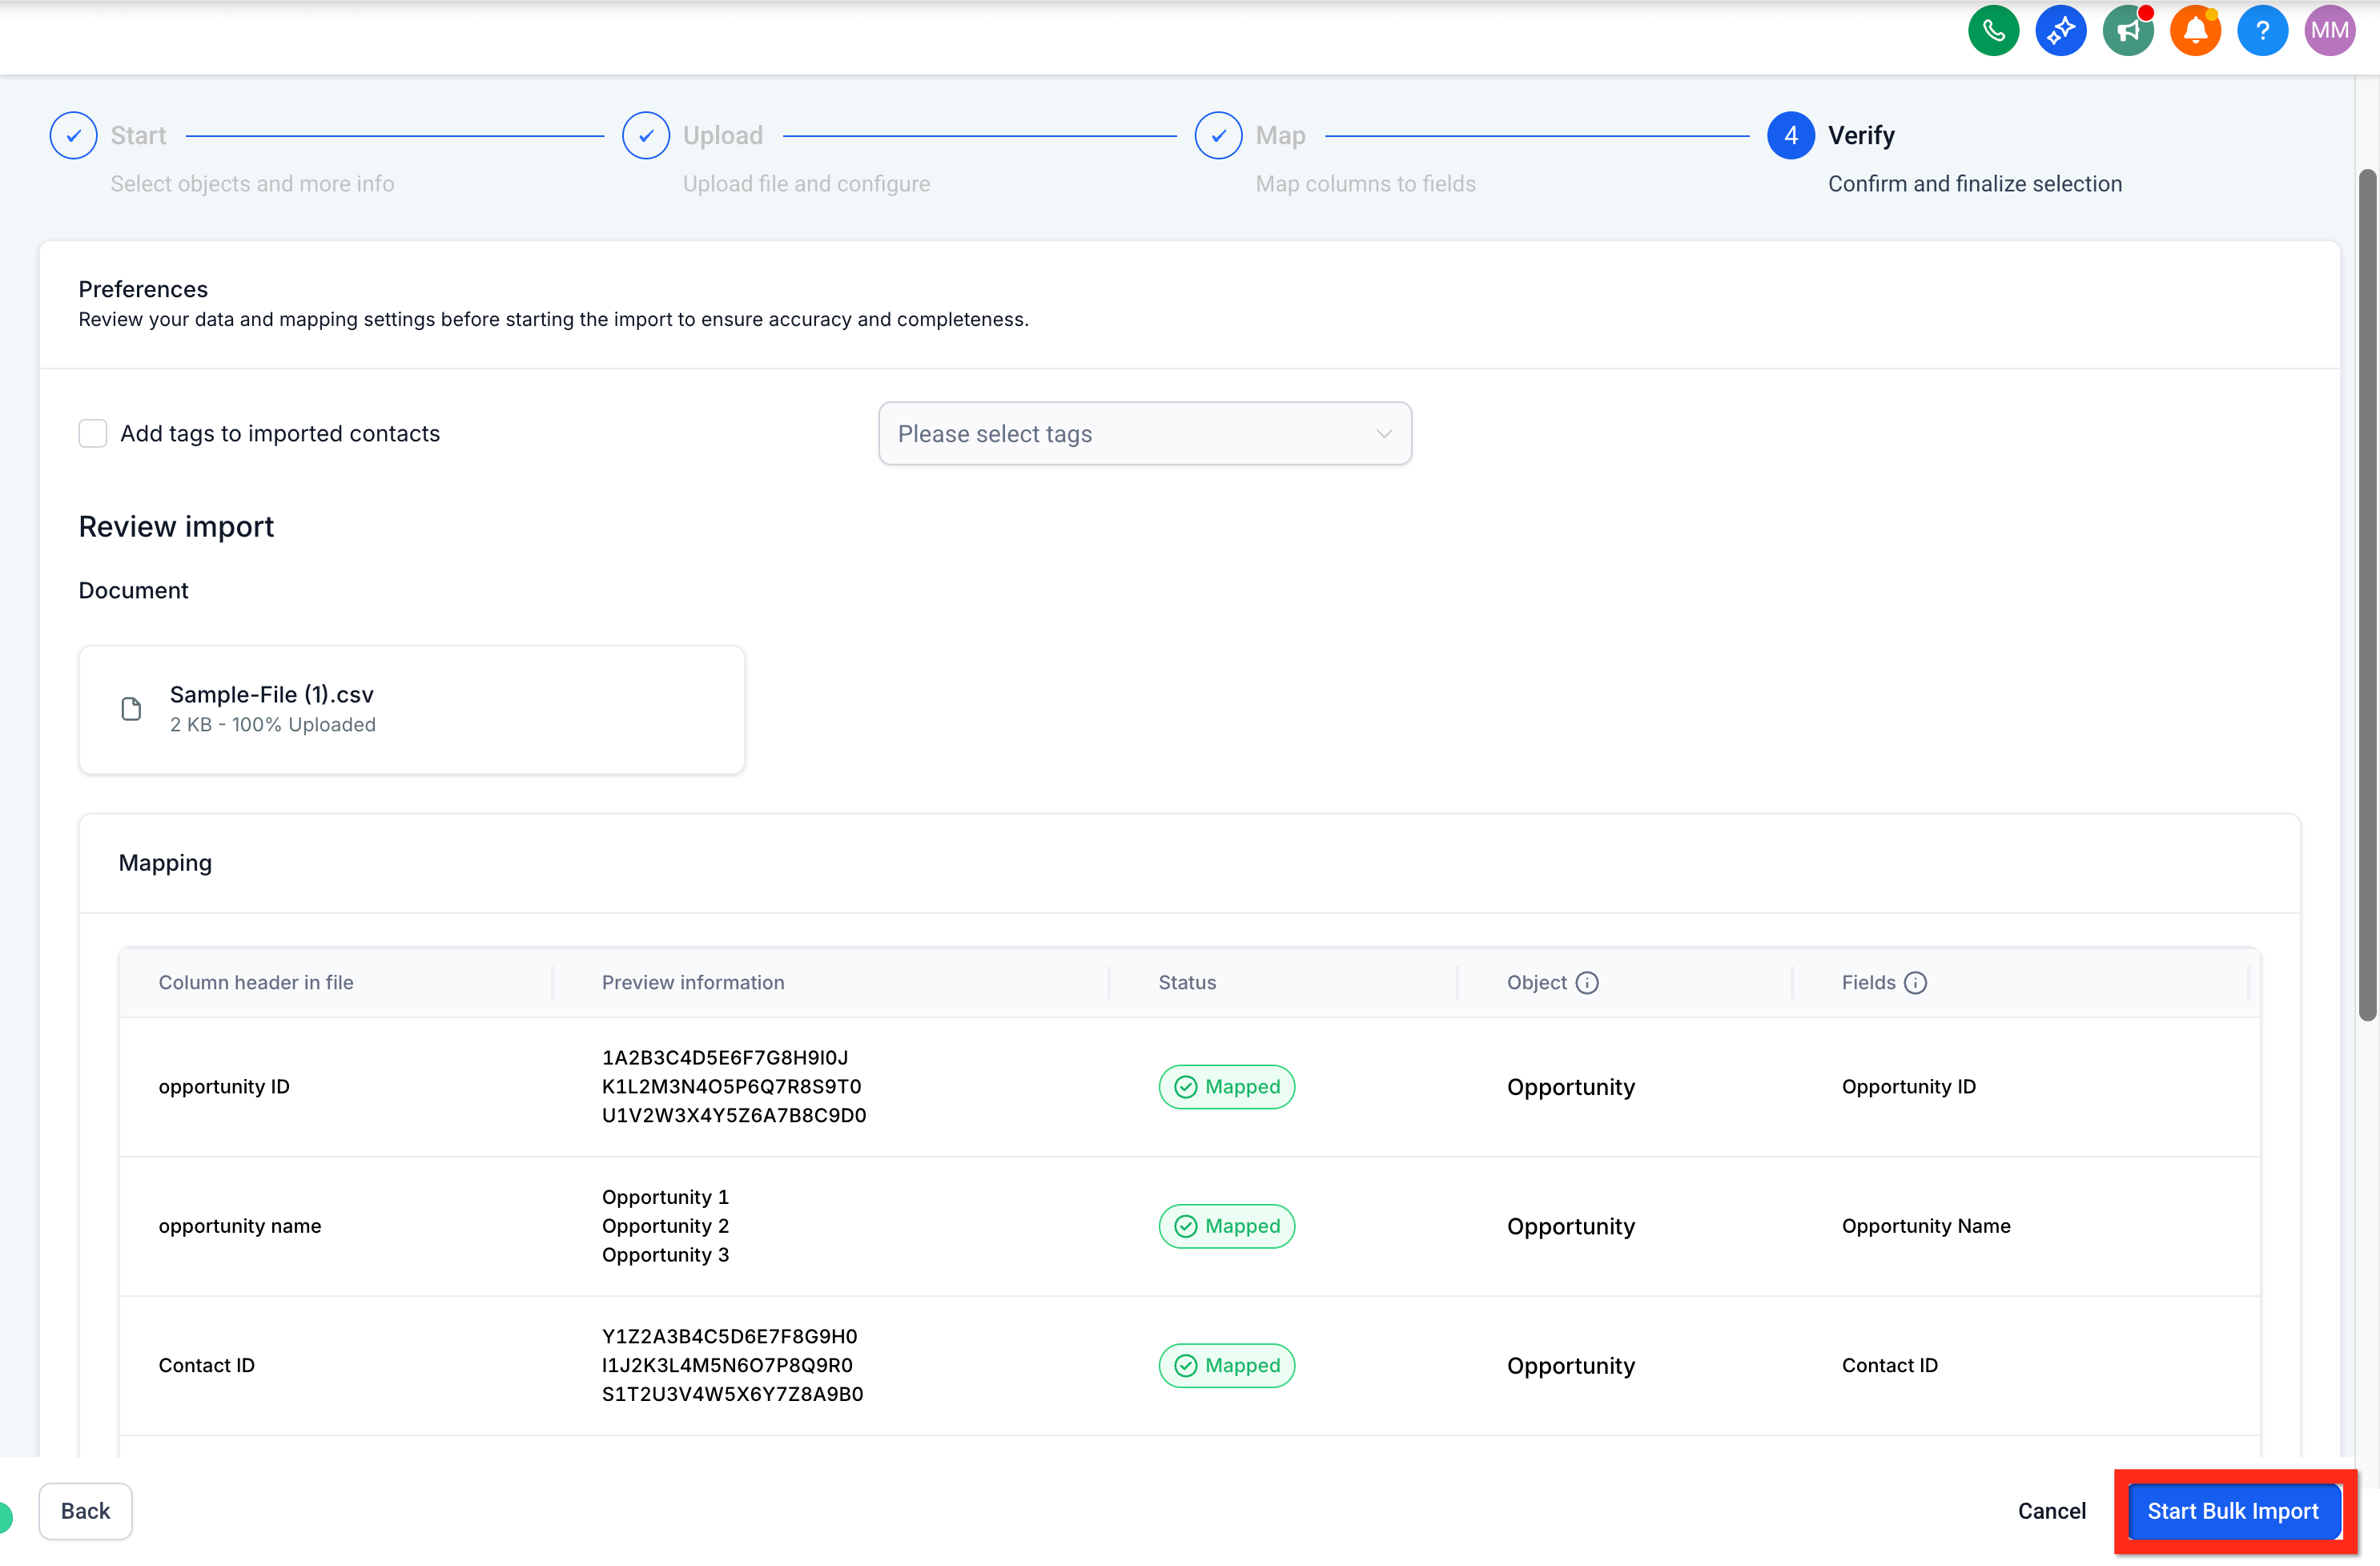
Verify all information and click Start Bulk Import.
Want more details? Check out our guide on importing contacts and opportunities via CSV.
Next, you might want to manually add opportunities to fine-tune your pipeline.
Create Opportunity Manually
Sometimes, opportunities come in one by one, and adding them manually gives you precise control. Plus, it's quick and intuitive! Here’s how you do it:
-
Navigate to Opportunities.
-
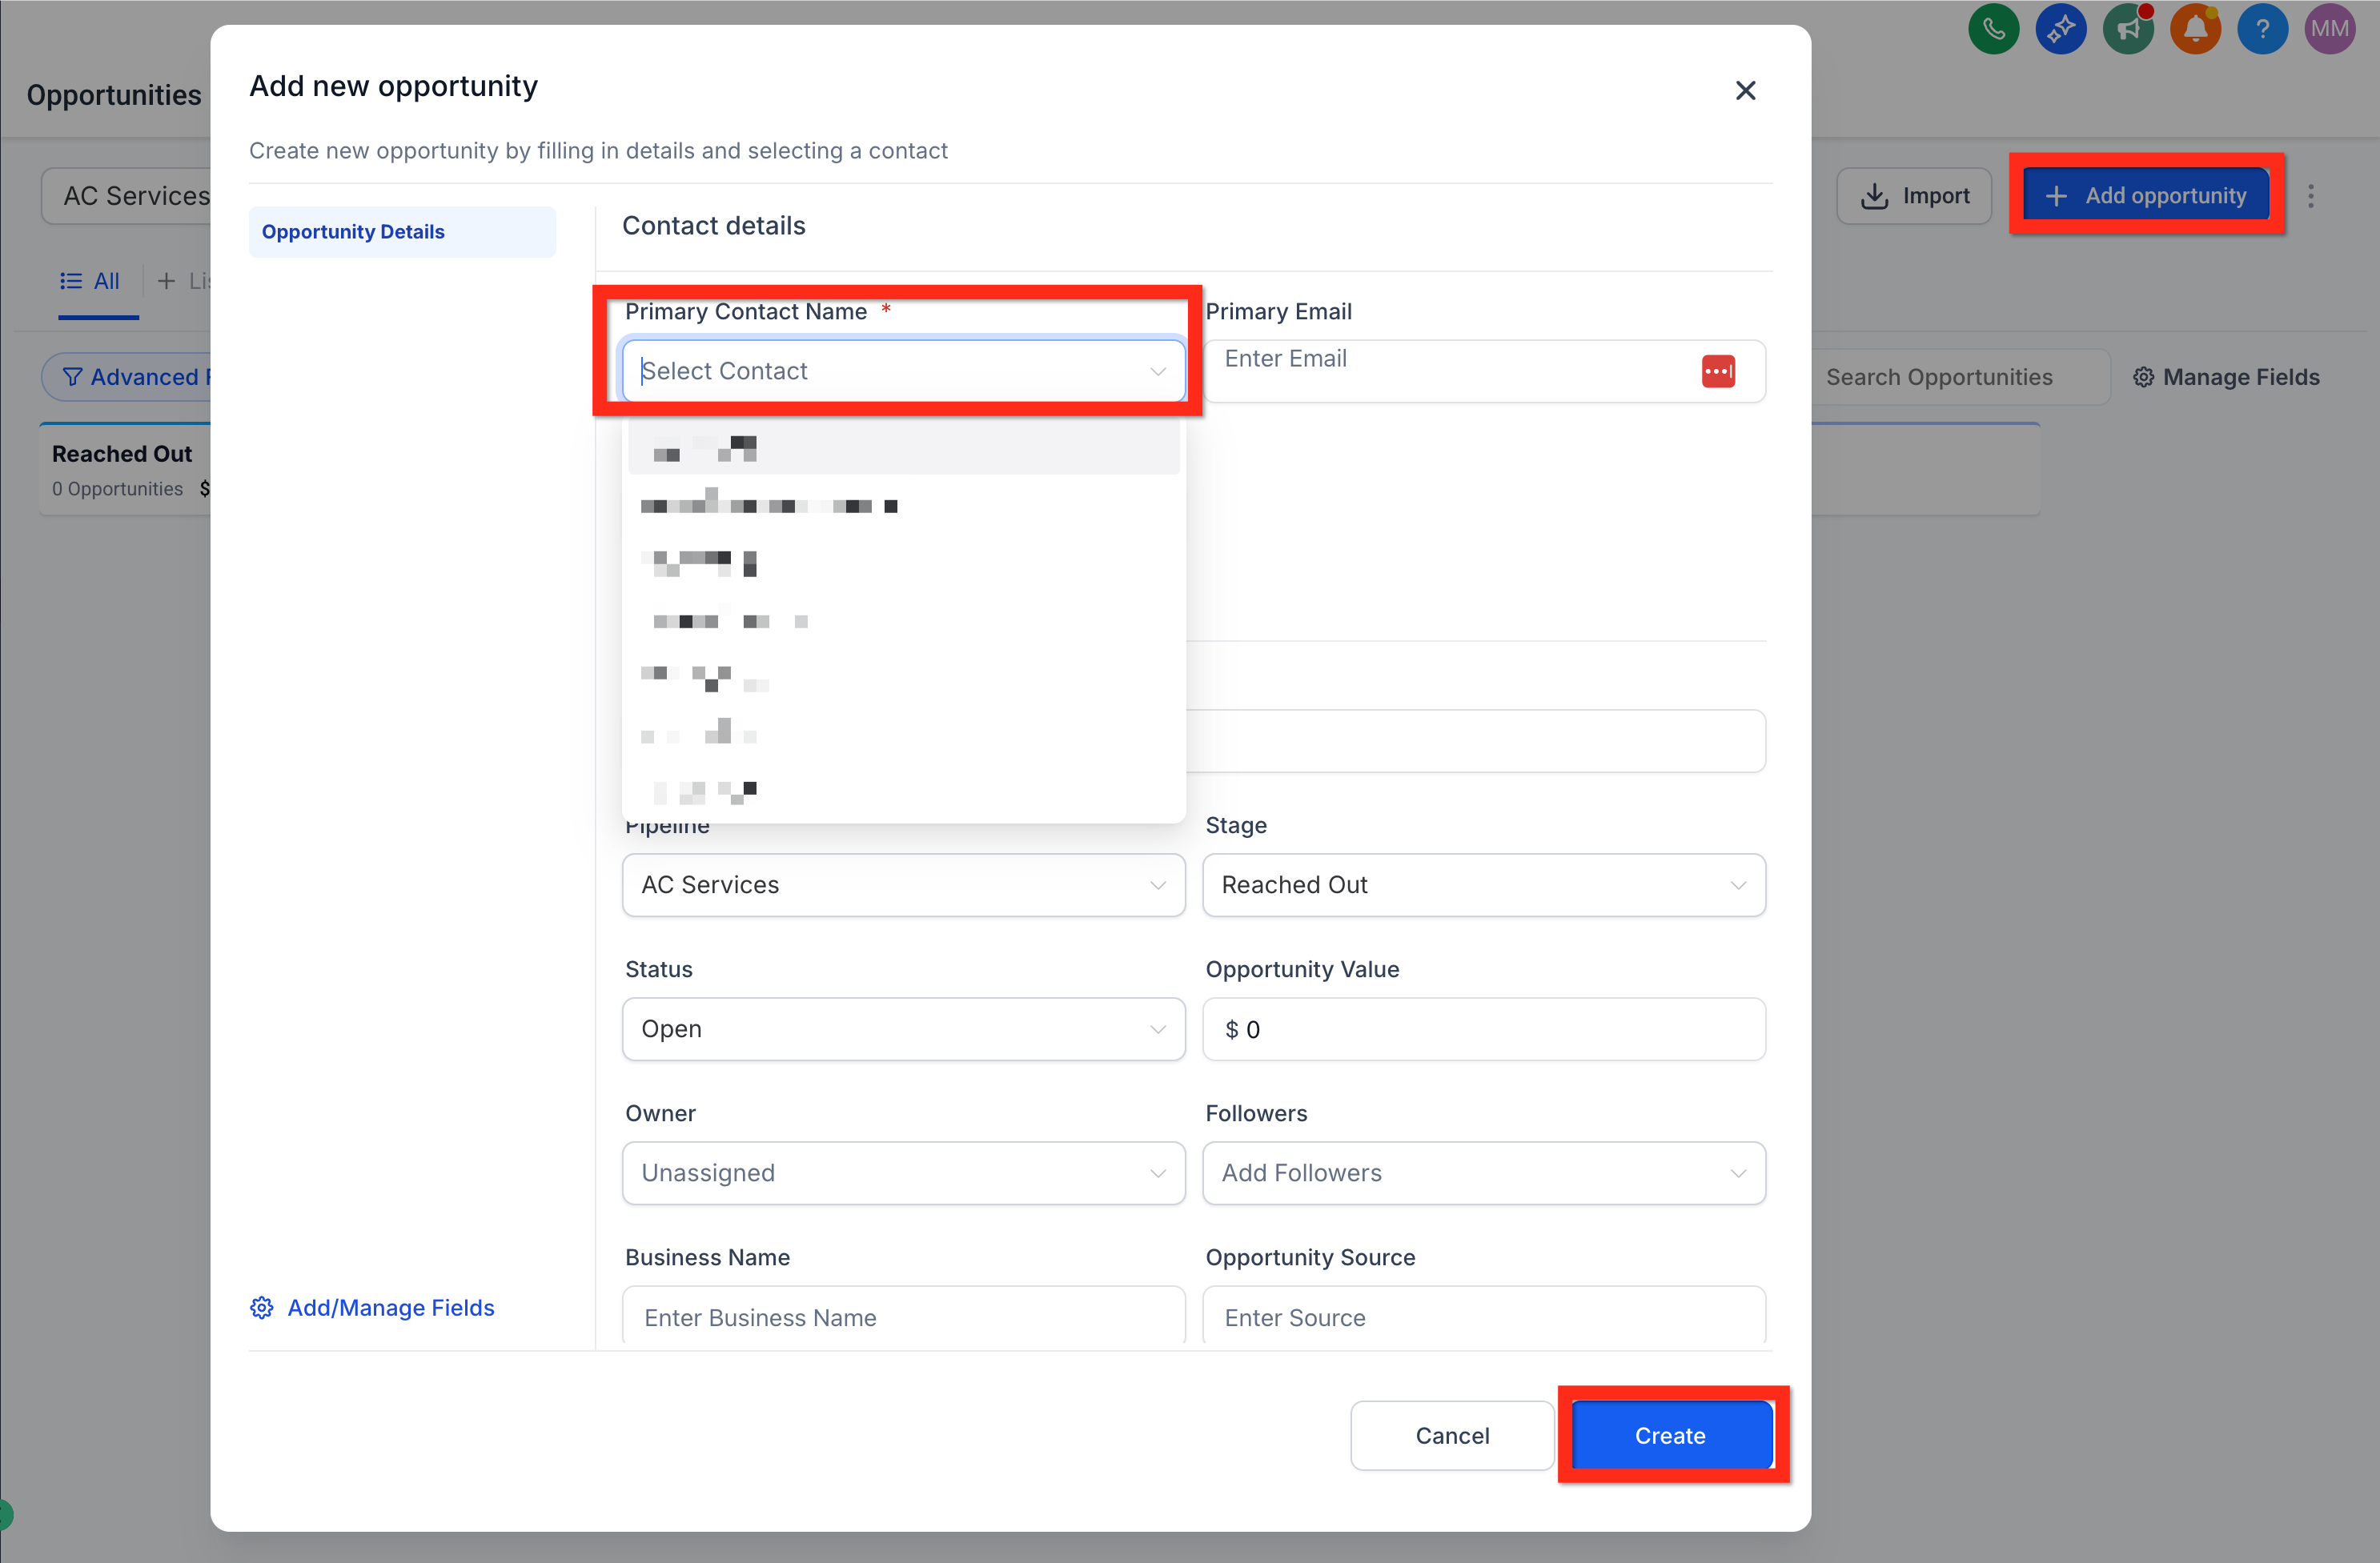
Click Add opportunity.
-
Select an existing contact or enter details for a new contact.
-
Fill in the Opportunity details (pipeline name, stage, value, etc.).
-
Click Create.