Create Live Chat Widget
First things first! Creating a live chat widget is easy and straightforward. Here's how you can quickly set up and customize your widget to perfectly match your website's style:
-
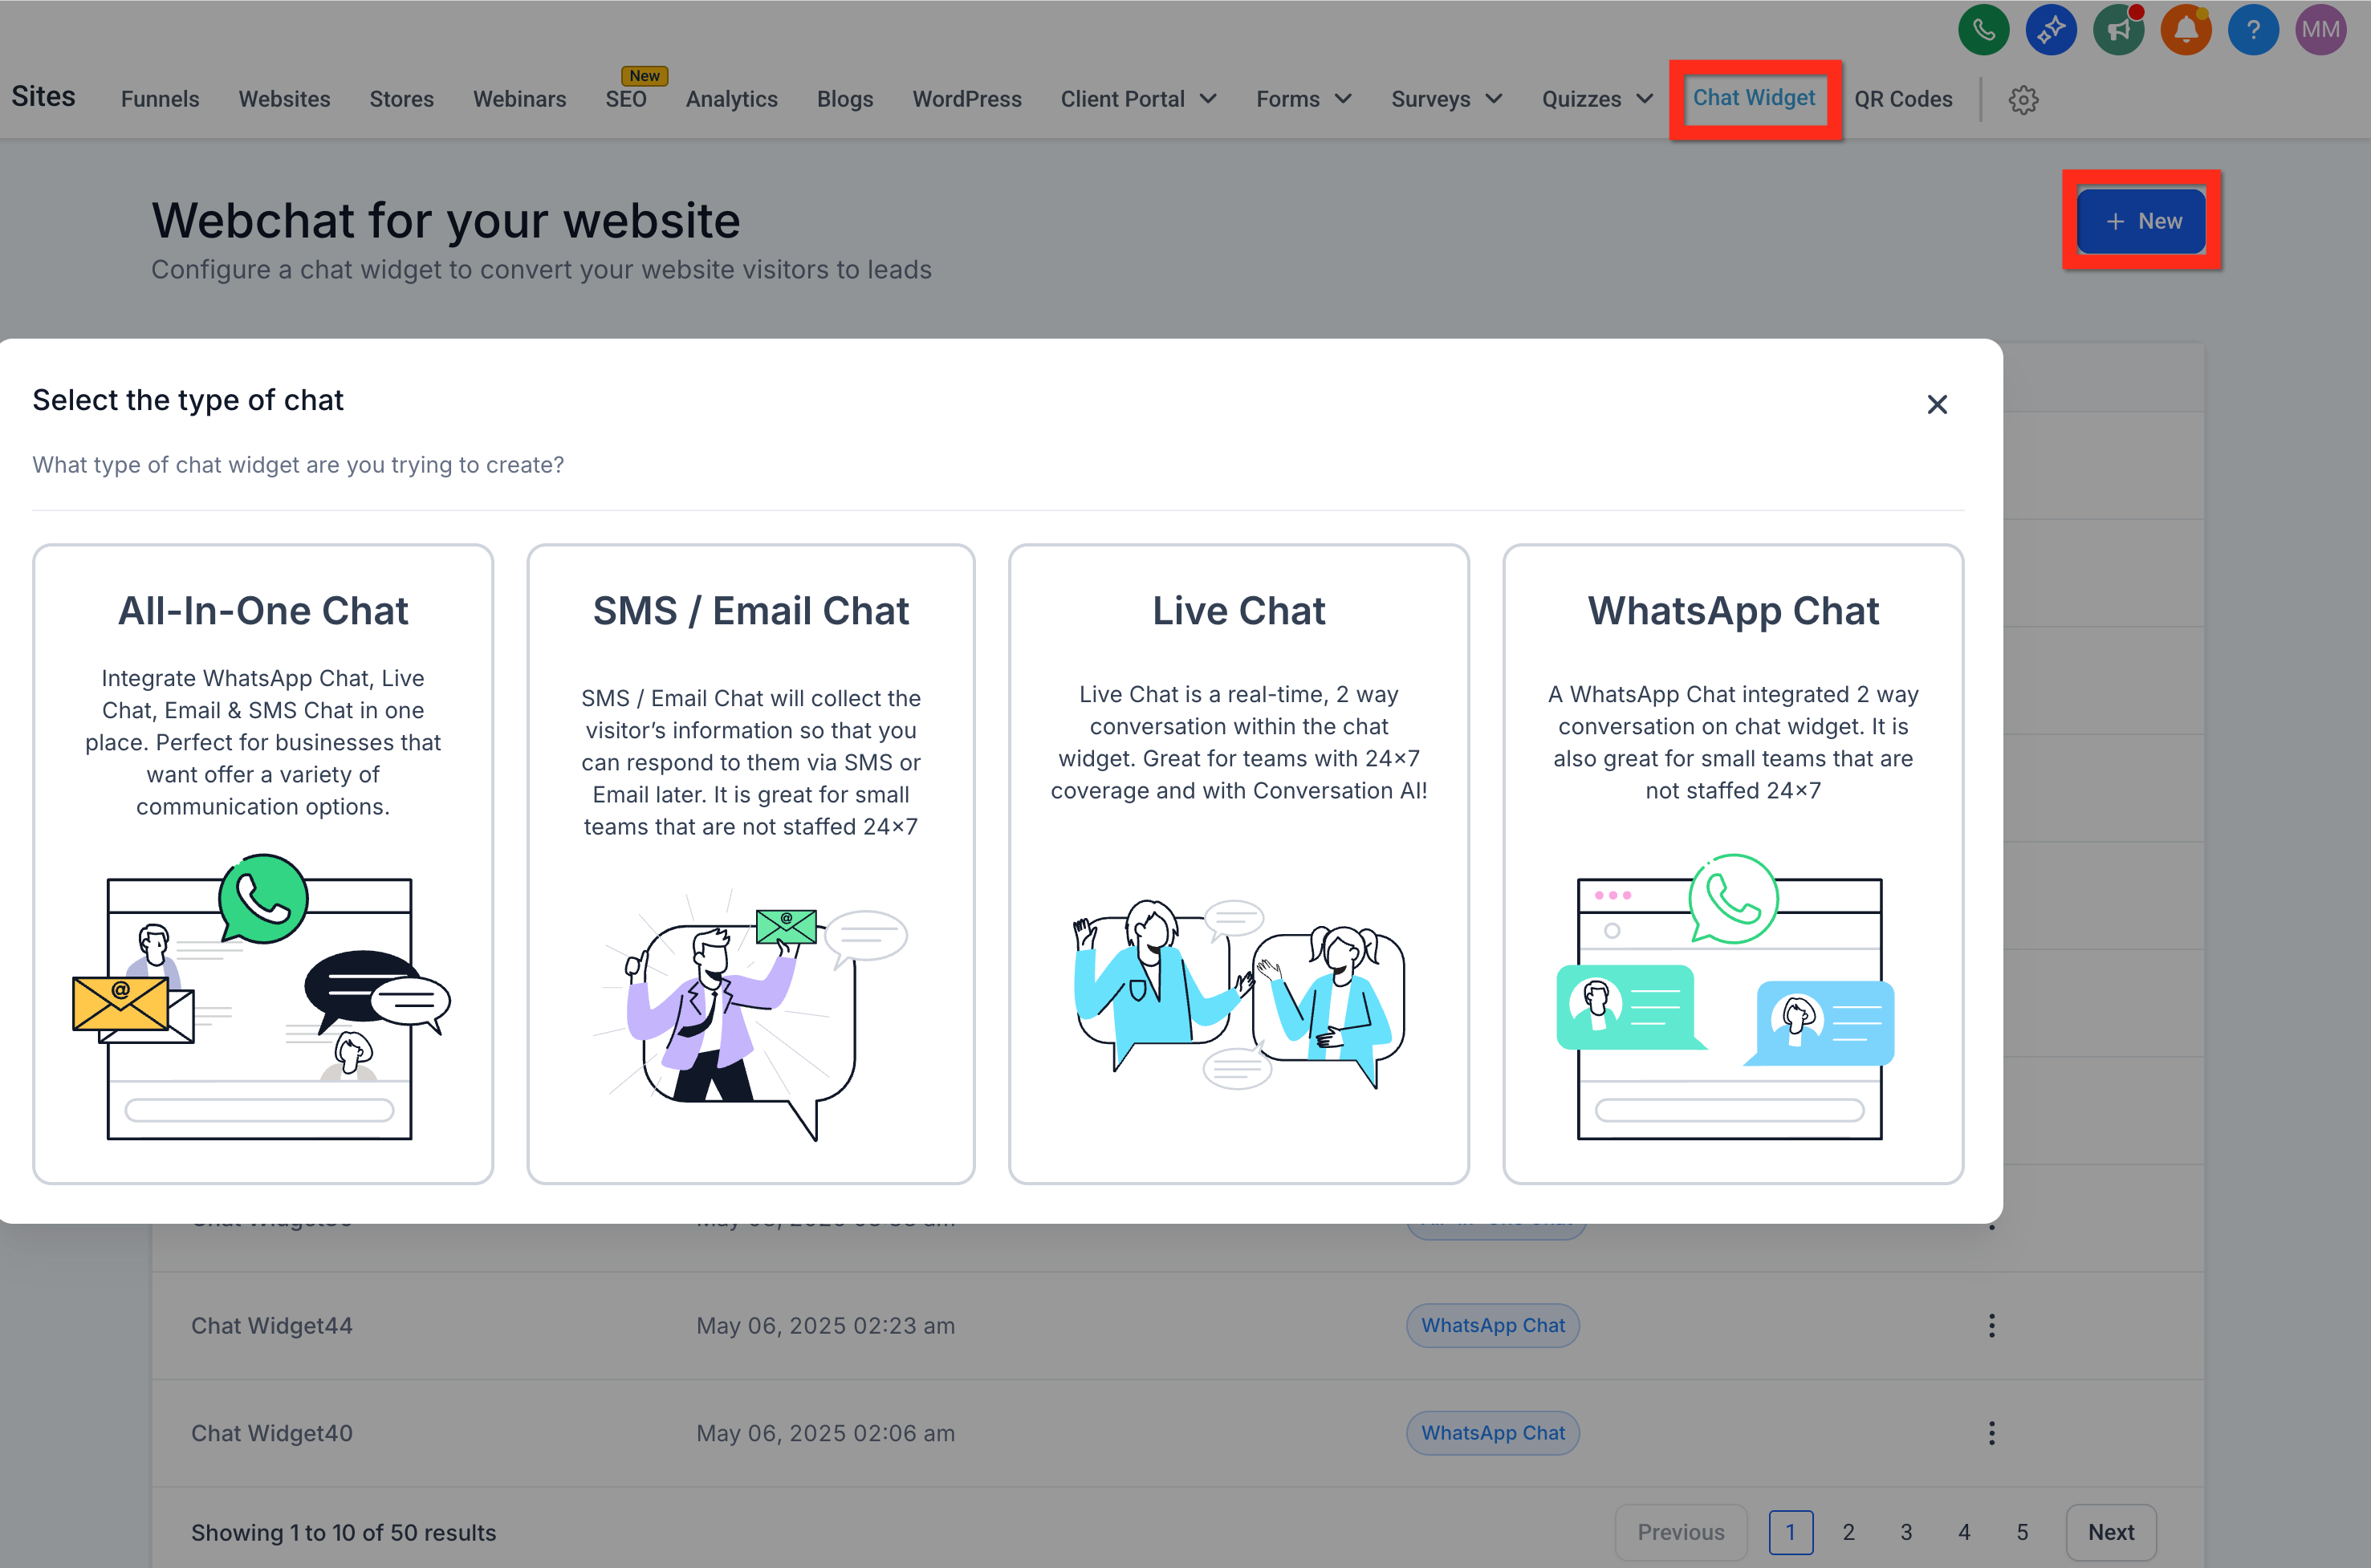
Navigate to
Sites > Chat Widget. -
Click "New", then choose one of the following options:
- All-in-one chat
- SMS / Email chat
- Live chat
-
Select "Live Chat".
-
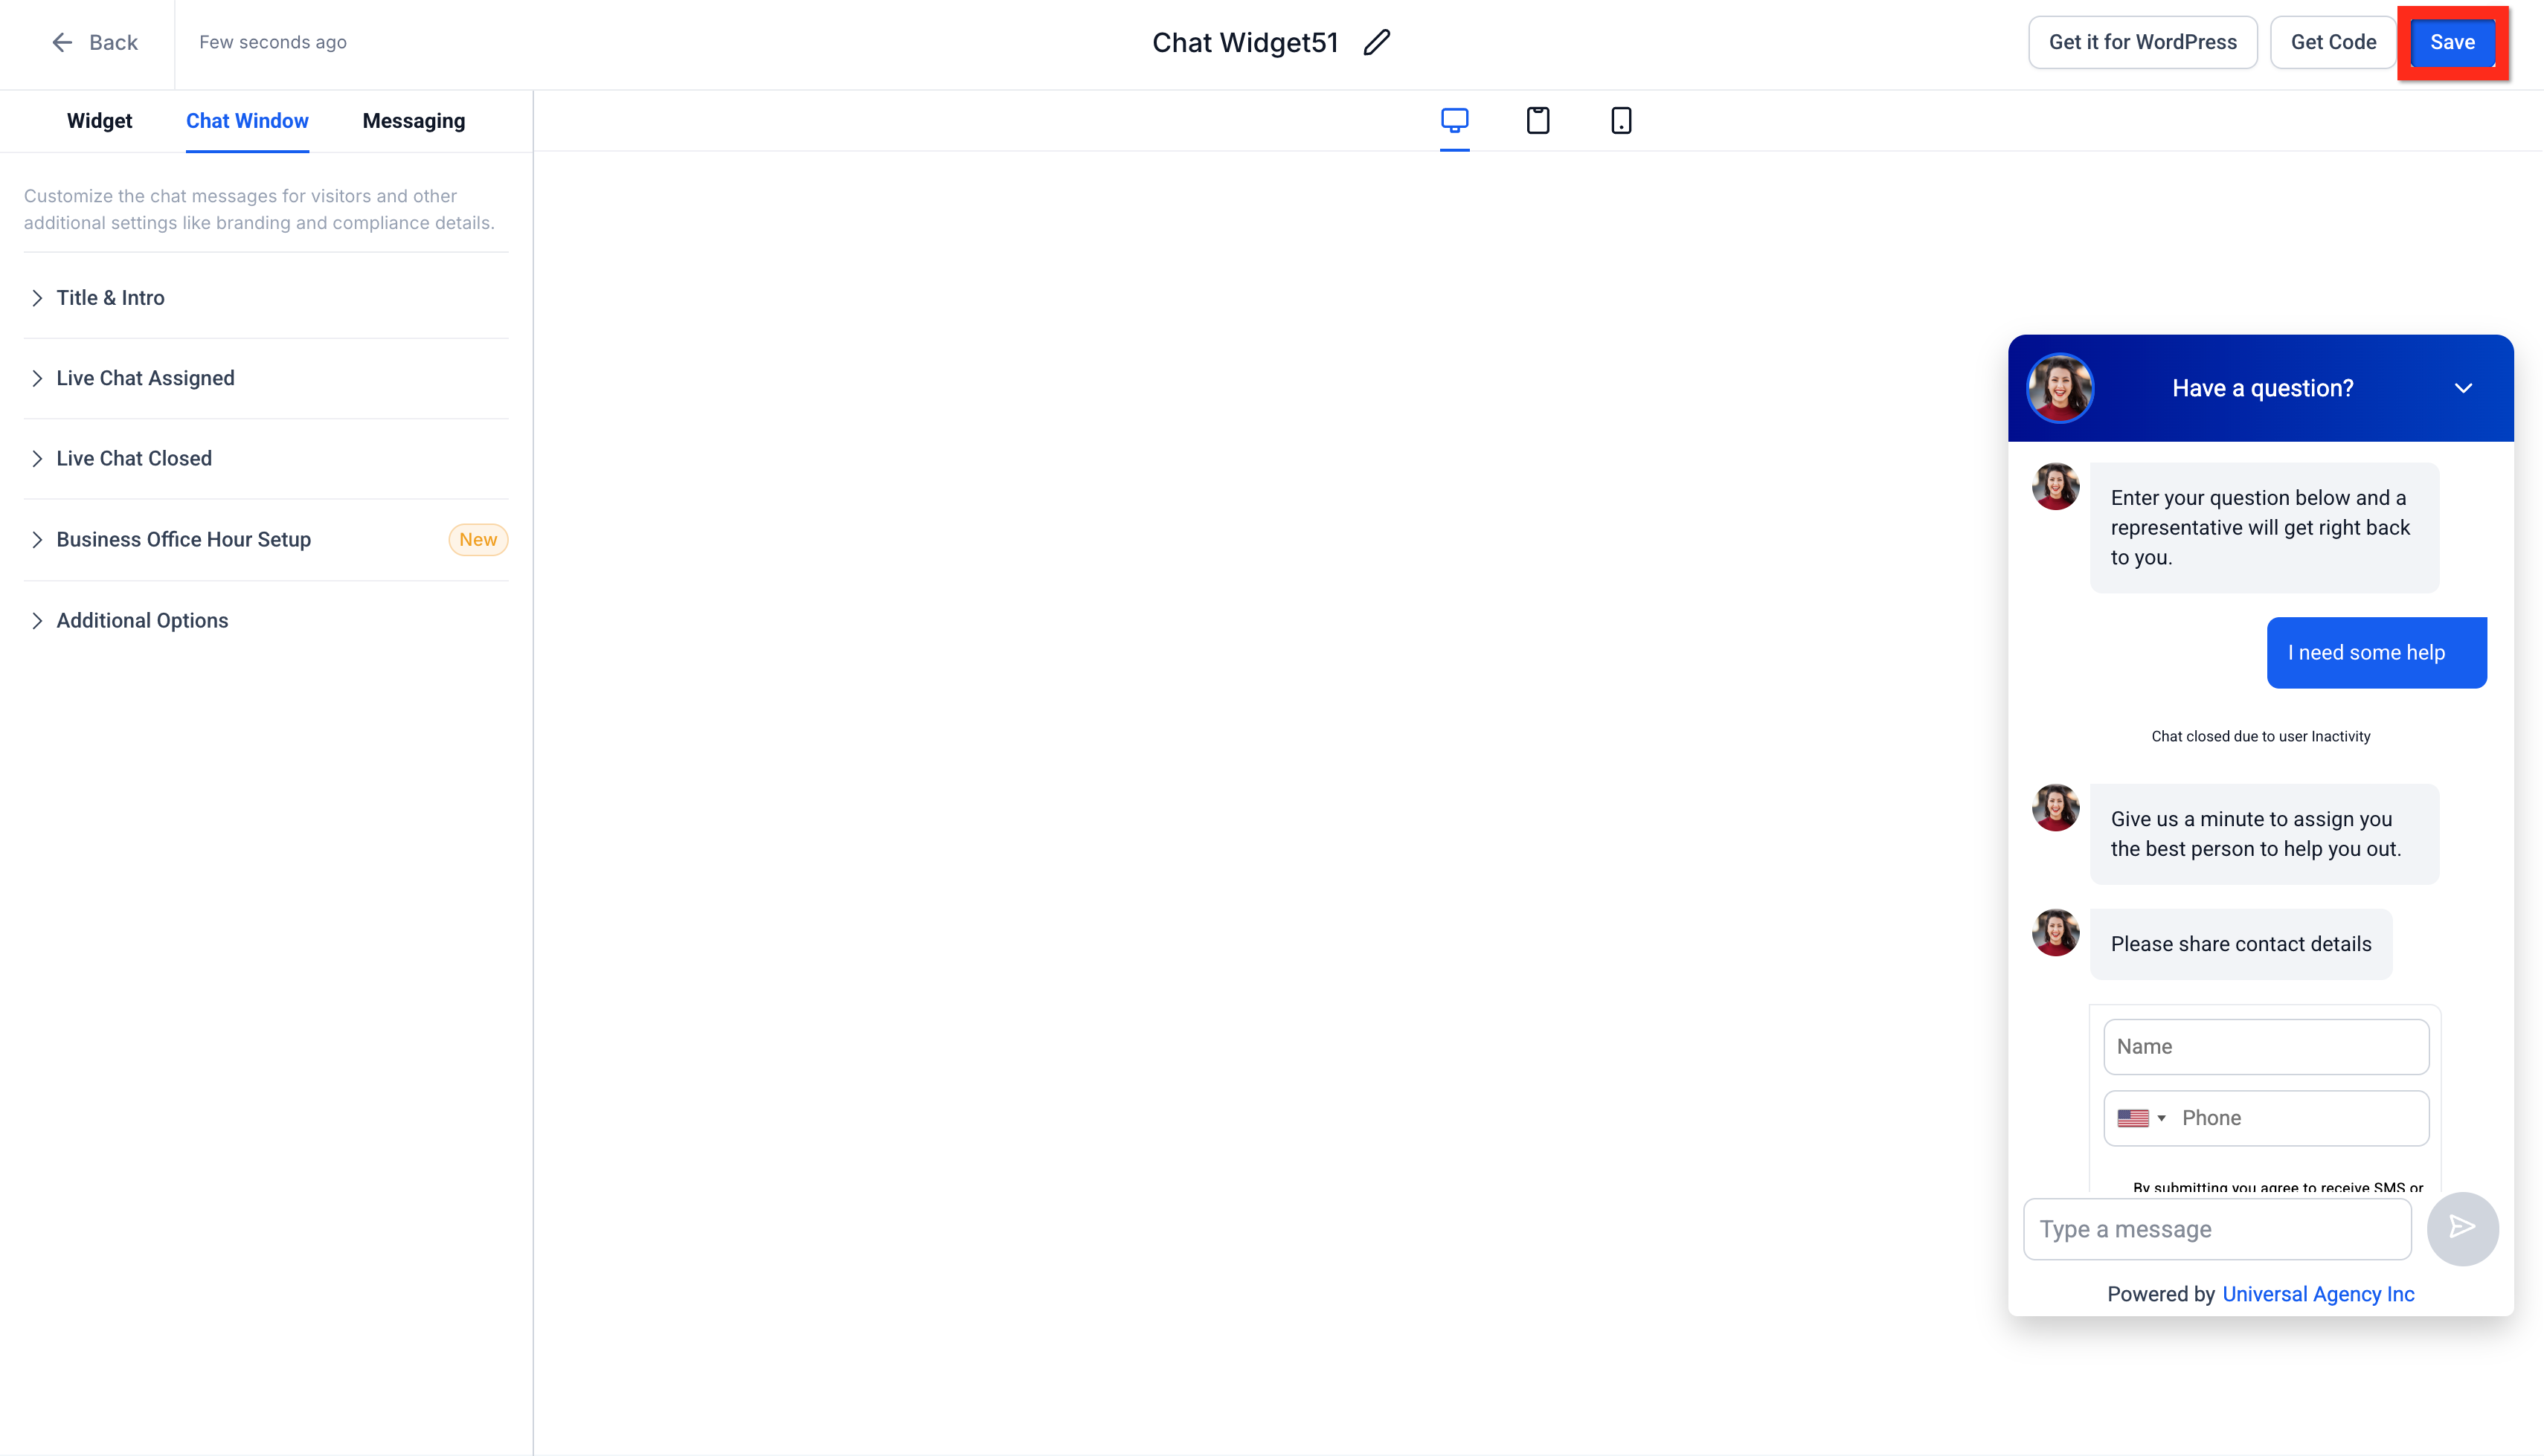
Customize your widget to match your brand.
-
Click "Save".
-
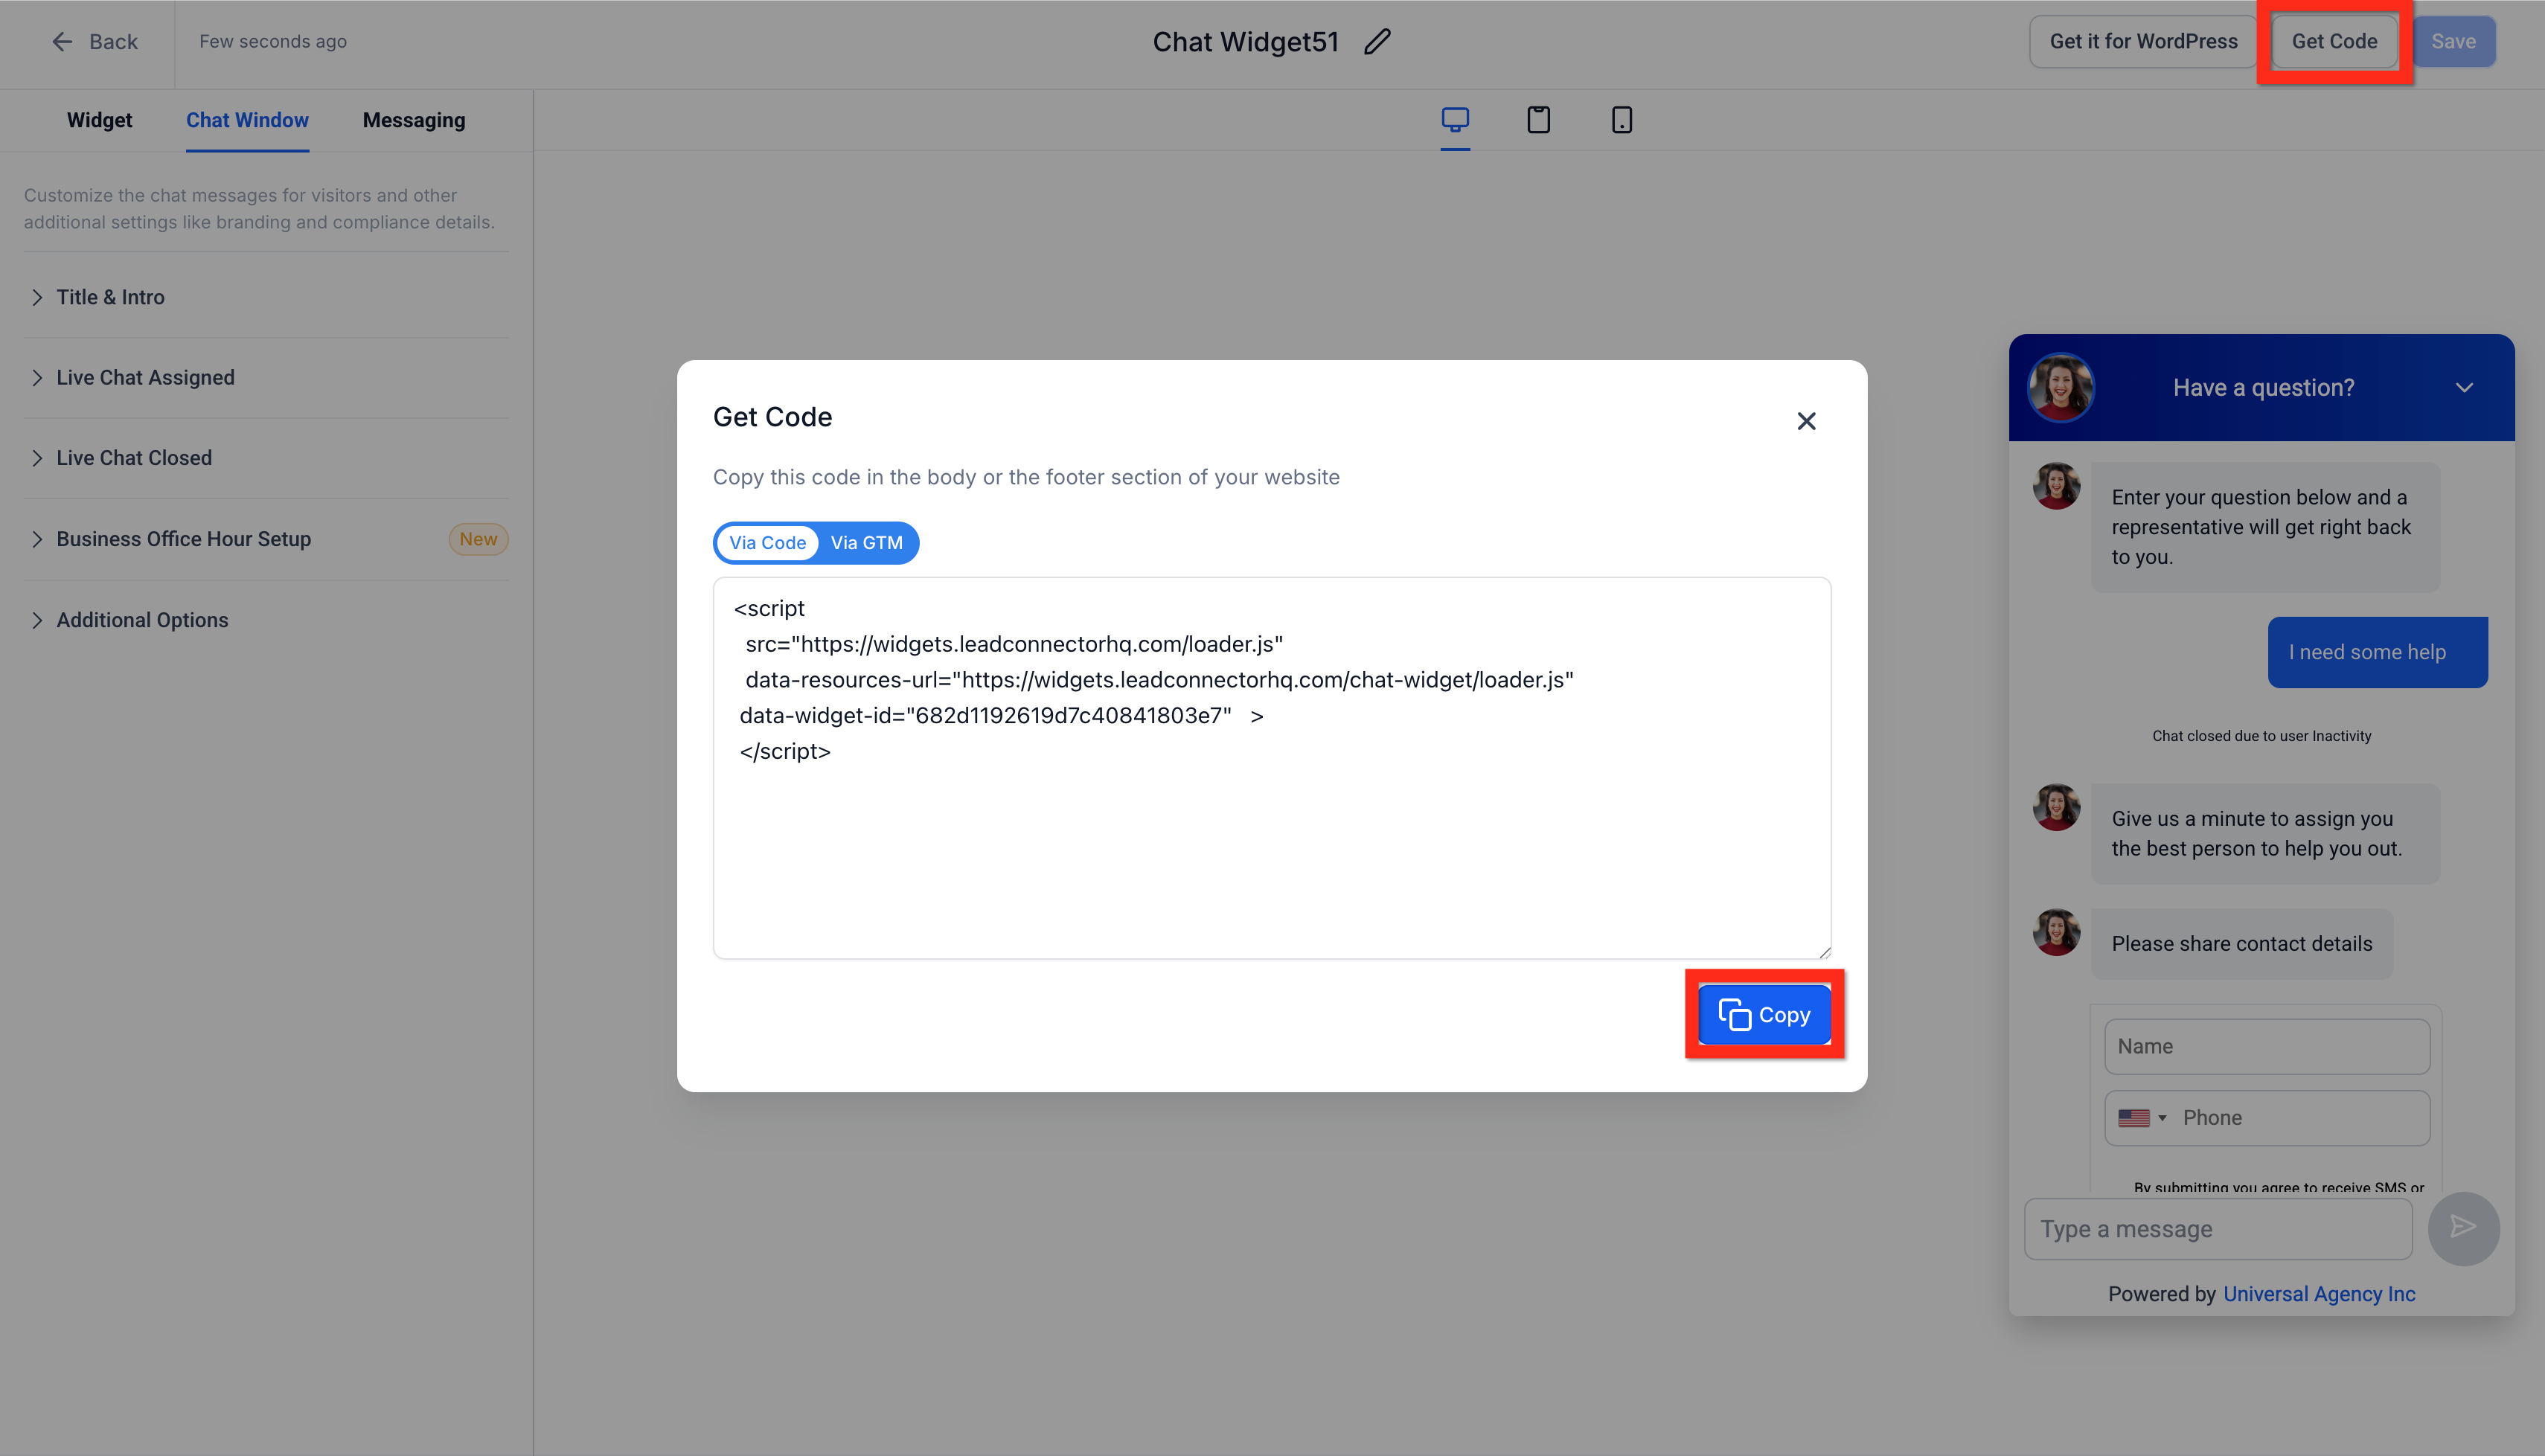
Click "Get Code" > "Copy".
-
Copy the provided embed code.
Next, you can decide how you'd like to deploy your new widget! Let's explore your options.
Deploy Live Chat Widget via Embed Code
Already familiar with adding scripts directly into your website or funnel? Perfect! Embedding the chat widget directly into your site editor couldn't be simpler. Follow these quick steps:
-
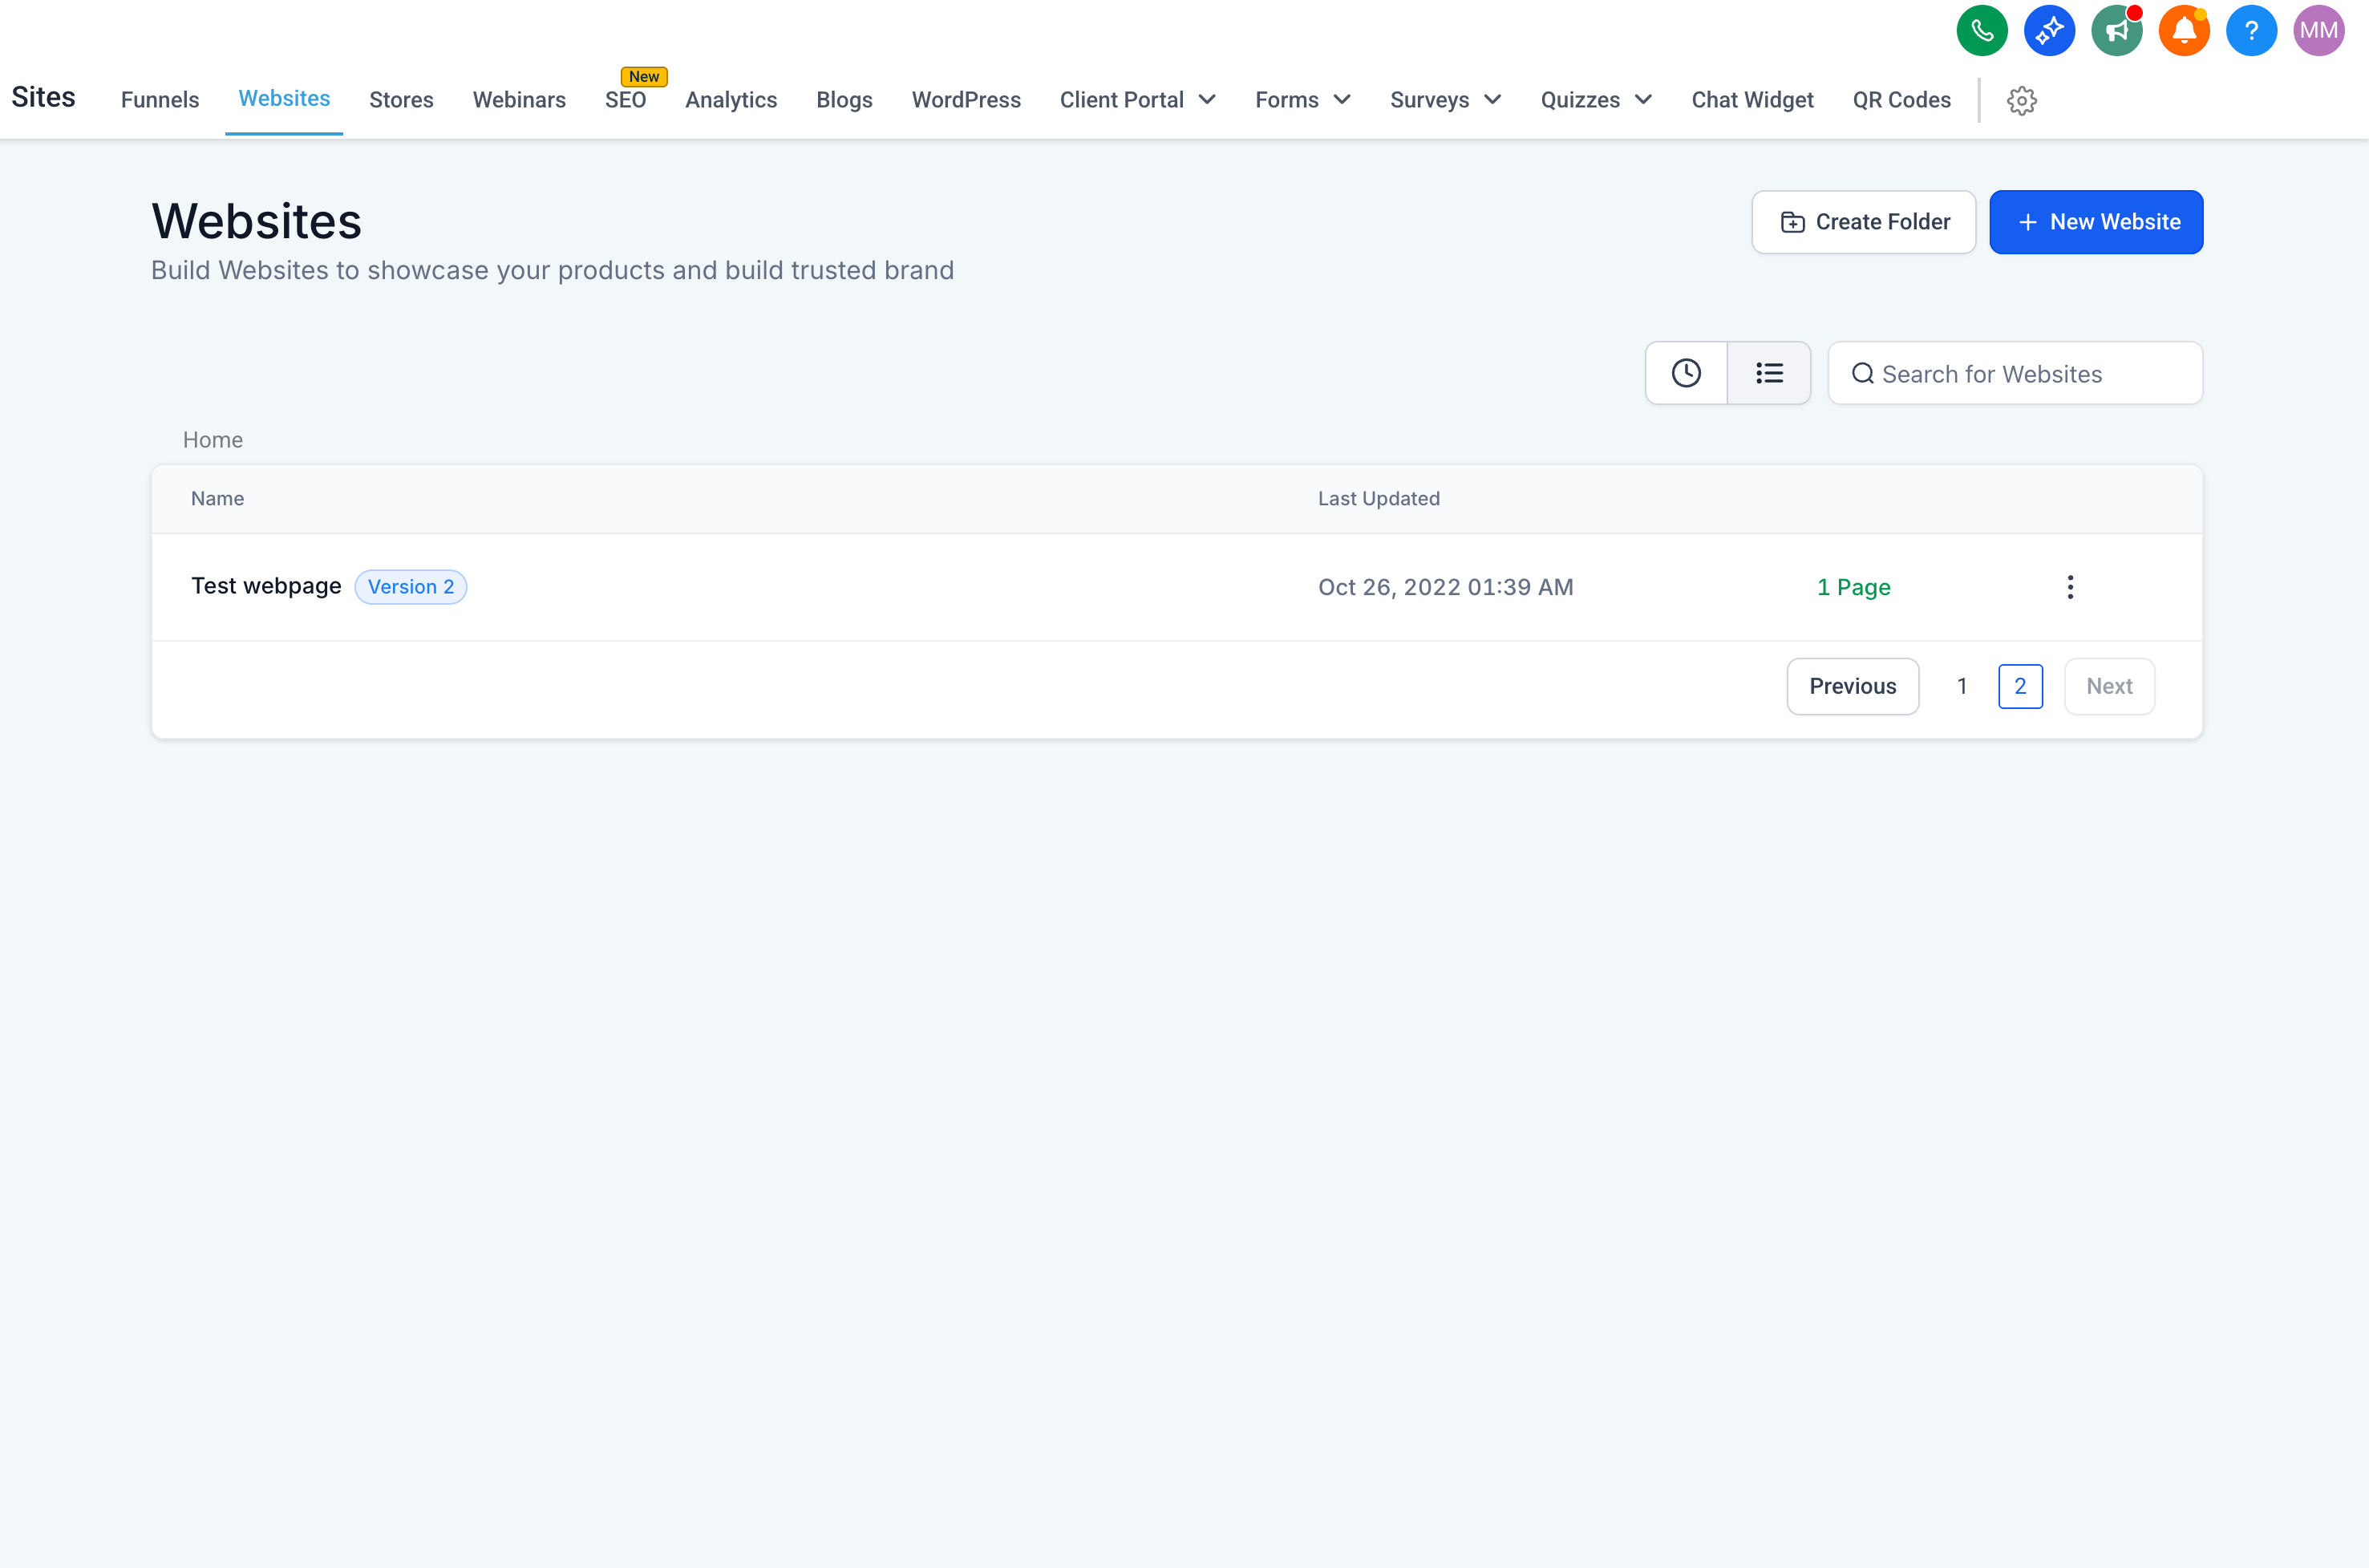
Navigate to Sites > Websites OR Sites > Funnels
-
Find your desired website or funnel and open it for editing
-
In the editor, click the Tracking Code icon </>
-
Paste the copied chat widget code
-
Click Save

>Great job! Next, you might consider testing your widget to ensure it's functioning seamlessly.
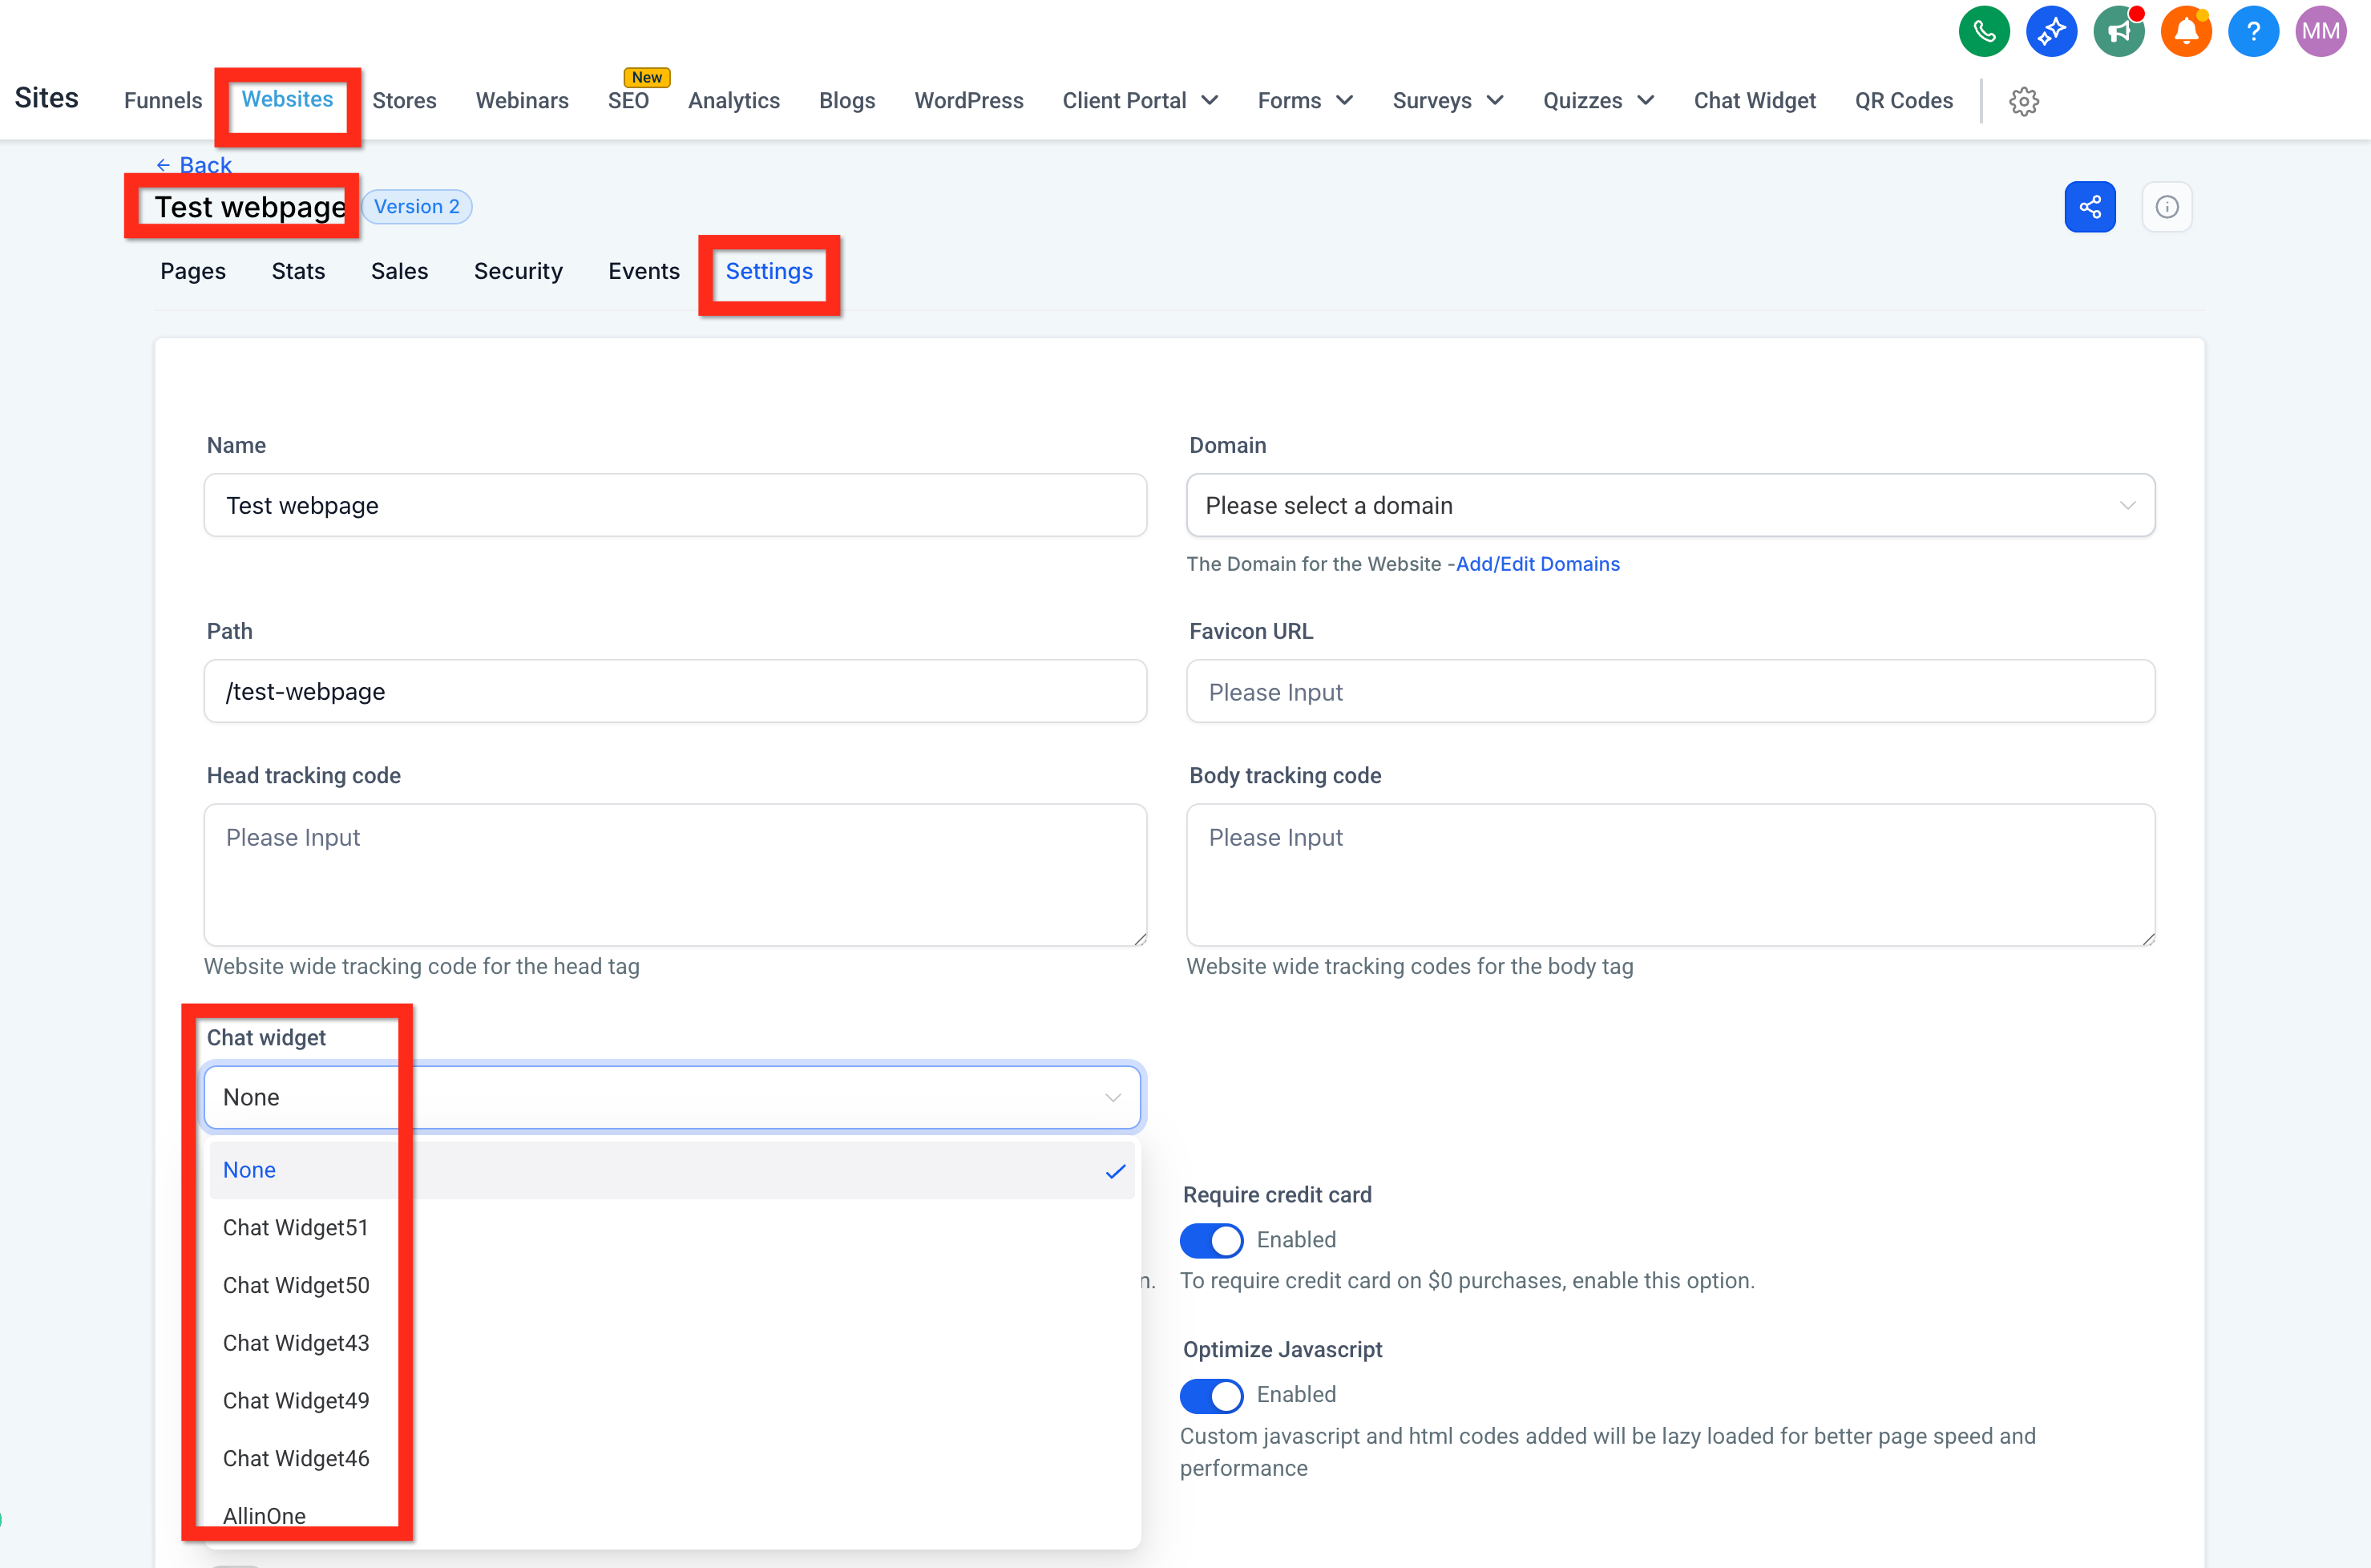
Deploy Live Chat Widget via Settings
Prefer to keep things even simpler? Deploying your widget directly through your website settings is super convenient, especially if you're less comfortable dealing directly with code. Let’s walk through it:
-
Navigate to Sites > Websites OR Sites > Funnels
-
Find your desired website or funnel and open its settings

-
Under the Chat Widget section, select your live chat widget
-
Click Save

Fantastic! You're all set. Next, why not explore advanced customization options to really make the chat experience unique to your brand?